4.7
Fitting the 1"1/2 cap
Important
If the immersion heater option is not fitted:
The cap and its insulation are supplied in an accessories bag.
A plug and its new 1 1/2" gasket (not supplied) must be fitted
before using the water tank.
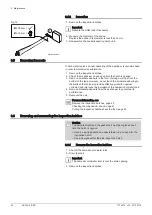
1. Insert the insulation into the cap.
2. Fit the cap in place.
3. Lock the cap by turning it.
4.8
Fitting the immersion heater (optional)
1. Affix the washer to the 1 1/2" connector.
Important
The washer is located in the accessories bag.
2. Fit the immersion heater into position along with a new gasket.
3. Connect the immersion heater by following the instructions in the
manual.
4.9
Hydraulic connections
4.9.1
Primary heating circuit
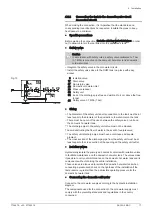
Before connection, flush the primary circuit to remove any particles that
may damage certain devices (safety valve, pumps, valves, etc.)
1. Hydraulically isolate the primary and domestic circuits with stop valves
to facilitate maintenance on the tank. The valves make it possible to
carry out maintenance on the tank and its components without
draining the entire installation.
2. Carry out installation in compliance with the applicable legislation and
standards.
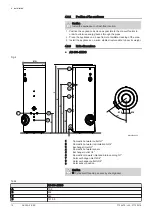
Fig.8
1
1
2
3
L000877-A
Fig.9
1
2
2
MW-L000878-2
4 Installation
16
AS 300–2E BC
7724479 - v03 - 07102019


