Basler BE1-87B, Instruction Manual
The Basler BE1-87B is a high-quality protection relay designed for critical power systems. Ensure proper installation and operation with the included Instruction Manual. Download it for free from manualshive.com to access detailed guidance on configuring and troubleshooting this essential component for your electrical infrastructure.
Share
Download


Reviews:
No comments
Related manuals for BE1-87B

PNOZ 16SP
Brand: Pilz Pages: 28

Revo Sx
Brand: CD Automation Pages: 8

M-RX2-280
Brand: CD Automation Pages: 53
3RU7116 Series
Brand: Siemens Pages: 3

3RU7136 Series
Brand: Siemens Pages: 4

3NB2 - 4KK Series
Brand: Siemens Pages: 2

3RU2136 B0 Series
Brand: Siemens Pages: 9

3MU8400 Series
Brand: Siemens Pages: 4

3MU8100 Series
Brand: Siemens Pages: 3

3RB30 1 Series
Brand: Siemens Pages: 9

3TK2810-0
Brand: Siemens Pages: 14
3TK2805
Brand: Siemens Pages: 16

3RT2840.-2
Brand: Siemens Pages: 17

3MU711 Series
Brand: Siemens Pages: 11

3RB31 Series
Brand: Siemens Pages: 18
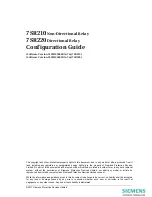
7SR220 Argus
Brand: Siemens Pages: 14

3RB12
Brand: Siemens Pages: 19

7SR210 Argus
Brand: Siemens Pages: 24


