Configuring the Camera
Basler A400k
4-3
DRAFT
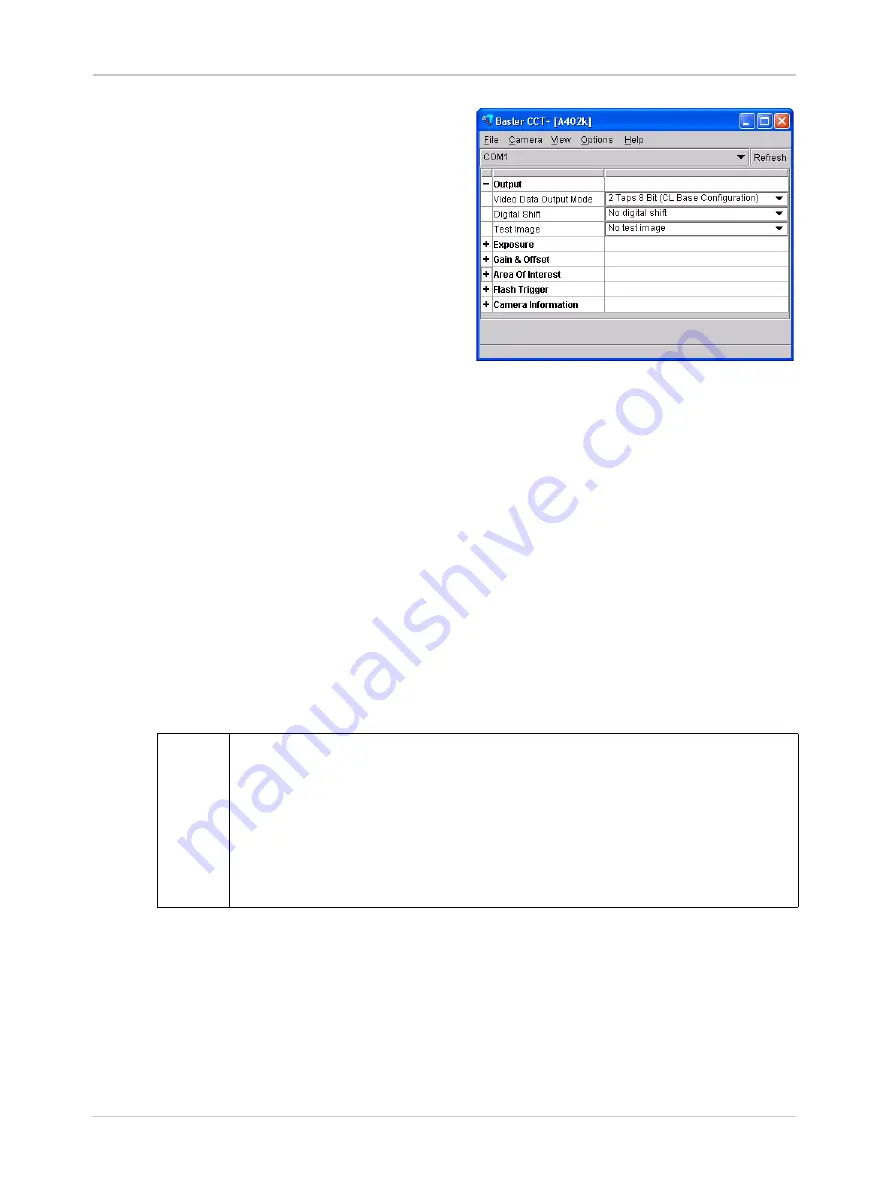
To simplify navigation, parameters are
organized in related groups. For example, all
parameters related to the camera output can
be found in the
Output
group.
When you click on the plus or minus sign
beside a group (+ or -), the parameters in this
group will be shown or hidden, respectively.
To get an overview of all parameters
available on the connected camera,
maximize the CCT+ window and click the
+ sign beside each group.
The camera parameter names always
appear in the left column of the list. The
current setting for each parameter appears in
the right column.
By default, a
Parameter Description
window is displayed. In this window, you can find basic
information on the selected parameter and if present, on the dependencies that may exist between
the selected parameter and other parameter(s).
Modifiable parameter settings and available commands appear in black while read-only settings
and unavailable commands appear in gray.
If you make a change to one of the parameter settings, that change will immediately be transmitted
from the CCT+ to the camera’s Work Set. Because the parameters in the Work Set control the
current operation of the camera, you will see an immediate change in the camera’s operation. If
the change limits the range of available settings for other parameters, the available ranges will
automatically be refreshed.
By default, the CCT+ also automatically updates the displayed settings every 5 seconds. The
feature behind this behavior is called Auto Refresh. If auto refresh is not enabled, the display will
not update when a camera setting is changed using another tool, when power to the camera is
switched off and on, or when the connected camera is exchanged while the CCT+ is displaying
the camera settings. To manually refresh the display, you can use the
Refresh
button in the top
right corner of the tool.
4.1.4 Configuration Tool Help
The CCT+ includes a complete on-line help file which explains how to change parameter settings.
It also explains how to copy the work set to a saved user set file and how to copy a saved user
set file or the factory set file to the work set. To access on-line help, press the F1 key whenever
the configuration tool is active.
L
Keep in mind that the work set is stored in the camera’s volatile memory. Any
changes you make to the work set using the configuration tool will be lost when the
camera is switched off. To save changes you make to the work set, save the modified
work set to one of the camera’s four user set files. The user set files are stored in
non-volatile memory and will not be lost when the camera is switched off (see Sec-
tion
).
Alternatively, you can also save the Work Set to the hard disk of your computer and
load it from hard disk.
Figure 4-1: Output Group
Summary of Contents for A400K
Page 1: ...Basler A400k USER S MANUAL Document Number DA00062410 Release Date 27 September 2007 ...
Page 4: ......
Page 25: ...Camera Interface Basler A400k 2 9 DRAFT Figure 2 5 A402k Camera Frame Grabber Interface ...
Page 26: ...Camera Interface 2 10 Basler A400k DRAFT Figure 2 6 A403k Camera Frame Grabber Interface ...
Page 27: ...Camera Interface Basler A400k 2 11 DRAFT Figure 2 7 A404k Camera Frame Grabber Interface ...
Page 52: ...Camera Interface 2 36 Basler A400k DRAFT ...
Page 154: ...Configuring the Camera 4 54 Basler A400k DRAFT ...
Page 168: ...Troubleshooting 6 10 Basler A400k DRAFT ...
Page 172: ...Feedback iv Basler A400k DRAFT ...
Page 176: ...Index viii Basler A400k DRAFT ...


