background image

-25-

16-3. Confirmation after adjustment

18-1. Hoisting

Stop the engine and move the respective levers to check for interference.
Check that the machine is in the neutral position and will not move even if the 
engine is in the full-throttle state. 
(When the side brake lever is pulled and returned)
After moving the traveling lever to move the machine, release the traveling lever, 
and check that the machine will not move.

After the above-mentioned adjustment, confirm the following:

17. Engine

 (JIS No.2 diesel oil)

a)  Use the low sulfur or ultra low sulfur diesel fuel (JIS No.2 diesel).
b) The machine is to be operated under severe condition such as vibration, slopes, 

and dust.  Change the entire engine oil 10 hours after the initial operation.  Then 
while  continuing  inspection  and  replenishment  before  use,  change  the  entire 
quantity every 100 hours thereafter.
Change all the oil filters simultaneously as well.
When  using  the  machine  in  a  dusty  place,  change  oil  and  the  oil  filters  more 
frequency.
The quantity of the engine oil is 5.5 liters.  Use the diesel engine oil in the service 
class CD or above specified by the API standard.

c) When air is sucked in the fuel system of a diesel engine, the engine will not be 

started.    Inspect  and  maintain  the  diesel  engine  at  all  times  to  prevent  entry 
of  air  into  the  fuel  system.    Operation  will  be  difficult  when  the  fuel  filter  and 
electromagnetic pump filter are clogged with dust or when water remains in them.  
Drain water or clean filters every 50 hours.  Replace filters with new ones every 
200 hours.

d)  Keep  a  pre-cleaner  attached  to  the  suction  port  of  the  air  cleaner  at  all  times 

during operation.  Be sure to clean the dust cup before operation.

e) Mix  antiseptics  (long-life  coolant)  into  water,  and  put  the  mixture  in  the  reserve 

tank up to the MAX position as a radiator cooling water.  Change the cooling water 
every 50 hours.  Check and supply the cooling water before operation.  When the 
temperature is likely to drop below the freezing point, use an antifreeze mixture.  
When the radiator fins are clogged with dust, blow air to clean them.

Refer to the diesel engine operation manual for the method of handling 
the engine.

There  is  a  risk  of  a  skin  burn.    Do  not  open  the  radiator  cap  during  or  right  after 
operation.

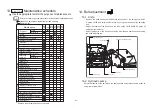
18. Hoisting and jacking up the machine

Precautions as to hoisting

a)  Qualification necessary to use a crane to hoist the machine
          For hoisting the machine, follow the appropriate laws of the country where it is 

hoisted.

b) Hoisting procedure
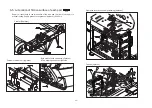
          Lower the mower portion until it touches the ground.
           Pull out the four hoisting hooks and secure them with pins.  Hook the wire ropes 

completely with shackles.  Use wire ropes with sufficient strength.  Be sure to 
use four ropes of 2.5 m or more in length.

           Pay attention to the position of the center of gravity during hoisting to balance 

the  machine  sufficiently.    Do  not  approach  the  machine  inadvertently  during 
hoisting.

CAUTION

CAUTION

CAUTION

1

2

3

1

2

3

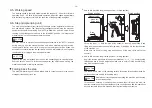
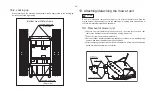
           When  lowering  the  machine,  keep  the  machine  horizontally  and  lower  it  in  a 

manner that the crawlers at right and left will touch the ground at the same time.  
Impact applied to the traveling motor (sprocket) at that time will cause failure.

4

Precautions as to handling of engine

Summary of Contents for HMC172E

Page 1: ...Hammer Knife Mower Serial No 10101 Owner s operating manual Read this manual and the owner s manual for the engine before using the machine Required reading Original lnstructions Ver 1 2...

Page 2: ...nt 14 1 Knife 14 2 Hydraulic pump 14 3 List of the place using belts 15 Crawler 15 1 Crawler tension 15 2 Installation removal of crawler 15 3 Prevention of crawler tearing loose 15 4 Greasing the cra...

Page 3: ...ntain your machine to bring out the best in the machine and for safe operation Keep this manual near the machine for future reference to confirm unclear points as necessary Greeting The type of the ma...

Page 4: ...fore using always visually inspect to see that the blades blade bolts and cutting assembly are not worn or damaged Replace worn or damaged blades and bolts in sets to preserve balance Never allow chil...

Page 5: ...a running board select one with sufficient strength length and width and that will not cause the machine to slip Close the fuel valve before transporting the machine Use care when approaching blind co...

Page 6: ...nectors in the hydraulic system are properly tightened Before applying hydraulic pressure check the connections of the hydraulic pressure lines and the condition of the hoses When checking the hydraul...

Page 7: ...5 15 11 12 13 18 16 17 14 19 20 2 1 3 4 5 6 7 8 9 10 8 2 1 3 4 6 7 5 Location of labels Decals are indicated with for warning and for instruction...

Page 8: ...e K4205001550 Decal caution fire Pay attention to fire Read the Owner s Operating Manual K4205001540 Decal caution for high temperature High temperature Do not touch Otherwise you will be burned K4209...

Page 9: ...m or body completely before using the machine Be careful of rotating parts 1 3 Do not touch the cover or muffler during operation or right after the machine stops otherwise a skin burn may result Be c...

Page 10: ...ot to injure people animals crops buildings automobiles and so on Check the operating place 2 3 Do not operate the machine with mown grass dust etc accumulated in the cover V belt or around the engine...

Page 11: ...tiscattering chain can not prevent all the objects from scattering Even when installing these equipments always exercise due care for surrounding area especially for forward during operation Protectio...

Page 12: ...knives are attached to move freely and the structer lessens impact of stones and other obstacles when they hit against the hammer knives hardly causing damage to the hammer knives The hammer knife is...

Page 13: ...e 2000 14 EC This machine was confirmed to transmit a maximum vibration level of 4 50 m s2 to hands and arms by measuring identical machines in accordance with the procedure specified in ISO5349 1 200...

Page 14: ...n Manual For details on handling the battery please refer to the separate Battery Instruction Manual Be careful not to let your skin eyes or clothes etc come into contact with battery fluid electrolyt...

Page 15: ...e inlet outlet of the wire and the joint of each part to prevent rusting Supply grease to the grease nipple every 50 hours 6 5 Lubrication of friction surface of each part 50h Crawler 26 places Fulcru...

Page 16: ...t 16 160 36 360 72 720 120 1200 Bolts are used for each part After initial use of the machine the bolts and nuts may get loose Tighten loose bolts and nuts 7 Tightening each part 8 Engine starting seq...

Page 17: ...Adjust the mowing height appropriately Adjust the mower unit lowering speed with the valve unit which will be seen at the back of the fuel filler port when the right side cover is opened 9 4 Mowing h...

Page 18: ...tand on the step for starting the machine Prohibition of traveling and or operating the machine with the step in the stored position The steel mesh is used on the standing surface of the step for anti...

Page 19: ...unting hitch section by 11 mounting pin 32 and the nut with disc washer and the knife can be removed easily Attach the mounting pin in the same direction as before The knife shaft assy is balanced whe...

Page 20: ...abrasion Replacement Mounting pin Looseness Tightening 1 Wrong direction Attach correctly Mounting hitch Curved or open Correction or repair by specialist 2 Breakage or uneven abrasion Repair by spec...

Page 21: ...achine upward gradually from the bottom of the slope along the contour line Release the traveling lever and the lever will be set in the neutral position stopping the machine For safety stop the machi...

Page 22: ...to contact your body or the machine If the electrolyte adheres to your body or the machine wash it off with water immediately Especially when it enters your eyes or you swallow it by mistake see a do...

Page 23: ...protection plate Greasing each section Looseness of screw in each section Accumulation of dust Visible damage Initial After 10 hr Hydraulic motor oil Initial After 50 hr Before use 10hrs every 50hrs...

Page 24: ...belt W4SB58 P bearing 6308LLU B2V pulley 25175F K 8 0 3 0 0 0 0 0 2 0 K 0 6 1 2 0 6 2 0 4 0 K 2 3 7 1 4 0 0 6 4 0 K 2 4 2 3 0 0 0 0 8 D H M C 1 5 6 0 1 0 0 1 Z D K 2 3 7 1 4 0 0 7 3 0 K 2 4 2 4 0 0 0...

Page 25: ...t the crawler is not slackened and the crawler tension is adjusted appropriately before operation 16 Adjustment of traveling section Conduct the following work before adjusting the traveling section R...

Page 26: ...al positions of both bases are determined stop the engine and tighten the mounting bolts Start the engine again to check that the sprocket crawler will not rotate Pump Mounting bolt Left neutral lever...

Page 27: ...h new ones every 200 hours d Keep a pre cleaner attached to the suction port of the air cleaner at all times during operation Be sure to clean the dust cup before operation e Mix antiseptics long life...

Page 28: ...mower unit Pull out 6 clip pin and remove the lock pin Set the cylinder single double acting changeover switch in the double acting position and lower the attachment mounting base After confirming tha...

Page 29: ...linder single double acting changeover switch in the single acting position and change it to the double acting position before installing or removing the mower unit Operation with the changeover switc...

Page 30: ...5 Black Black AV2 Black White and red AV2 Red and white AV0 85 Blue and white AV0 85 Red and white AV0 85 White and red AV1 25 White AV5 White Black and yellow AV0 85 White and yellow AV0 85 White an...

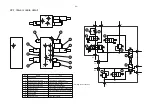
Page 31: ...P08 Eng 166 166 VPF 06 KP1009 Hydraulic tank 10 m CV 00630 50 00 Mower unit up down 45 70 250 double actingX2 PF PF T3 T1 E A B C D T1 Refer to Valve module T1 S B2 B1 IN P1 P2 P2 T2 T2 P1 P2 T1 P1 P3...

Page 32: ...t valve Solenoid poppet valve Solenoid valve Solenoid valve Solenoid valve Name for holding mower portion for adjusting lowering speed Unload for emergency for cooling fan rotation changeover for rais...

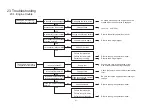
Page 33: ...aning or change Refer to the engine operation manual Change fuses Charge or replace the battery Connect the wire again Change the relay Supply fuel Change filters Clean or change the element Clean the...

Page 34: ...heck the wiring Replacement of fuel pump Replacement of filter Failure of control timer Failure of oil pressure switch Failure of alternator Is the fuel pump operating The engine starts but it stops I...

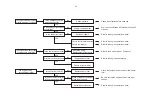
Page 35: ...of brake release solenoid valve Failure of traveling motor Change oil Engine maintenance Resetting replacement Change filter Failure of hydraulic pump Failure of high pressure relief valve Failure of...

Page 36: ...id valve Failure of hydraulic cylinder Failure of flow dividing valve YES NO YES YES NO NO The mower unit rises but it does not lower Are respective connections of wiring normal Is the mowing height a...

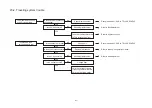
Page 37: ...g the knife balance Replacement of switch Cleaning Removal cleaning Replacement of knife blade Damage of knife mounting hitch Damage of balance weight Distortion of knife shaft Failure of flow dividin...

Page 38: ...clamp Cylinder mounting shaft Step mounting base shaft ass y Changeover switch wiring Cleaning Inspection of hydraulic and electrical pages Failure of engine Failure of pump Failure of water temperate...

Page 39: ...ness Hydraulic oil filter Tightening of hydraulic hose joint Traveling motor gear oil quantity cleanliness Battery qty of electrolyte connection Operation of operation levers Neutral position Operatio...

Page 40: ...HMC156E UM GBZ 12H 00 S K Tel 0533 84 1390 Fax 0533 89 3623 Head Office 1 26 Miyuki cho Toyokawa Aichi Pref 442 8530 Japan...

Reviews: