of OSP. Selection of UL would allow the set point to be
unlimited and would not be affected by OSP setting.
To modify/view the Set Point Limit follow the instructions
given below:
1.
Plug the unit into the appropriate power, but do
not turn it on (displays should be blank, unless
Hot Top Warning System is indicating a hot sur-
face), enter the Service Menu by pressing and
holding the POWER key. After about 3 seconds
a single beep will be heard and you may
remove your finger from the POWER key. The
display will change to
OSP
.
2.
Rotate the center knob until the display reads
SL
. Press the SET key under the HEAT display
to accept, and the display will change to either
OSP
or
UL
. Rotate the center knob to change
the display and press the SET key under the
HEAT display again.
3.
The unit will return to the previous menu. Select
another feature to change, or press the POWER
key again to return to the off mode.
Error Disable - Err
The purpose of this feature is to enable or disable a par-
ticular error from being detected and displayed. All errors
except E12 (locked rotor – stirring control) are able to be
disabled. A general option is also available to re-enable
all errors at once. When disabling errors though they
must be done one at a time.
To modify/view the Error Disable menu follow the instruc-
tions given below:
1.
Plug the unit into the appropriate power, but do
not turn it on (displays should be blank, unless
Hot Top Warning System is indicating a hot sur-
face), enter the Service Menu by pressing and
holding the POWER key. After about 3 seconds
a single beep will be heard and you may
remove your finger from the POWER key. The
display will change to
OSP
.
30
S
ERVICE AND
C
ALIBRATION
Summary of Contents for SUPER-NUOVA HP133420-33
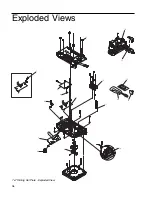
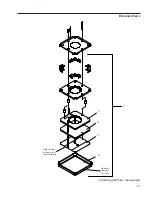
Page 38: ...38 EXPLODED VIEWS 7 x 7 Hot Plate Exploded View 5 6 7 8 10 22 12 13 16 1 2 3 4...
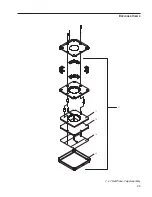
Page 39: ...39 EXPLODED VIEWS 21 17 18 19 20 7 x 7 Hot Plate Top Assembly...
Page 45: ...45...
Page 46: ...46...
Page 47: ...47...


