background image

Manual 2100-759 
Page 

3 of 16

General Information

The ventilator should only be installed by a trained 
heating and air conditioning technician. These 
instructions serve as a guide to the technician 
installing the ventilator package. They are not 
intended as a step-by-step procedure with which the 
mechanically inclined owner can install the package.
The ventilator housing is shipped in one carton which 
contains the electrical harness, miscellaneous hardware 
and installation instructions.

Unpacking

Upon receipt of the equipment, be sure to compare the 
model number found on the shipping label with the 
accessory identification information on the ordering and 
shipping document to verify that the correct accessory 
has been shipped.
Inspect the carton housing of each ventilator as it is 
received. Before signing the freight bill, verify that all 
items have been received and that there is no visible 
damage. Note any shortages or damage on all copies 
of the freight bill. The receiving party must contact 
the last carrier immediately, preferably in writing, 
requesting inspection by the carrier’s agent. Concealed 
damage not discovered until after loading must be 
reported to the carrier within 15 days of its receipt.

Description

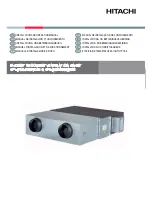
The CRVS-3A ventilator is designed to be used with 
Bard heat pump models T24H, T30H and T30S. It is 
an electromechanical vent system designed to provide 
fresh air to meet indoor air quality standards.

Models

When installed in the above listed models, the CRV 
provides built-in exhaust provisions. When the damper 
blade opens to bring fresh air in, the damper also 
opens an exhaust relief. The exhaust air will flow into 
the condenser section of the unit. The condenser fan 
will help draw exhaust air out.

CRV Features

•  One piece construction – easy to install.
•  Exhaust air damper – built in with positive closed 

position. Provides exhaust air capability to prevent 
pressurization of tight buildings.

•  Actuator motor – 24 volt, power open, spring return 

with built in torque limiting switch.

GENERAL 

Electrical shock hazard.

Disconnect remote electrical power supply 
or supplies before servicing.

Failure to do so could result in electric 
shock or death.

!

WARNING

Exposed moving parts.

Disconnect all electrical power before 
servicing.

Failure to do so can result in severe injury 
or amputation.

!

WARNING

Sequence of Operation

On a call for blower operation, CRV will open to 
pre-purge position as set by "PP" potentiometer 
for the amount of time set by the PP jumper. The 
CRV will then move to the position set by the "OCC" 
potentiometer. If PP jumper is in 0 position, the CRV 
will immediately open to the position set by the "OCC" 
potentiometer.

NOTE:


These sequence descriptions do not apply if CO

2


controller is used. The CRV will control according 

to observed CO

2

 levels in the conditioned space. 

Refer to information on page 8.

A call for 1st stage cooling or heating cycles the 
compressor, and the dampers reposition to the Y1 
potentiometer setpoint. A call for 2nd stage cooling or 
heating energizes compressor solenoid and repositions 
the damper blade to the Y2 potentiometer position. On 
loss of blower operation, CRV closes fully.

Sharp metallic edges.

Take care and wear appropriate protective 
devices to avoid accidental contact with 
sharp edges.

Failure to do so can result in personal injury.

!

CAUTION

Summary of Contents for CRVS-3A

Page 1: ...STRUCTIONS Bard Manufacturing Company Inc Bryan Ohio 43506 www bardhvac com Manual 2100 759 Supersedes NEW Date 12 8 21 Commercial Room Ventilator with Exhaust For Use with Bard Heat Pump Models T24H...

Page 2: ...re 1 Removal of Exterior Panels 4 Figure 2 Removal of Exhaust Cover Plate 5 Figure 3 Install Ventilator 6 Figure 4 8403 096 CO2 Sensor Set Up 8 Figure 5 CRV Control Board Wiring 9 Figure 6 CRV Control...

Page 3: ...o bring fresh air in the damper also opens an exhaust relief The exhaust air will flow into the condenser section of the unit The condenser fan will help draw exhaust air out CRV Features One piece co...

Page 4: ...entilator with attached electrical harness and miscellaneous hardware 2 Remove and save the existing exterior blower access and service access panels on the Bard wall mount unit see Figure 1 Open and...

Page 5: ...g unit return air filter and left side filter support bracket by removing two 2 screws from front side of unit see Figure 2 Remove and save top four 4 screws from grille 4 Remove and discard the exhau...

Page 6: ...e 3 Note When installing CRV position so hole in front Plug the 4 125 holes in the service door with insert a self drilling screw WIRES in condenser grille to lip is centered over hole CRV in unit Rig...

Page 7: ...tion set by the OCC potentiometer Energize Y ventilator should open to the position set by the Y1 potentiometer Energize Y1 ventilator should open to the position set by the Y2 potentiometer D De ener...

Page 8: ...O CHANGE ANY SETTINGS WITH THE SIDE BUTTONS TO LOCK THE CO2 DIP SWITCHES MUST BE POSITIONED AS SHOWN FOR PROPER OPERATION MIS 4025 C Settings Recommended Default RON RELAY ON SET POINT 725 ROF RELAY O...

Page 9: ...E STAGE UNIT D FIELD JUMPER FOR CONSTANT VENTILATION BLACK WHITE BROWN WHITE ORANGE BROWN WHITE RELAY BLACK WHITE 56 30 0 CRV CONTROL BOARD 60 Damper Motor RED BLACK BROWN A CO2 Sensor 90 A OPTIONAL C...

Page 10: ...meter Adjusts the airflow during pre purge mode if jumper is installed in positions 30 90 OCC Potentiometer Adjusts the airflow during blower only operation or during an occupied input from an applica...

Page 11: ...E COOLING POT Y1 SETTING FOR WHEN Y2 IS ENERGIZED COOLING OR BLADE POSITION Y1 WILL OVERRIDE OCC POT PP PRE PURGE SET FOR PREOCCUPANCY POT OCC OCCUPIED SETTING TURN OFF FOR C02 FULL MODULATION SETTING...

Page 12: ...ccupied setting is instantaneous and the pre purge setting PP is no longer in the sequence Occupied Setting Occupied is used to ventilate a specified CFM amount when occupants enter the room or struct...

Page 13: ...other end of the gray wire should be connected to the CO2 sensor as stated in Method 1 During 2 10VDC operation with 01 energized and pre purge timed operation active DC voltage signaling occupancy f...

Page 14: ...1100 1200 1300 A B C D E F Airflow cfm Vent Position Total Air 0 ESP Total Air 2 ESP Total Air 4 ESP Vent Air 0 ESP Vent Air 2 ESP Vent Air 4 ESP 0 100 200 300 400 500 600 700 800 900 0 A B C D E F A...

Page 15: ...0 759 Page 15 of 16 FIGURE 8 Call for Ventilation with or without Compressor Operation MIS 347A Supply Air Evaporator Coil DAMPER BLADE EXHAUST AIR Return Air Condenser Air Direction Condenser Coil Ou...

Page 16: ...Manual 2100 759 Page 16 of 16 MIS 348A Supply Air Return Air Evaporator Coil DAMPER BLADE Condenser Air Direction Condenser Coil FIGURE 9 Call for Compressor or Fan Only with Ventilation Off...

Reviews: