


4. Getting started
10
Lens control
use these buttons to obtain the desired ZOOM, SHIFT, FOCUS.
11
VOL
use this button to obtain the desired sound level (audio = optional)
12
Picture controls
use these buttons to obtain the desired picture analog level.
13
DIGI ZOOM
allows a digital Zoom of a part of the image
14
FREEZ
press to freeze the projected image.
15
PIP
allows to activate the PICTURE IN PICTURE mode
16
ENTER
to confirm an adjustment or selection in the MENU.
On the local keypad the ENTER button additionally accesses the PIP window resize function
17
Cursor keys
Cursor Keys on RCU or on the local keypad : to make menu selections or to access the
toolbar.
18
BACK
to leave the selected menu or item (go upwards to previous menu).
19
EFFECTS
not yet implemented
20
PIP ADJUST
allows to select a PiP window and change its configuration on screen
21
RC operating indication
lights up when a button on the remote control is pressed. (This is a visual indicator to
check the operation of the remote control)
22
IR receiver
IR receiver
Table 4-2
ordernumber RCU: R763794K
4.3
Switching on
How to switch on.
1. Press the power switch to switch on the projector.
- When ’0’ is pushed in, the projector is switched off.
- When ’1’ is pushed in, the projector is switched on
The projector starts in standby mode, LED3 is red.
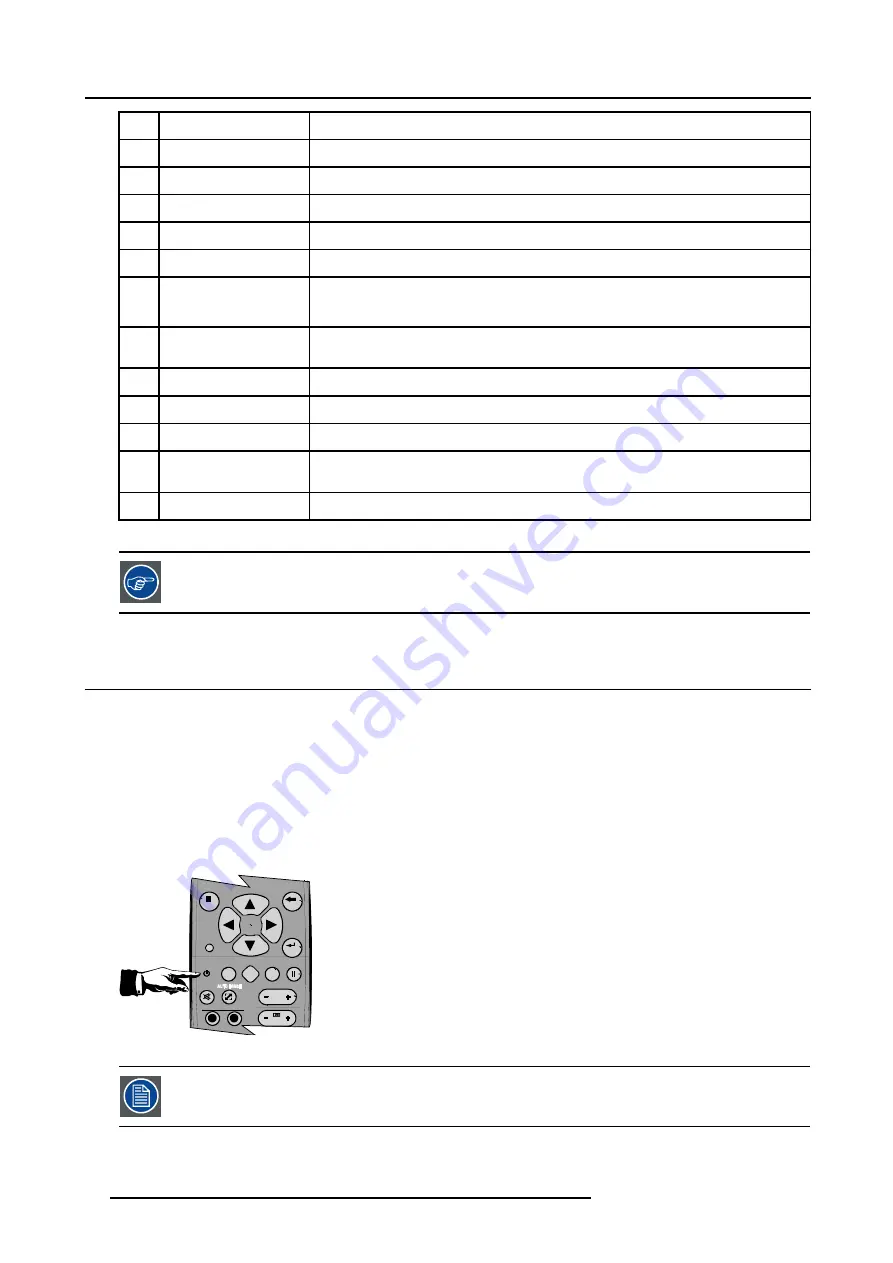
Starting image projection.
1. Press
Standby
key once on the local keypad or on the remote control. (image 4-3)
9
0
EN
T ER
M EN
U
B A C K
D I G I
Z O O M
PH
A SE
PA
U SE
PI P
L O G O
Image 4-3
It may take about 60 seconds before image projection, i.e. no projection until the completion of several oper-
ations (software initialization,...).
32
R5976694 IQ PRO R500 01/02/2007
Summary of Contents for iQ Pro R500
Page 1: ...iQ Pro R500 Owner Manual R9010221 R5976694 04 01 02 2007 ...
Page 6: ......
Page 10: ...Table of contents 4 R5976694 IQ PRO R500 01 02 2007 ...
Page 17: ...2 Installation Guidelines 1 2 3 4 Image 2 1 R5976694 IQ PRO R500 01 02 2007 11 ...
Page 24: ...2 Installation Guidelines 18 R5976694 IQ PRO R500 01 02 2007 ...
Page 34: ...3 Connections 28 R5976694 IQ PRO R500 01 02 2007 ...
Page 48: ...4 Getting started 42 R5976694 IQ PRO R500 01 02 2007 ...
Page 54: ...5 Source Selection Image 5 9 48 R5976694 IQ PRO R500 01 02 2007 ...
Page 60: ...6 General Menu Image 6 10 54 R5976694 IQ PRO R500 01 02 2007 ...
Page 80: ...7 Image Menu Image 7 38 74 R5976694 IQ PRO R500 01 02 2007 ...
Page 100: ...10 Lamp Menu 94 R5976694 IQ PRO R500 01 02 2007 ...
Page 110: ...11 Image files menu Image 11 20 104 R5976694 IQ PRO R500 01 02 2007 ...
Page 120: ...12 Display setup 114 R5976694 IQ PRO R500 01 02 2007 ...
Page 188: ...19 Troubleshooting 182 R5976694 IQ PRO R500 01 02 2007 ...


