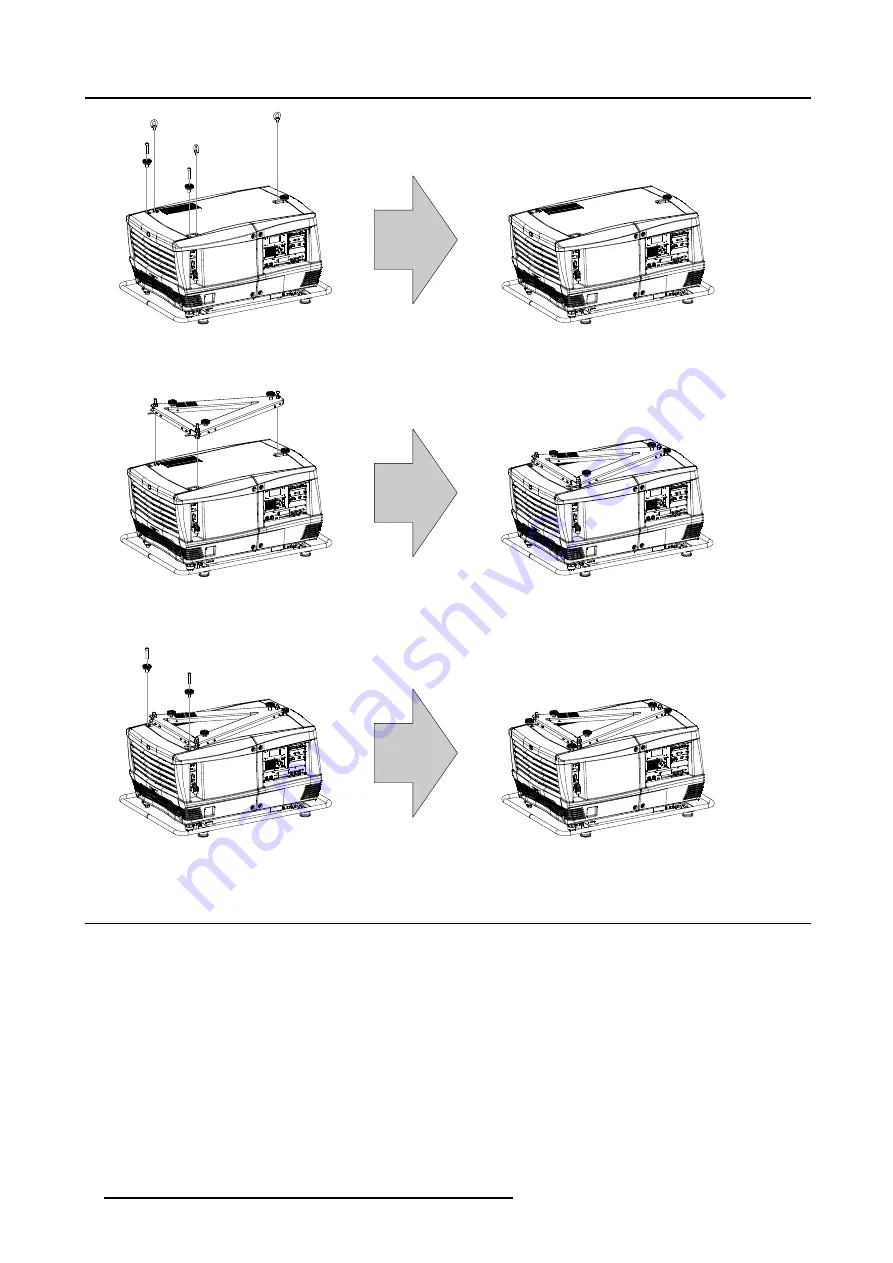
1. FLM/SLM adaptor plate
Image 1-2
2. Place the FLM/SLM adaptor plate on top of the FLM projector as illustrated. The fixation bolts of the FLM/SLM adaptor plate
must fit into the threaded holes of the removed eyebolts.
Image 1-3
3. Secure the FLM/SLM adaptor plate by fastening the three hexagon socket bolts. Use for that an eight millimeter Allen key.
4. Reinstall the two rear interlocking adaptors which you removed in step one.
Image 1-4
1.3
Stacking an SLM projector upon an FLM projector
How to stack an SLM projector upon an FLM projector ?
1. Turn in the four feet of the SLM projector you want to stack.
2. Place the projectors on top of each other. Ensure that all three interlocking pins of the SLM projector match with their correspond-
ing interlocking sockets of the FLM/SLM adaptor plate.
Tip:
In case of stacking projectors for a ceiling mount configuration, first turn the projectors upside down before placing the
projectors on top of each other.
4
R5976959 FLM/SLM ADAPTOR PLATE 24/05/2006


