


Smart maintenance
Smart maintenance
Cleaning
Cleaning
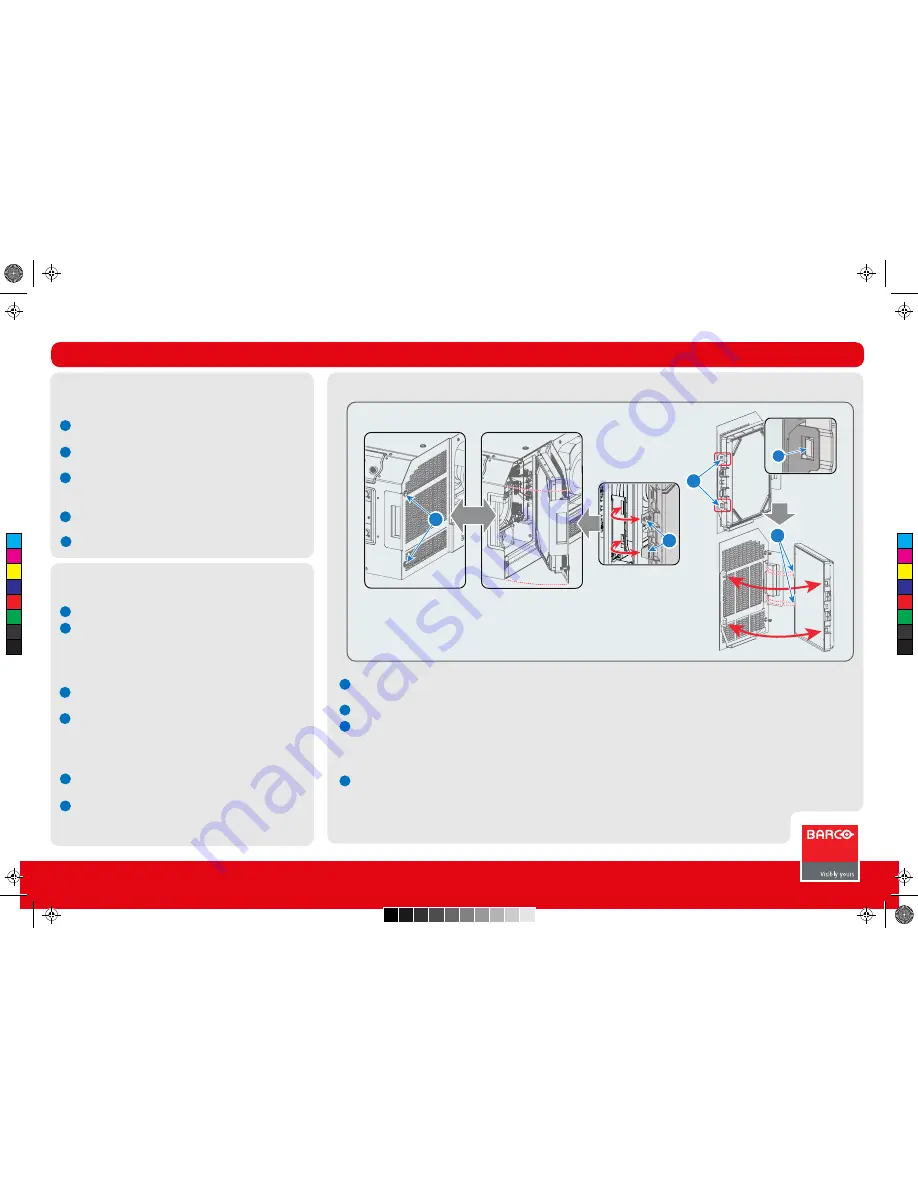
Dust filter replacement (large filter next to the lens)
Dust filter replacement (large filter next to the lens)
DP2K S-series
Quick Start Guide
1
1
2
1
2
1
2
2
3
4
1
1
2
2
3
Maintenance
Maintenance type A = monthly maintenance
Check dust filters for dust and grease. See cleaning the dust
filters.
Check the surface of the lens for dust. Only clean if neces-
sary.
Check the porthole for dust.
Maintenance type B = 3 monthly maintenance
Clean the back/side air inlet vents of the Lamp Power
Supply.
Clean the housing of your projector.
Loosen the two captive screws (7 mm flat screwdriver).
Pivot the assembly away from projector.
The other side of the assembly contains two mounting lips which are engaged in the projector chassis.
Push both latches of the dust filter inwards to detach the dust filter from the cover plate.
Check the “air in” side of the dust filter for dust and/or grease.
In case the filter is contaminated with grease wash and dry the dust filter.
In case the filter contains dust but doesn't feel greasy then vacuum clean the dust filter.
Attach a clean dust filter to the cover plate. Ensure that both latches and both mounting lips of the dust filter are engaged.
Install the dust filter assembly back at the front side of the projector. Secure both captive screws. Ensure that both mounting lips of
the assembly are engaged in the projector chassis.
Lens
Always wipe lenses with a CLEAN Toraysee cloth.
Wipe lens in a single direction.
Do not leave the cleaning cloth in either an open room, do
not use liquid cleaners on the cloth, as doing so can
contaminate the cloth.
Exterior of the projector
Switch off the projector and unplug from the mains power
net.
Clean projector’s outside housing with a clamp cloth.
Stubborn stains may be removed with a cloth that is lightly
dampened with a mild detergent solution.
Vacuum cleaning dust filters
Lightly tap the filter on its dusty side to expel heavy dust
contamination
Carefully vacuum the air inlet side of the dust filter. Use a
vacuum cleaner with a soft brush suction nuzzle. The air
inlet side of the dust filter is the side which is surrounded
with a silicon edge.
2
1
4
3
3
Trained projectionist
4
C
M
Y
CM
MY
CY
CMY
K
r5905465_00_userguide.pdf 4 17-12-2012 9:20:16


