


Projector is booting up.
Projector is running correctly.
Projector in sleep mode without errors, warnings and notifications.
Projector is running with warnings. Event can go on but a technical
intervention will be necessary in the near future to prevent a
complete stop of the projector.
Projector in sleep mode with warnings.
Projector is in error state. Problem could prevent normal operation.
Solve the problem before continuing
with the projector.
Projector in sleep mode with errors.
Projector runs in notification state. Maintenance action required. Lamp
run time is exceeded, filters needs to be cleaned, etc.
Projector in sleep mode with notifications.
3
1
2
6
2
7
8
9
10
11
4
5
Caution !
High voltage and strong UV radiation is present in the projector.
To prevent personal injury, electrical shock, exposure to UV
radiation and fire hazard, always refer to the “Safety manual” of
the projector.
Projector Status Light
Projector Status Light
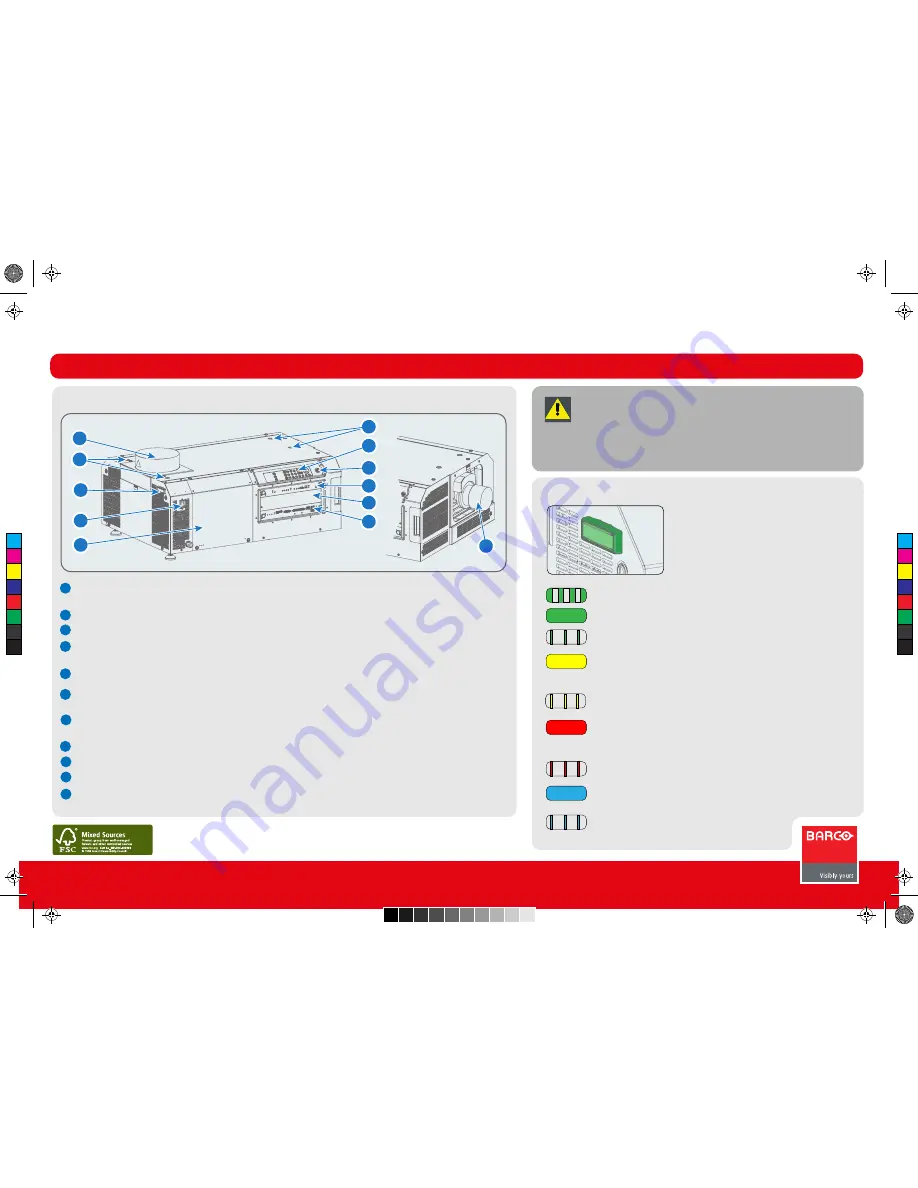
Projector Components
Projector Components
DP2K S-series
Quick Start Guide - Trained projectionist
Exhaust Output:
removes heat from lamp house. Must be connected to external extraction system.
Important:
the extraction system must be running. A flexible duct must be installed.
Touch panel position:
places where a touch panel can be mounted.
Status light:
shows the status of the projector. Can be green, yellow, red or blue.
Mains power switch:
powers projector on and off. Shuts off all electrical connections.
Important:
the lamp must be cooled down for 5 minutes before switching off.
Lamp house cover:
to be removed to replace the lamp house.
Keypad:
Used for local operations on the projector such as switching the lamp on-off, dowser, selecting a macro
or test pattern or switching the projector to standby or sleep mode.
Touch panel connector:
provides power and communication for the touch panel.
Important:
To avoid connector damage, align the pins before you connect the cable.
Integrated Cinema Processor (ICP).
I
nput slot for IMB, IMS, or HDSDI module
.
Cinema Controller.
Automated motorized lens
: automatically adjusts the image between screen formats when a macro is selected.
Always remove the lens cap prior to use.
11
10
9
8
7
6
5
4
3
2
1
General
R5905465/00
Printed on FSC certified paper (www.fsc.org)
1
C
M
Y
CM
MY
CY
CMY
K
r5905465_00_userguide.pdf 1 17-12-2012 9:20:10


