R5900096 /00
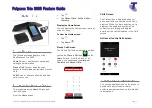
CX-50
32
4.1 Installation methods for the Base unit
For optimal performance, install the Base unit close to the display and avoid obstacles between the
Base unit and the Buttons.
Make sure not to install the Base Unit in a metal enclosure.
Physical installation
The Base unit can be installed in different ways in a meeting room.
•
Table mount
•
Wall mount
A Kensington lock is foreseen on one side of the Base Unit.
WARNING:
Ceiling mount is not allowed !
Standalone or network integration
The Base Unit can be use as standalone unit or integrated in a corporate network.
•
Out-of-the-box use
•
Out-of-the-box use with Ethernet link
4.2 Table mounting
Overview
Put the Base Unit directly on the meeting room table.
The total weight of the Base Unit is 900 g.
4.3 Wall mounting
About wall mounting
No mounting bracket is needed to install the Base unit on the wall. The Base Unit can be mounted in any
position on the wall, but it is preferred to mount it with the connections downwards.
The total weight of the Base Unit is 900 g.
Required tools
•
a drill (type of drill depends on the type of wall)
•
Screwdriver (depending on the used screws)
Required parts
•
2 mounting screws, maximum head diameter of 6.5 mm
•
2 plugs
How to install
1.
Drill two holes in the wall or ceiling as indicated on the drawing.
Horizontal distance : 162 mm,
Summary of Contents for CX-50
Page 1: ...ENABLING BRIGHT OUTCOMES Installation manual CX 50...
Page 18: ......
Page 54: ...R5900096 00 CX 50 54 Preparing the Buttons...
Page 56: ...R5900096 00 CX 50 56 CX 50 Configurator...
Page 91: ...91 R5900096 00 CX 50 Firmware updates 7...
Page 93: ...93 R5900096 00 CX 50 Troubleshooting 8...