background image

WEB


Visit your favourite websites via your television. Switch between websites and 

navigate on the television screen by means of the remote control. The operation 
here only applies when BeoMaster 5 is connected to a television. 
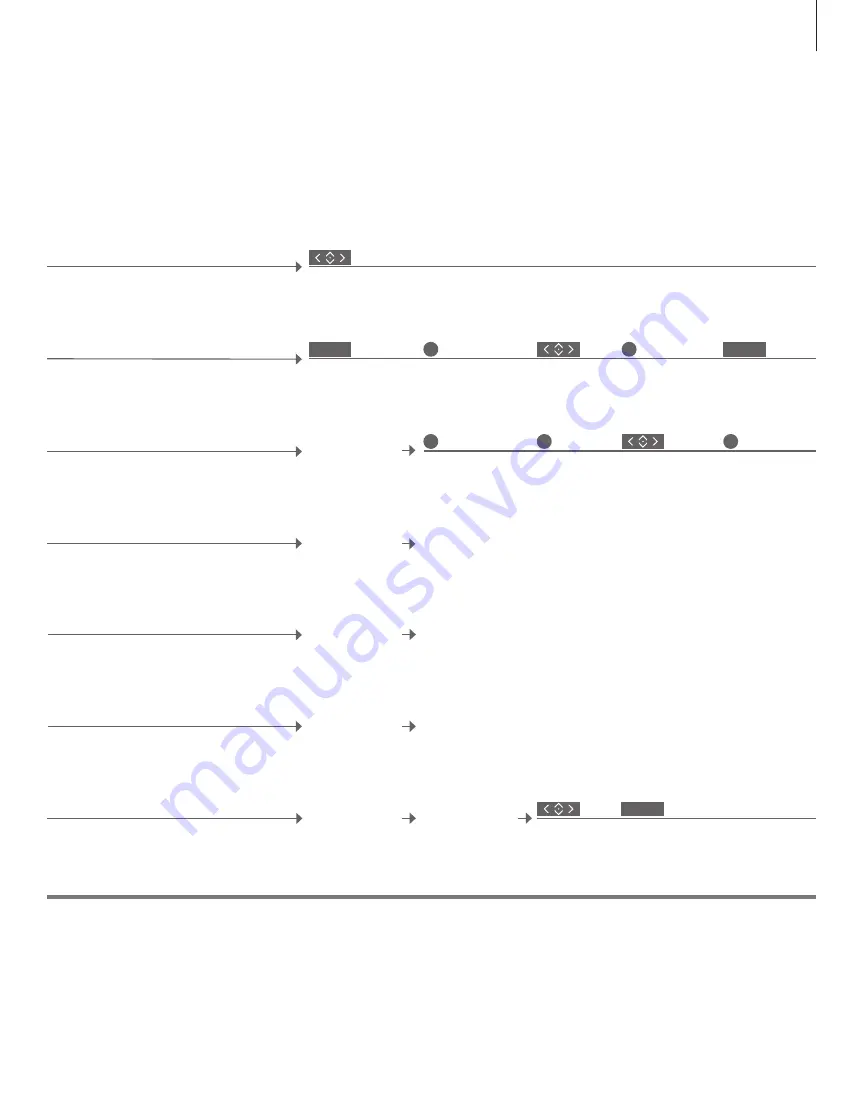
View next/previous 

Step between websites. 

Press 

4

 for ‘Previous’ and 

6

 for ‘Next’ 

website 

Bring up menu 

overlay 

Bring up menu 

overlay 

Press 

1

 for ‘Home/Return’ 

Move the cursor to the website being viewed. 

Bring cursor to website 

Scroll on a website when no list is shown. 

Scroll

Scroll on the website 

Change 

settings 

Store setting and 

leave menu 

Configure WEB 

Change settings for WEB. 

Bring up menu 

overlay 

Press 

9

 for 

‘Configuration’ 

Select bookmark

Move the highlighted bookmark to a group. 

Move a bookmark 

Press and hold 

Move to a link and bring up the new web site. 

Navigate 

Move cursor to 

a link 

Change to cursor 

Bring up new 

page 

Change to scroll 

mode 

Select group


Confirm

View popups 

View a list of popups from the menu overlay.*

2


Bring up menu 

overlay 

Press 

3

 for ‘Popup list’ 

Hide list 

Organise bookmarks and folders 

Delete bookmarks

2

*Popups

Add the websites you want to view on your television screen in Internet Explorer on your computer.  

For more information, see the BeoConnect Guide. 
Bring up the menu overlay, then press 

8

 and follow the on-screen instructions. 

Use 

4

 and 

6

 to view the popups shown on the television screen. 

Release button 

when menu 

appears

BACK 

BACK

BACK 

15

Summary of Contents for BeoMaster 5

Page 1: ...BeoMaster 5...

Page 2: ......

Page 3: ...connected to the Internet and music must be transferred to it For this purpose dedicated software is developed BeoConnect and BeoPlayer How to use the dedicated software is described in the guides su...

Page 4: ...orrect and safe installation and interconnection of equipment in multimedia systems The supplied plug and mains cord are specially designed for the product Do not change the plug and if the mains cord...

Page 5: ...Contents 6 Menus and symbols 7 Listen to your music 8 How to use your remote control 10 Operate sources 12 N MUSIC 13 N RADIO 14 PHOTO 15 WEB 16 Use from a link room 18 Set up your system...

Page 6: ...0 Source selection Leave mode Add to playlist Home Return Random on off Show info Hide info List root Play all Play group Full Size cover Track info view Delete Rename GO EXIT GO 1 2 3 4 5 6 7 8 9 0...

Page 7: ...ster 5 sources Press 2 Select source Activate source or Select and activate source BeoPlayer BeoPort 1 BeoConnect 2 PC on Beo4 If you have the BeoPlayer or BeoPort software on your computer you can al...

Page 8: ...turn Select colour specific functions Press volume wheel next to the colour Bring up digits to select track or station Press again to return Back up through Beo6 displays Remove menu overlay Press aga...

Page 9: ...and accept settings Browse groups and albums Start playback Standby Bring up the menu overlay Pause playback Select numbered track or station or an option Step through tracks or stations Hold for cont...

Page 10: ...t playlist view Add to list Bring up menu overlay and change view Step between groups Browse groups lists Change source Bring up the source selection menu to change source 1 Select a source Activate B...

Page 11: ...and confirm Select source and confirm Bring up menu overlay Select view and confirm Select source and confirm Expand group list Step in or collapse group list Select list and confirm Select source an...

Page 12: ...on Select track album group list Press 8 for Delete Select the content you wish to delete Delete content Follow on screen instructions Bring up menu overlay Press 6 for Play all Play group Set the mus...

Page 13: ...te content Select the content you wish to delete in the favourite coloured lists Change setting Store setting and leave menu Configure N RADIO Change settings for N RADIO Bring up menu overlay Press 9...

Page 14: ...onfigure PHOTO Change settings for PHOTO Bring up menu overlay Press 9 for Configuration Rotate zoom photo Rotate and zoom in on a photo on the screen Press 6 for Rotate right and 7 for Zoom Zoom off...

Page 15: ...EB Bring up menu overlay Press 9 for Configuration Select bookmark Move the highlighted bookmark to a group Move a bookmark Press and hold Move to a link and bring up the new web site Navigate Move cu...

Page 16: ...ss and hold Step in a coloured list Press 2 1 Beo4 on Mode 1 Menu overlay in link room 2 N MUSIC N RADIO Play Timer If Beo4 is in Mode 1 you have to press PLAY instead of the centre button and long pr...

Page 17: ...pend on your setup The illustration below is an example of a setup BeoMaster 5 BeoSound 5 setup You can view the same content from BeoMaster 5 on a link room TV as you have on a main room TV You can f...

Page 18: ...roduct and 10 cm 4 above it Never place BeoMaster 5 in a closed cabinet without ventilation For safety reasons the mains cord from the wall outlet must be secured to the product Use the enclosed cable...

Page 19: ...ver SPDIF For loudspeakers with a digital input MASTER LINK Connection for BeoLink distribution throughout the house LINE OUT Left and right sound channel output to television POWER LINK Loudspeaker c...

Page 20: ...PER FORMANCE ACCURACY AND EFFORT INCLUDING LACK OF NEGLIGENCE IS WITH YOU ALSO THERE IS NO WARRANTY AGAINST INTER FERENCE WITH YOUR ENJOYMENT OF THE SOFT WARE OR AGAINST INFRINGEMENT IF YOU HAVE RECE...

Page 21: ...install your media collection on the BeoMaster you must use BeoPlayer BeoPort or BeoConnect for MAC users only software to transfer your collection to the BeoMaster This ensures that you will not lose...

Page 22: ...for a class B digital device pursuant to part 15 of the FCC Rules These limits are designed to provide reasonable protection against harm ful interference in a residential installation This equipment...

Page 23: ...l advise you of the correct way of disposal in your country If a product is too small to be marked with the symbol it will appear in the User guide on the Guarantee certificate or on the packaging Was...

Page 24: ......

Page 25: ......

Page 26: ......

Page 27: ......

Page 28: ......

Reviews: