Using
Console
Mode
Manual Documentation Number: ESP904-0504
Chapter 9
51
B&B Electronics Mfg Co Inc – 707 Dayton Rd - PO Box 1040 - Ottawa IL 61350 - Ph 815-433-5100 - Fax 815-433-5104 –
www.bb-elec.com
B&B Electronics Ltd – Westlink Commercial Park – Oranmore, Galway, Ireland – Ph +353 91-792444 – Fax +353 91-792445 –
www.bb-europe.com
C
C
h
h
a
a
p
p
t
t
e
e
r
r
9
9
:
:
U
U
S
S
I
I
N
N
G
G
C
C
O
O
N
N
S
S
O
O
L
L
E
E
M
M
O
O
D
D
E
E
Before the ESP904 is installed on a LAN the
Console Mode
can be used to
change the settings from the defaults. The ESP904 is shipped with Port 1 set
in the
Console Mode
. Connect a crossover (null modem) cable between the
ESP904 Port1 and the COM port on the Computer.
N
N
o
o
t
t
e
e
:
:
See Chapter 5 for details of each Server Property Settings.
Console Mode Setup
Step 1:
Apply power to the ESP904. The power and ready LED will light.
Step 2:
Using a VT100 Terminal emulation program (typically
HyperTerminal
in Windows) open the computer COM port
connected to the ESP904 Port 1 (via an RS-232 crossover cable).
Step 3:
In the HyperTerminal
Port Settings
window set:
o
Baud rate: 9600
o
Data bits: 8
o
Parity: None
o
Stop bits: 1
o
Flow control: None
Click
OK
Step 4:
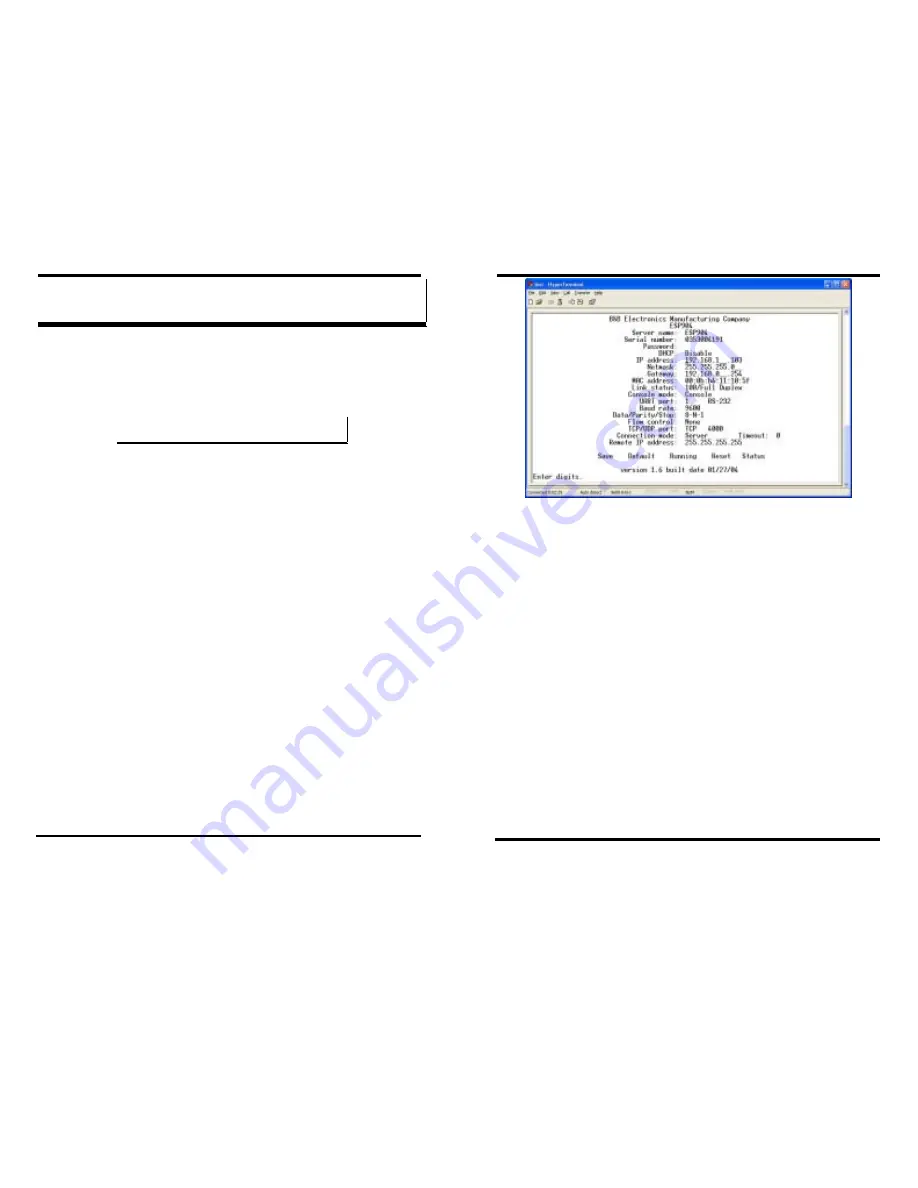
To view the
Configuration Menu
, press the
space bar
.
Using
Console
Mode
52
Chapter 9
Manual Documentation Number: ESP904-0504
B&B Electronics Mfg Co Inc – 707 Dayton Rd - PO Box 1040 - Ottawa IL 61350 - Ph 815-433-5100 - Fax 815-433-5104 –
www.bb-elec.com
B&B Electronics Ltd – Westlink Commercial Park – Oranmore, Galway, Ireland – Ph +353 91-792444 – Fax +353 91-792445 –
www.bb-europe.com
Figure 36. The Console Mode Server Configuration Screen
Navigating the Configuration Menu
Pressing the Space Bar refreshes the page. Tab, Back Space and arrow keys
can be used to navigate to the desired field. The following fields can be
changed by pressing
Enter
and selecting from the list that appears:
•
DHCP
•
IP Address
•
Netmask
•
Gateway
•
Console mode
•
UART Port
•
RS-232, RS-422, RS-
485
•
Baud Rate
•
Data/Parity/Stop
•
Flow control
•
TCP/UDP Port
•
Connection mode
•
Timeout
•
Remote IP address
•
Save
•
Default
•
Running
•
Reset
•
Status
Step 5:
Once all the changes have been made move to the
Save
field and
select
Enter
.


