


mvBlueGEMINI Technical Manual (EN) v
2.6
FIRST STEPS
18
8 First steps
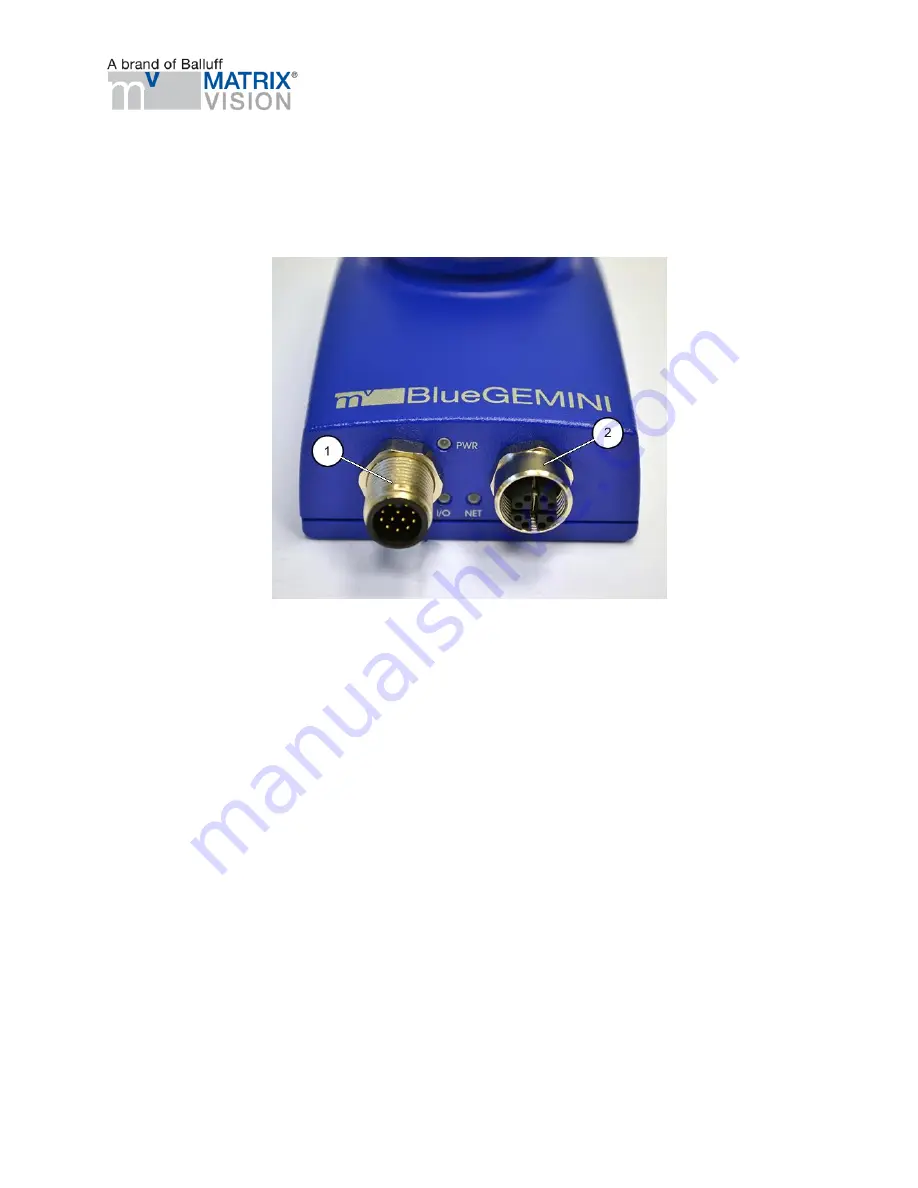
8.1 Connect the smart camera
Figure 3 Connector side
•
Connect the smart camera with the local network using the
NET
(2) connector .
•
Power the camera using the connector
PWR/IO
(1).
•
Now, the smart camera will start which will take approx. 30 seconds.
•
The smart camera will load the most recently opened inspection program and will continue with
the most recently used operating mode (active/inactive).
8.2 Connect with the smart camera
•
The smart camera is configured via PC, tablet or smartphone. It is assumed that the device
used for this purpose
o
has
a minimum resolution of 1024 x 768 pixels
,
o
has
an supported web browser and
o
is connected to the same network
as the smart camera. In Windows, you need to
apply the setting
"Obtain an IP address automatically" (DHCP)
for the network
adapter for the PC or smart camera.
Supported web browsers are:
•
Google Chrome version 32.0 and above
•
Mozilla Firefox version 24.0 and above
•
Microsoft Internet Explorer version 11 and above


