12
english
5
Software example in LASAL CLASS 2 & LASAL SCREEN (continued)
Prepare visualization
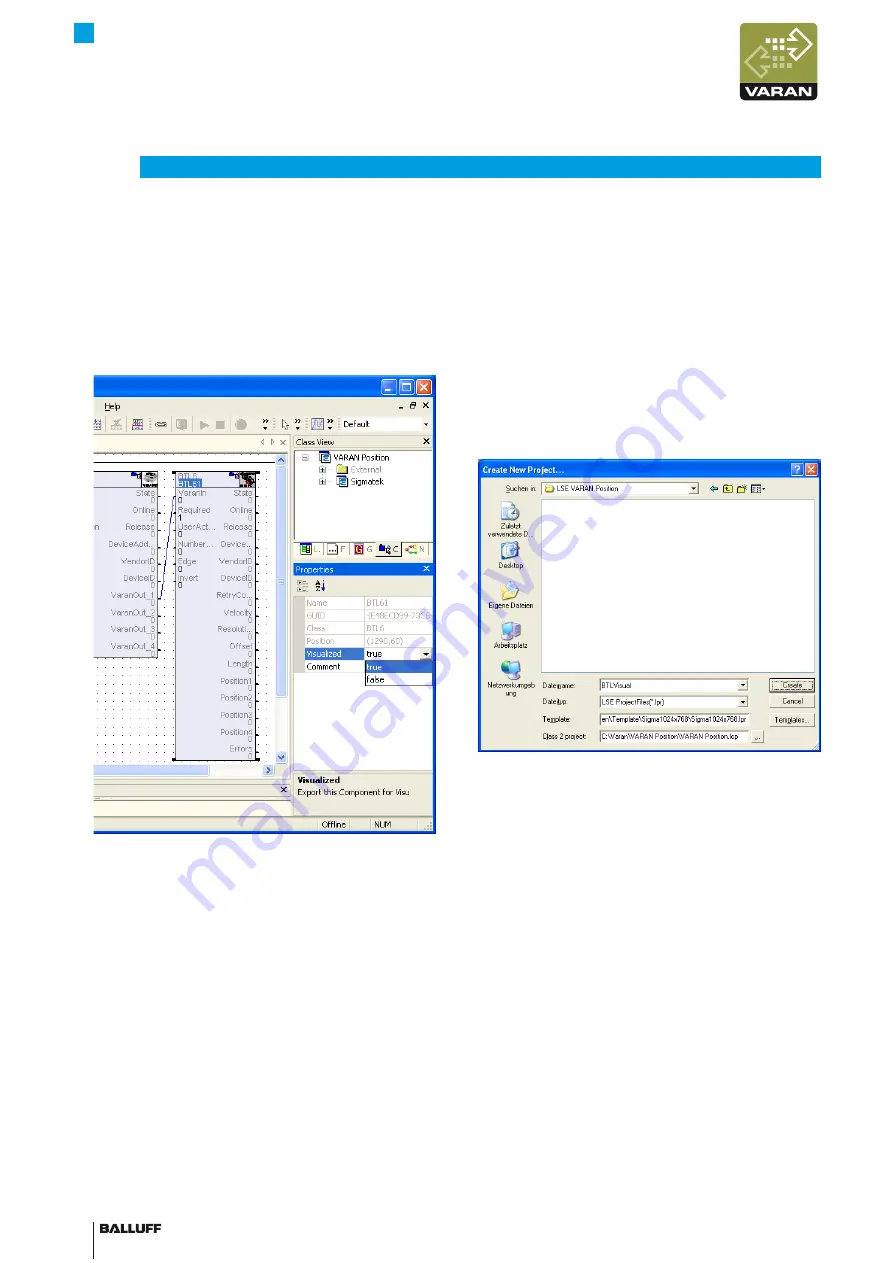
Graphically display the BTL position:
In the BTL block, set the “Visualized” property to
1.
“True”.
Press <Ctrl> + <F9>
2.
or
click the “Rebuild Project” icon in the menu bar.
Close the LASAL CLASS 2 program.
3.
Fig. 5-8: Prepare visualization
Visualization with LASAL SCREEN
5.2
Create a new project
Open the LASAL SCREEN program.
1.
Select “File > New Project”
2.
or
press <Ctrl> + <N>.
Assign a file name (e.g. “BTLVisual”).
3.
Select a template (e.g. “Sigma800x600.lpr”, the tem-
4.
plate must fit the screen resolution for the touch panel).
Select the previously created LASAL CLASS 2 project
5.
“VARAN Position.lcp” as a CLASS 2 project.
Click
6.
c
reate
.
Fig. 5-9: Dialog: Create New Project
Confirm the following question (“Continue Scripting?”)
7.
with
Y
es
.
The LASAL CLASS 2 program will automatically be
⇒
opened with an updated circuit diagram.
Integrate variables from LASAL CLASS 2
Select “Project > Reference to Variables ....” in the
1.
menu.
Click
2.
U
pdate
.
Confirm the following dialog with
3.
O
K
.
BTL6-V11V-...
Configuration
Summary of Contents for BTL6-V11V Series
Page 1: ...BTL6 V11V Konfigurationshandbuch deutsch...
Page 2: ...www balluff com...
Page 21: ...BTL6 V11V Configuration Manual english...
Page 22: ...www balluff com...


