


THE AUTOGRAPH CONTROL PANEL
Overview
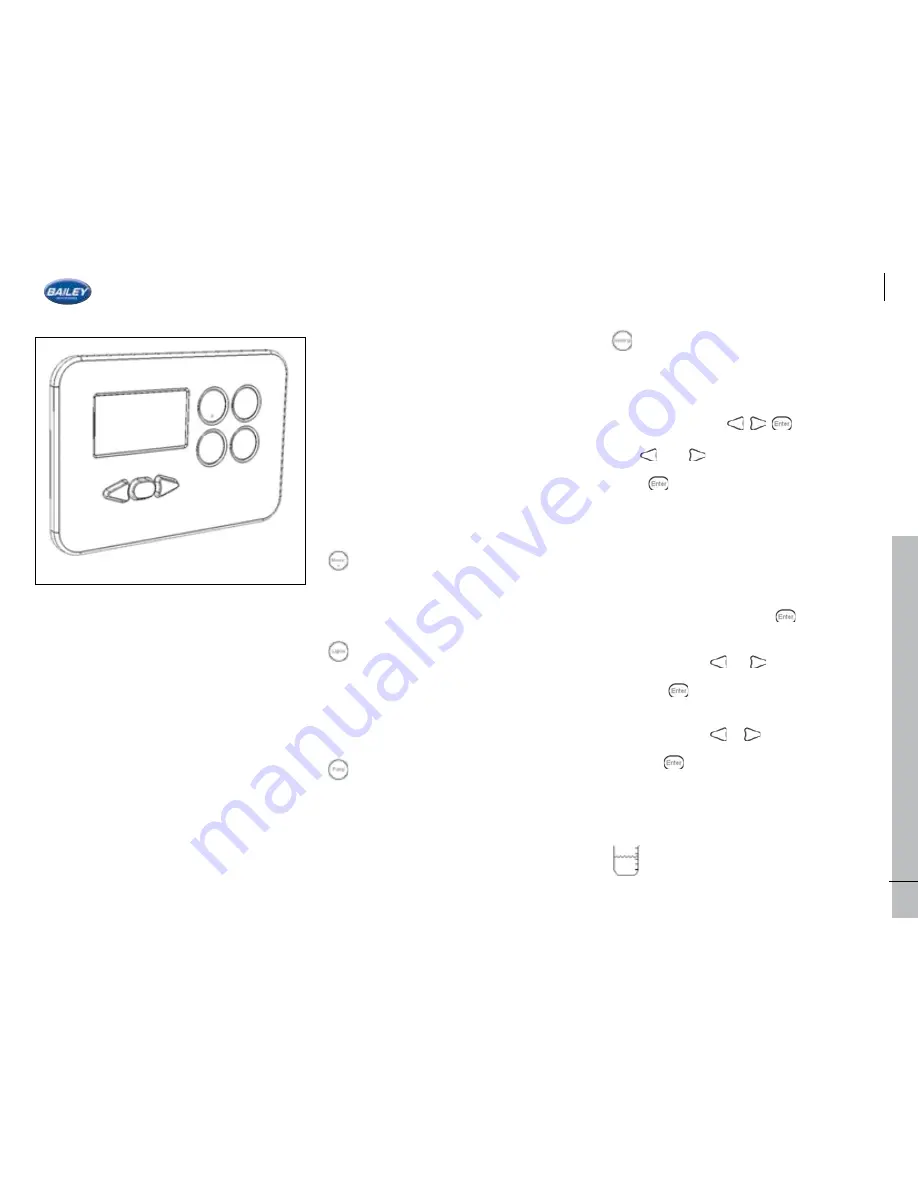
The control panel provides the user with a
central point to check:
• Leisure battery voltage
• Vehicle battery voltage
• Level in fresh water tank
• Level in waste water tank
• Current in amps being drawn from the
leisure battery
• Inside (internal) temperature
• Outside (external) temperature
• Time
The control panel also provides the user with
the ability to:
• Switch off all non-essential electrical
appliances/accessories
• Switch off all the lights
• Switch off the pumps
• Switch the awning light
• Charge the vehicle battery when 230V
mains is connected
• Force internal pump to run (for purging
pipes)
The control panel has optional audio and visual
warnings for:
• Low battery (leisure)
• Low battery (vehicle)
• Low level (fresh water tank)
• High level (waste water tank)
• High power drain (leisure battery)
• 230V mains supply lost
• Circular function buttons
Master Switch
When pressed will switch power to all non-
essential accessories.
*The alarm, radio and fridge still receive power
when the master switch is off.*
Lights Switch
When pressed will switch power to all the
interior lights.
*If the master switch is off, this button will not
function.*
Pump Switch
*Also see “Icons” section below for relevant
warning icon*.
When pressed will enable/disable the water
pumps. Holding this button will force the
internal pump to run.
*If the master switch is off, this button will not
function.*
Awning Switch
When pressed will switch power to the
awning light.
*If the master switch is off, this button will not
function.*
Navigation buttons
Use and buttons to navigate.
Press to enter function or change settings
(if further settings are available).
Screens
Time
The time screen is displayed by default. The
control panel will return to the time screen
when left idle.
Setting the time:
1. On the time screen, hold for 3 seconds
until the hours begin to flash.
2. Keep pressing or to change hours.
3. Press to set hours; minutes will now
flash.
4. Keep pressing or to change minutes.
5. Press to finish.
Water Level
*Also see “User Settings” (on the next page) –>
“Water Low” for associated alarm*.
*Also see “Icons” section for associated icon*.
The level in the fresh water tank is
displayed as a % on this screen.
43
6
FITTED E
QUIPMENT – T
he C
on
tr
ol P
anel
FITTED EQUIPMENT – The Control Panel
Summary of Contents for Approach Advance
Page 1: ...Owner s Manual...
Page 2: ......
Page 36: ...33 5 CONNECTION OF SERVICES The Water System CONNECTION OF SERVICES The Water System...
Page 45: ......
Page 98: ......
Page 107: ...1 0 4 NOTES...
Page 108: ...1 0 5 10 Notes NOTES...
Page 109: ...1 0 6 NOTES...
Page 110: ...1 0 7 10 Notes NOTES...


