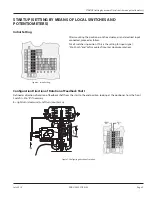
Setting of Zero, Span and Gain
Figure 8: Setting zero, span and gain
1 Apply 4 mA to Input
2 Turn potentiometer
P3
for zero point (ZERO) until actuator just
begins to move from its end position
Rotate P3 to the right: zero point is increased
Rotate P3 to the left: zero point is reduced
3 Apply 20 mA to Input
4 Turn potentiometer
P2
for span (S) until actuator exactly reaches its
end position
Rotate P2 to the right: span is increased
Rotate P2 to the left: span is reduced
5 The loop amplification of the positioner is set via potentiometer P4
Trim the gain so that the actuator will not swing at constant given
input value
6 Re-check zero and span settings
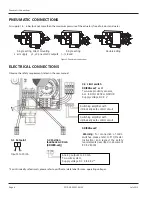
SETTING AND STARTUP OF POSITION TRANSMITTER 4-20MA
Verify the electronic connection of the position transmitter Both LED’s are then light up
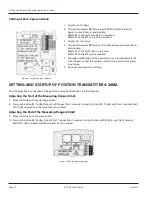
Adjusting the Start of the Measuring Range (4 mA)
7 Move the actuator to the starting position
8 Press push-button
S1
"Config Output 4mA“ longer than 2 seconds During this time, LED
1
lights up After 2 seconds, both
LED’s light up again and the value for 4 mA is stored
Adjusting the End of the Measuring Range (20mA)
9 Move the actuator to the end position
10 Press push-button
S2
"Config Output 20 mA“ longer than 2 seconds During this time, LED
2
lights up After 2 seconds,
both LED’s light up again and the value for 20 mA is stored
Figure 9: Adjusting measuring range
Setting and StartUp of position transmitter 4-20mA
Page 10
July 2013
POS-QS-00007-EN-02
Summary of Contents for RCV SRI990
Page 1: ...Valve Positioners SRI990 Analog Positioner POS QS 00007 EN 02 May 2018 Quick Start Guide...
Page 2: ...Valve Positioners SRI990 Analog Positioner Page ii July 2013 POS QS 00007 EN 02...
Page 4: ...Valve Positioners SRI990 Analog Positioner Page iv July 2013 POS QS 00007 EN 02...
Page 11: ...INTENTIONAL BLANK PAGE Quick Start Guide Page 11 July 2013 POS QS 00007 EN 02...


