background image

R

O

L
L

E

D

E

D

G

I

N

G

36

Lettuce Edge

Belt Loops and Button Loops

Returning to Standard Serging

A

B

C

Use  the  rolled  edge  thread  chain,  stitched  without  fabric,  to  make
professional belt loops and button loops.  Using a heavy decorative
thread in the upper looper forms a stronger loop.

Clear the stitch fingers and return the stitch length dial to the standard range.  Set stitch width and length
at the desired settings.  Replace the left needle and its corresponding thread, if desired.

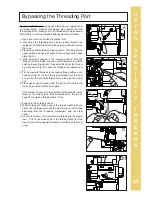
A frilly or "lettuce" edge can be created on most light and medium
weight stretch fabrics and on bias edges of soft, woven fabrics.  It
makes a pretty decorative edging for activewear, lingerie, acces-
sories and children's wear.

Set the machine for the 3-thread rolled edge (page 23).

Set differential feed at 0.6 (fig.B).  Serge the fabric in the direction
of greatest stretch - the crossgrain on knits, bias grain on wovens.
For a "leafier" effect, try using a shorter stitch length and gently
stretch the fabric (fig.A) as it is being sewn.  Sew a test sample
(fig.C).

Use  the  3-thread  rolled  hem  setting  when  sewing  sheer  fabrics  that  otherwise  would  require  French
seams.  Set the stitch length at 2.5.  Then simply sew the seams, aligning the fabric edges with the serg-
er seam guide, trimming away the excess seam allowance.

Seaming Sheers

To convert "ROLLED EDGE", please refer to page 23 to change the settings and threading.

Rolled Edging

Summary of Contents for Enlighten BLE3ATW-2

Page 1: ......

Page 2: ...Do not operate where aerosol spray products are being used or where oxygen is being administered 8 To disconnect turn the main switch to the symbol O position which represents off then remove plug fro...

Page 3: ...ast and trim all in one operation Fabrics and threads you previously avoided are now a joy to sew because the Baby Lock Enlighten handles all varieties with equal ease With the Baby Lock Enlighten you...

Page 4: ...5 MACHINE SETTINGS 16 Stitch Length Rolled Hem 16 Stitch Width 16 Differential Feed 17 Disengaging the Upper Cutting Blade 18 Presser Foot Pressure Adjustment 18 Snap On Presser Foot 18 4 THREAD OVERL...

Page 5: ...g Inside Corners 40 Serging Curves 41 Inserting Tapes 41 USING SPECIALTY THREADS 42 Using Specialty Threads 42 Threading Lightweight Thread 42 Changing Threads 42 Threading Medium Weight Thread 42 Thr...

Page 6: ...ed dogs first The feed dogs move the fabric along as the cutting blades trim the edge creating a clean edge to be finished Then the loopers and needle s form the stitch on the fabric edge supported by...

Page 7: ...port 6 Snap on presser foot 21 Power switch 7 Needle plate 22 Stitch selector 8 Side cover 23 Accessory compartment spool stand 9 Stitch width adjusting dial 24 Upper looper threading port 10 Cutting...

Page 8: ...box Lint brush needle insert tool 1 Accessory compartment Needle clamp screw 2 Accessory compartment Package of assorted sized needles 1 Accessory compartment Organ ELx705CF Medium screwdriver 1 Acces...

Page 9: ...e too weak or too fuzzy for the rolled edge Poor grades of these threads can result in frequent fraying breaking and unbalanced stitches Threads of other fiber contents and weights may be used dependi...

Page 10: ...e plug does not fit fully in the outlet reverse the plug If it still does not fit contact a qualified electrician to install the proper outlet Do not modify the plug in any way The sewing speed of the...

Page 11: ...freely With the spool notch side down insert a spool cap into the top of the spool fig B When using standard spool threads on your serger replace the cone holders with the sponge disks furnished with...

Page 12: ...ith the presser foot up and threding lever in the threading position fig A 2 Place the thread cone or spool on the far right front spool pin on the thread stand fig C page 11 Slip the thread into the...

Page 13: ...g C 3 Pull 18 inches 45cm of thread through guide C Insert the end of the thread into the threading port U about 1 2 inch 1 2cm Use tweezers if necessary to insert the thread end more easily fig D 4 P...

Page 14: ...read guides 1 and 2 through the groove on the front of the machine and through guides 3 4 5 6 and 7 Pull a 6 inch 15 cm length of thread through guide 7 3 Lower the presser foot to engage the tensions...

Page 15: ...he needle 3 Hold the needle thread horizontally with both hands and position the thread into the threader hook guides on top of thread hook illustration C for correct positioning 4 Tap the needle thre...

Page 16: ...ower the presser foot While holding the threads in your left hand press down on the foot control gently to begin a thread chain before serging fabric fig A You can leave the presser foot down for most...

Page 17: ...oper tube is completely removed This will eliminate any chance of the previous thread obstructing the flow of the air when re threading the machine The Wave Selector lever shows OVERLOCK and WAVE Sele...

Page 18: ...the placement of Right and Left needles and the stitch width dial positions Fig B The stitch length rolled hem adjusting dial is conveniently locat ed just to the left of the front cover near the base...

Page 19: ...am on the front cover indicates This action can eliminate wavy seams in stretchy fabrics or those cut on the bias grain fig A At the maximum setting of 2 0 fig C the differential feed can gather a lig...

Page 20: ...slot Insert the tape or ribbon into the slot in the front of the foot then under the sole of the foot page 41 for more instruction The raised markings on the toe of the foot are seam line guides They...

Page 21: ...e to create the seam The right needle thread visible on the top side of the stitch interlocks with both the loopers to add durability The thread that resembles a zigzag on the upper side of the fabric...

Page 22: ...ating either needle To convert your serger to a 3 thread overlock wide 7 5mm cut the right needle thread just above the needle eye fig A Remove the right needle and right needle thread completely from...

Page 23: ...e left needle and left needle thread completely from the machine Tighten the needle clamp screw slightly to prevent the screw from working out fig B Confirm needle is in the right needle clamp positio...

Page 24: ...clockwise to the rolled hem range Set the length at 0 75 to 4 0 fig A and the stitch width at 3 0 for a smooth decorative finish fig B Move the stitch selector lever to C For the right needle 3 threa...

Page 25: ...around the stitch finger The upper looper wraps the fabric edge while the lower looper thread is nearly invisible on the back side of the stitch formation Remove the left needle and thread Clear the s...

Page 26: ...ity The edges pull open and flatten within the stitch for a non bulky join Be sure to sew a test sample first to determine whether the stitch will have the strength to hold the seam without the fabric...

Page 27: ...er 3rd from left and down the front Then take the thread to the left and thread the machine as you would for the needles in their normal position illustration on page 26 27 for correct threading 5 Usi...

Page 28: ...read at the hook on front of the machine Then take the needle thread through the normal needle thread paths illustration below Thread the left needle for a wide flatlock 4 Engage the subsidiary looper...

Page 29: ...al needle thread paths illustration below Thread the right needle for a nar row flatlock 4 Engage the subsidiary looper following step 3 on page 25 5 Thread the lower looper as shown in the illustrati...

Page 30: ...bric right side or wrong side out depending on the loop page 26 or ladder page 31 stitch you want to show along stitch placement lines 5 Position the fabric under the presser foot aligning the fold of...

Page 31: ...allowance back against the fabric right side to create a fold about 1 4 from the top edge of the hem as shown fig A 3 Align the fold under the presser foot and stitch allowing the needle to catch onl...

Page 32: ...tinue to thread the needle as illustrated 5 Thread Maxilock thread in the lower looper 6 Swing the subsidiary looper into place on the upper looper 7 Place water soluble stabilizer on top of the fabri...

Page 33: ...path below illustration 4 Engage the threading lever in the serging position pull the thread out the upper looper tube and continue to thread the needle as illustrated 5 Thread Maxilock thread in the...

Page 34: ...looper slightly to the back to release from the eye of the upper looper Rotate it to the right until it snaps back into place and out of the way 3 Engage the threading lever to the threading position...

Page 35: ...ead cone on the far left spool pin 5 Slip the right needle thread into the telescopic thread guide directly above the thread Follow the left needle threading path down to the right needle 6 Thread the...

Page 36: ...directly above the thread Follow the top threading path for the right needle thread down the front threading path to the left of the chrome thread guide and directly to the U threading port for the u...

Page 37: ...e directly above the thread Follow the top threading path for the right needle thread down the front threading path to the left of the chrome thread guide and directly to the U threading port for the...

Page 38: ...woven fabrics It makes a pretty decorative edging for activewear lingerie acces sories and children s wear Set the machine for the 3 thread rolled edge page 23 Set differential feed at 0 6 fig B Serge...

Page 39: ...asic uses of a serger such as making a garment or project with 5 8 inch 16mm pressed open seams fig A To overedge place the single layer of fabric in front of the presser foot aligning the cut edge wi...

Page 40: ...use a large eye tapestry needle or double eye needle to weave the chain back into the stitching 4 Lock the beginning or end of a seam by serging over the previ ous stitches To lock the beginning of th...

Page 41: ...fabric to clear the stitch fingers 3 Turn the fabric over with the wrong side of the stitch facing up fig B and reposition it under the presser foot with the nee dle at the seam edge aligned with the...

Page 42: ...te A loose thread loop at the corner is caused by too much slack in the needle thread when clearing the stitch fingers Try again turning corners takes a little practice 1 Reinforce loosely woven fabri...

Page 43: ...long serger presser foot holds the fabric more securely you may need to raise and lower the presser foot several times to maneu ver around very tight curves The slot in the standard presser foot is de...

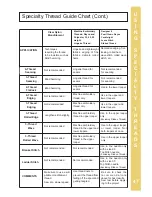
Page 44: ...are too heavy for the needle and should only be used in the loopers Use the Specialty Thread chart on pages 46 47 as a guide keeping in mind that the threads can vary from one manufacturer to another...

Page 45: ...ding port fig D 5 Cut a 24 inch 55cm strand of serger thread and fold in half to form a thread cradle Insert the loose ends of the thread cradle into the port about 1 inch 2 5cm 6 Holding the cradle l...

Page 46: ...With machine engaged in threading position 4 Thread specialty thread into the upper thread guides leaving an 18 inch 45cm tail above the threading port 5 Place the straight end of the looper threadin...

Page 47: ...ing looper thread out of tube extending from the thread ing mechanism fig B Leave the thread in the tubular loop er 5 Tie the specialty thread onto the regular thread with an over hand knot fig C Pull...

Page 48: ...etc Use in upper looper only When using decorative thread in the needle use a size 90 Top Stitch needle for best results Yes For exposed edges only Yes For exposed edges only Use in upper looper only...

Page 49: ...recommended Not recommended Not recommended Not recommended Not recommended Not recommended Not recommended Not recommended Not recommended for seaming Not recommended for seaming Lingerie thread for...

Page 50: ...nt of this blade The upper moving blade is made of a softer steel material and will require replacement A spare blade is provided with the machine for replacement if necessary The spare blade is locat...

Page 51: ...CEED AS FOLLOW 1 For safety reasons unplug main power cord 2 Raise and remove presser foot 3 Select stitch length dial to rolled hem setting 4 Remove needles from needle clamp 5 Turn your handwheel un...

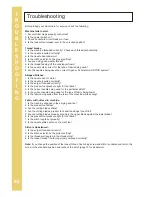
Page 52: ...foot pressure right for the fabric 5 Is the correct needle being used for the particular stitch 6 Is the correct needle being used for the type of fabric being sewn 7 Is the fabric being pulled from t...

Page 53: ...achine while sewing Wave Stitch is not forming correctly 1 Is the machine threaded correctly Check each thread path carefully 2 Is the machine set for 3 Thread Wave sewing 3 Is the Wave Selector set o...

Page 54: ...Edge 3 Thread Wave 3 Thread Rolled Wave 1 needle left or right 1 looper 2 Thread Flatlock wide and narrow 2 Thread Blanket Stitch 2 Thread Ladder Stitch Stitch Width Standard 2 3 4 thread with left ne...

Page 55: ...s according to fabric weight and thread type Stitch Length Stitch Width Needle Stitch Selector Differential Feed Page 3 Thread Rolled edge 2 Thread Flatlock Wide 4 Thread Overlock 4 Thread Gathering 3...

Page 56: ...EI 31 2 E BLE3ATW 2TA...

Reviews: