


Pg. 23
1-1 .
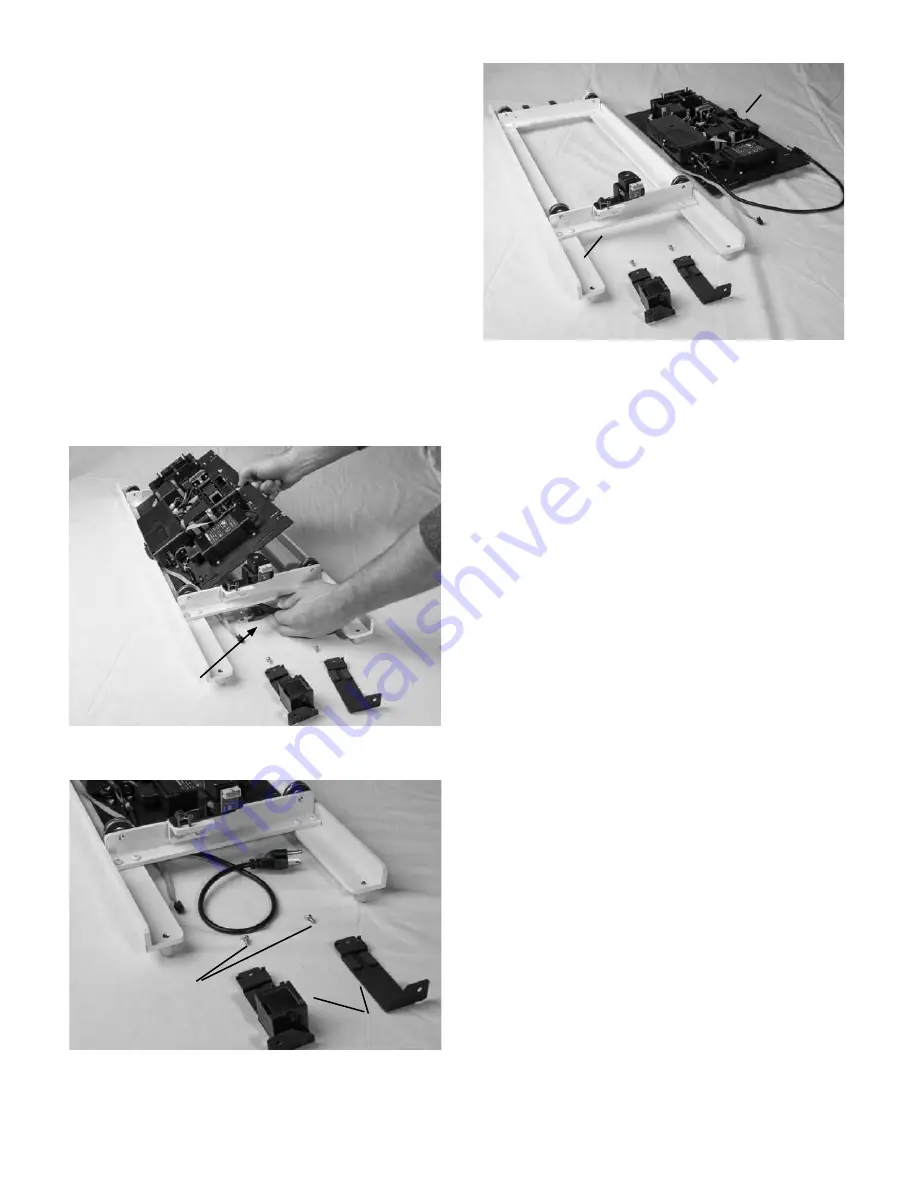
Turn your bottom carriage upside down and
make sure the back of the carriage (side with the
encoder) is facing towards you, as shown in
Fig. 1-A.
1-2 .
Place your QuiltMotion Plate inside your
bottom carriage, noting the direction shown in
Fig. 1-B. Make sure the power cord goes
underneath the upside down bottom carriage.
Note:
You will need to angle the QuiltMotion
Plate into the bottom carriage and make sure the
power cord and cables go underneath.
Step 1: QuiltMotion Plate Installation
Parts Needed:
1- QuiltMotion Plate
4- Motor Plate Brackets
2- Power Strip Brackets
2- Length Adaptors
1- Power Strip
7- M4 x 14mm Phillips Head Screw
2- M6 x 10mm Hex Bolt
1- Short Ribbon Cable
Fig. 1-B
Fig. 1-A
Fig. 1-C
1-3 .
Next, you will install your two (2) Power
Strip Brackets (left and right), using two (2) M4 x
14mm Phillips Head Screws (see Fig. 1-C).
QuiltMotion
Plate
Bottom
Carriage
Power Strip
Brackets
M4 x 14mm
Phillips Head Screw
Power Cord
Additional Tools Needed:
Phillips Screw Driver
Adjustable Wrench
Level (to ensure the frame is level)