IMPORTANT SAFETY INFORMATION LISTED ON REVERSE
READ, FOLLOW, AND SAVE ALL SAFETY AND INSTALLATION INSTRUCTIONS
RELEASE DATE
01/20/2022
REFERENCE NUMBER
INS-2506-00
40429 Brickyard Drive • Madera, CA 93636 • USA
559.438.5800 • FAX 559.438.5900
www.bklighting.com • [email protected]
B-K LIGHTING
THIS DOCUMENT CONTAINS PROPRIETARY INFORMATION OF B-K LIGHTING, INC. AND ITS RECEIPT OR POSSESSION DOES NOT CONVEY ANY RIGHTS TO REPRODUCE, DISCLOSE ITS CONTENTS, OR TO
MANUFACTURE, USE OR SELL ANYTHING IT MAY DESCRIBE. REPRODUCTION, DISCLOSURE OR USE WITHOUT SPECIFIC WRITTEN AUTHORIZATION OF B-K LIGHTING, INC. IS STRICTLY FORBIDDEN.
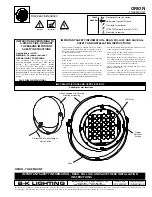
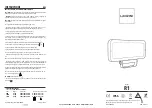
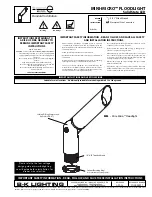
ORION
YOKE MOUNT
Standard Installation
WIRING DIAGRAM
3. Make watertight connections using waterproof
wire connectors to connect incoming primary
wiring to integral driver wiring as per NEC.
Secondary side is factory wired.
HOT
LED
NEUTRAL
GROUND
HOT
NEUTRAL
GROUND
Inte
gr
al
DRIVER
+
-
0-10V -
0-10V +
0-10V -
0-10V +
2. Line up fixture yoke to mounting location and
secure with 3/4”-10 bolt and locking washer
(mounting hardware not included).
1. Prepare for installation for yoke location.
Clearance hole is 7/16” diameter.
7/16” Dia.
4. To relamp: remove faceplate and louver by
loosening four (4) tamper resistant screws
using a TORX T27 socket (1/4” bit). Relamp as
needed, then reverse install.

