KARAT
®
180
US
OPERATING MANUAL KARAT® 180
9
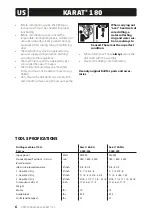
Drilling
•
For wet drilling open the water valve
6
and
switch on the machine
2
.
•
Hold the machine as rigidly as possible.
•
Always use the grip
10
at the front of the
machine.
•
Start drilling by keeping the machine at a
slight angle. You can use the soft starter
3
at
drilling start.
•
After the bit is guiding itself into the material,
swivel back the machine into the right angle
position.
•
Drill using an even forward feed. Do not over-
load the machine.
•
The leaking water should be milky and not
clear.
•
After drilling switch the machine off and shut
off the water tap.
Hand held dry drilling
Using the dry drilling kit
•
Install dry drilling kit
11
on drill shaft
5
.
•
Mount the hose of an industrial dust
exhauster.
•
Drilling is only possible if the masonry is
absolutley dry
.
•
Use a powerful industrial dust exhauster.
Change the filter regularly, there is risk of
obstruction.
•
•
Hold the machine as rigidly as possible.
•
Always use the grip
10
at the front of the
machine.
•
Start drilling by keeping the machine at a
slight angle. You can use the soft starter
3
at
drilling start
•
After the bit is guiding itself into the material,
swivel back the machine into the right angle
position.
WARNING: The machine has a very
high torque, especially in the first
gear. Therefor drill only extremely
concentrated, especially when
working in first gear and with
diameters of more than 3”. In case
of sudden blocking of the core bit
the machine, despite the safety
clutch, might get out of control and
hurt you considerably.
DRILLING WITH A DRILL
STAND
Guide block setting
A
B
When using a drill stand a right setting of the
guide block is required. Guide blocks for Karat
core drilling machines features slide strips for fine
tuning on the drill stand.
•
Loosen the safety nuts
A
using the supplied
wrench 13.
•
Adjust the bolts
B
for an flexible sliding of the
guide block on the drill stand.
•
Secure then the bolts with the safety nuts
A
.
Drill stand fixation
CAUTION: The drill stand must
always be mounted firmly and
must not be able to move during
drilling.
Aligning the drill stand
•
Set up the drill stand at the drilling location.
•
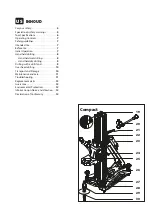
Rotate the centering plate
28
forwards, until
it snaps in.
•
Align the drill stand in such a manner that
for the used machine the tip of the centering
plate is located directly above the required
drilling location.
•
Fasten the drill stand.
Secure using assembly
•
Drill the rawlplug hole Ø3/8” (see instruction
rawlplug).
•
Insert rawlplug 1/2” (M12).
•
Screw in assembly
30
.
•
Align the drill stand.
•
Fasten the drill stand with the spindle nut
29
.


