

5
4.1.2
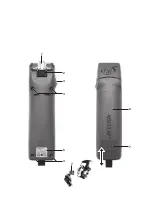
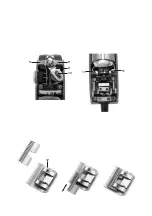
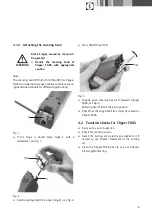
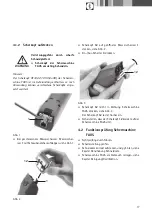
Attaching the shearing head
Note
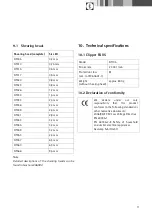
The shearing head GT330 #10 (USA+UK) for Clipper
FAV5 is included in the scope of delivery. Various shear-
ing heads are available for different applications!
Fig. 1
¾
If the hinge is closed: Open hinge
1
with a
screwdriver, see Fig. 1.
Fig. 2
¾
Install shearing head
12
on open hinge
1
, see Fig. 2.
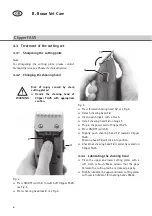
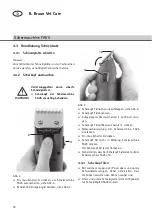
¾
Press ON/OFF switch
3
.
Fig. 3
¾
Slightly push shearing head
12
towards Clipper
FAV5, see Fig. 3.
Shearing head
12
will click into position.
¾
Check that shearing head
12
is correctly seated on
Clipper FAV5.
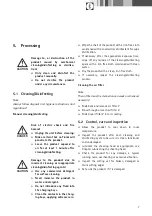
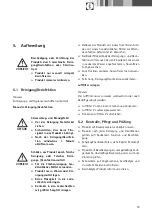
4.2
Function checks for Clipper FAV5
¾
Carry out a visual inspection.
¾
Check the switch position.
¾
Install the cutting set correctly and lubricate it if
necessary, see Chapter Treatment of the cutting
set.
¾
Clean the Clipper FAV5 prior to use, see Chapter
Cleaning/Disinfecting.
WARNING
Risk of injury caused by sharp cut-
ting plates!
¾
Handle the shearing head of
Clipper FAV5 with appropriate
caution.
1
12
1
12
Summary of Contents for FAV5
Page 2: ...7 6 7 1 3 5 4 4 2...
Page 3: ...10 12 9 8 9 11 11...
Page 77: ...75 1 IEC 2 2 1 GT330 10 USA GB FAV5 SNAP ON FAV5 GT105G GT105J GT105K GT330 10 USA GB TA012748...
Page 78: ...B Braun Vet Care FAV5 76 2 2 FAV5 2 3 FAV5 FAV5 FAV5 2 4 FAV5 FAV5 3 Aesculap IEC VDE 5...
Page 81: ...79 3 FAV5 4 2 4 5 12 5 12 1 12 1 FAV5 3 12 FAV5 12 12 FAV5 4 3 3 GT604 5 3 12...
Page 82: ...B Braun Vet Care FAV5 80 5 1 7 7 7 5 2 1...
Page 84: ...B Braun Vet Care FAV5 82 7 FAV5 FAV5 O O O...
Page 85: ...83 FAV5 FAV5 FAV5 O O FAV5...
Page 89: ......


