5
box.
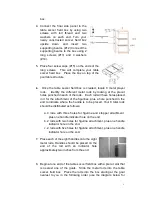
4. Connect the final side panel to the
table soccer field box by using two
screws with full thread and two
washers on each end.
Turn your
newly constructed soccer field box
upside
down
and
insert
two
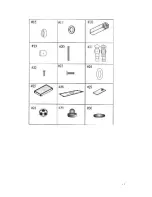
supporting beams. (#12) Connect the
supporting beams to the box using 2
long screws (#13) and 4 washers
(#14).
5. Place four screw caps (#15) on the ends of the
long screws. This will complete your table
soccer field box. Place the box on top of the
pool table structure.
6.
Once the table soccer field box is created, locate 8 metal player
rods. Identify the different metal rods by looking at the precut
holes punched in each of the rods. Each rod will have holes placed
in it for the attachment of the figurines, plus a hole punched in the
end to indicate where the handle is to be placed. Your 8 total rods
should be distributed as follows:
a. 4 rods with three holes for figurine and stopper attachment,
plus one handle indicator hole on the end.
b. 2 rods with two holes for figurine attachment, plus one handle
indicator hole on the end.
c. 2 rods with five holes for figurine attachment, plus one handle
indicator hole on the end.
7. Place each of the eight handles onto the eight
metal rods, Handles should be placed on the
end of the rod with an indicator hole
approximately two inches from the end.
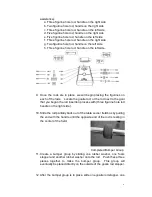
8. Begin at one end of the table soccer field box with a precut slot that
is nearest one of the goals. Slide the metal rods into the table
soccer field box. Place the rods into the box staring at the goal
nearest to you in the following order (use the diagram below for


