background image


GM533U

GETTING STARTED

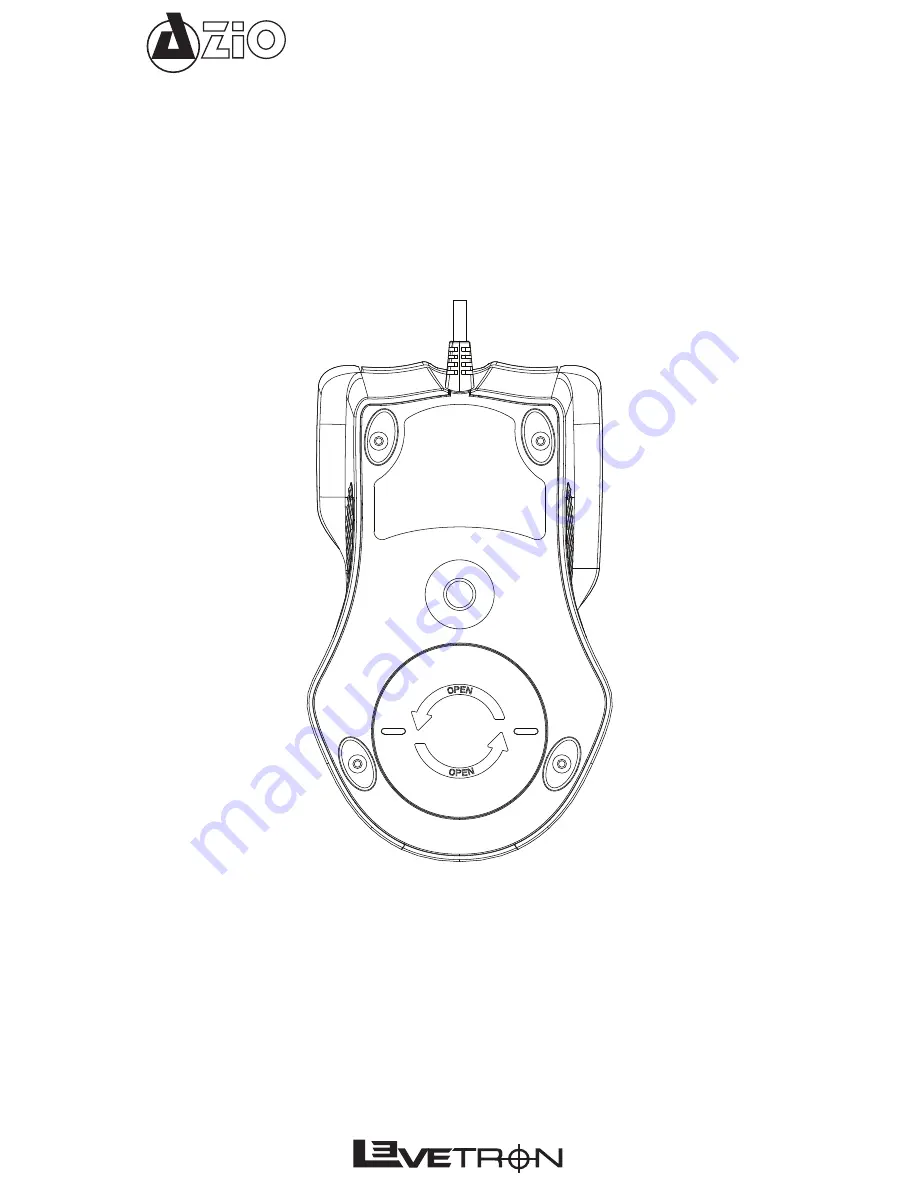
Adjusting the Mouse Weight:

1.  Open the weight cartridge compartment on the bottom side of the mouse by turning the 

cover 90 degrees counter-clockwise. 

2.  Remove the weight cartridge.

3.  Remove the desired amount of ballast weights from the cartridge to reduce the weight of the 

mouse.

4.  Replace the weight cartridge into the compartment and then replace the cover.

Connecting the Mouse:

Connect the USB plug of the gaming mouse into an available USB port on your computer. For 

maximum stability, we recommend connecting it directly to the computer. For maximum stability, 

we recommend connecting it directly to the computer (as opposed to through a USB hub). The 

operating system will automatically recognize the new hardware and install the required drivers. 

This gaming mouse is fully plug & Play and software is not required for basic operation. 

However, to access all functions of the mouse including macro button programming, please install 

the included software. 

Summary of Contents for LEVETRON GM533U

Page 1: ...GM533U...

Page 2: ...eight Cartridge x6 Ballast Weights Software CD User Guide FEATURES 800 1600 5000dpi Adjustment Laser tracking for optimal accuracy Weight adjustable between 134g to 164g in 5g increments 3 Dedicated p...

Page 3: ...ecting the Mouse Connect the USB plug of the gaming mouse into an available USB port on your computer For maximum stability we recommend connecting it directly to the computer For maximum stability we...

Page 4: ...Slow Blinks 2000 Medium Blinks 5000 Fast Blink SOFTWARE INSTALLATION To install the software please insert the software CD or visit our website to obtain the latest ver sion of the mouse software Soft...

Page 5: ...three columns Active Name and Path Each row represents one Profile Active Put a checkmark next to the Profile that you want to make active Name This column displays the name of the Profile Path This...

Page 6: ...ations and games This section will illustrate how to create or edit a Macro function After which please see the next section for assigning keys to the Macros created here For now click on Macro Settin...

Page 7: ...the DPI setting can be programmed to have a different button assignment to perform special functions such as launching an application or multimedia web navigating or to execute Macro functions To Pro...

Page 8: ...ted in the Macro Settings section Stop Playing Macro Click here to stop the Macro function once it has been activated but not yet completed For example if a very long Macro was executed use this funct...

Page 9: ...acceptable proof of original ownership such as original receipt for the product AZiO at its option shall repair or replace the defective unit covered by this warranty This warranty is non transferable...

Page 10: ...GM533U...

Reviews: