


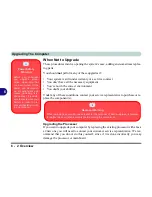


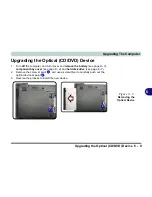


Upgrading The Computer
6 - 8 Upgrading the Hard Disk Drive
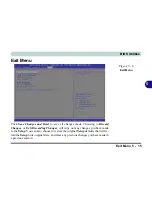
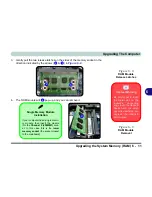
6
4.
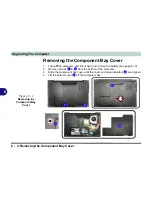
Remove screws
&
and the cover
.
5.
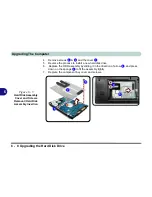
Reverse the process to install a new hard disk drive
.
6.
Replace the HDD assembly by sliding it in the direction of arrow
, and press
down on the sponge
to fit the assembly tightly.
7.
Replace the component bay cover and screws.
Figure 6 - 5
Hard Disk Assembly
Cover and Screws
Removal / Hard Disk
Assembly Insertion
5
6
7
8
9
9
8
6
7
5
Summary of Contents for 15L14
Page 1: ...V13 2 00...
Page 2: ......
Page 30: ...XXVIII Preface...
Page 66: ...Quick Start Guide 1 36 1...
Page 130: ...BIOS Utilities 5 16 5...
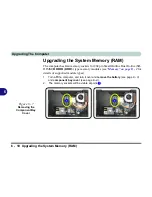
Page 143: ...Upgrading The Computer Upgrading the System Memory RAM 6 13 6...
Page 144: ...Upgrading The Computer 6 14 Upgrading the System Memory RAM 6...
Page 194: ...Modules Options 7 50 7...
Page 208: ...Troubleshooting 8 14 8...
Page 212: ...Interface Ports Jacks A 4 A...
Page 256: ...Specifications D 6 D...