background image


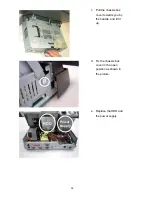
m. Follow the instructions on the screen to 

do a three point calibration of the touch 
panel. 

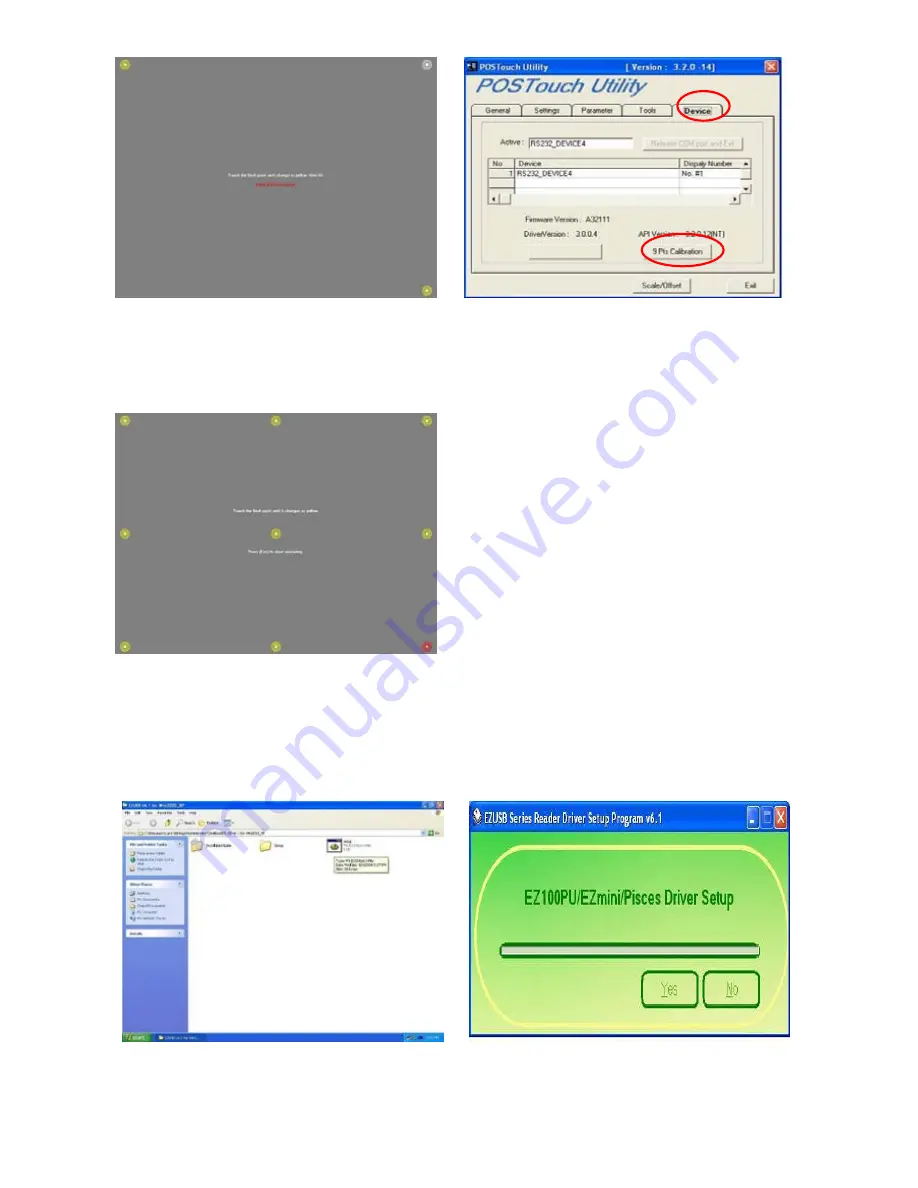
 n. Select 

“Device 

Æ

9Pts Calibration” on the 

POSTouch Utility window. 


o. Follow the instructions on the screen to 

do a three point calibration of the touch 
panel. 


3.8 USB Smart Card Reader Driver Installation 


a. Double click “setup” on the “My 

Computer” window. 

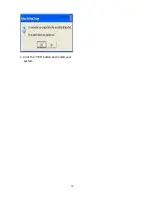
b. Click the “yes” button on the window. 


18

Summary of Contents for POS 460 Series

Page 1: ...POS 460 Series Manual Point of Sale Hardware System PIN 48201123 2007 July V2 2 ...

Page 2: ...for incidental or consequential damages in connection with the furnishing performance or use of this material This document contains proprietary information that is protected by copyright All rights are reserved No part of this document may be photocopied reproduced or translated to another language without the prior written consent of the manufacturer TRADEMARK Intel Pentium and MMX are registere...

Page 3: ...should never be placed near or over a radiator or heat register or in a built in installation unless proper ventilation is provided 7 This product should be operated from the type of power indicated on the marking label If you are not sure of the type of power available consult your dealer or local power company 8 Do not allow anything to rest on the power cord Do not locate this product where per...

Page 4: ...ts working life Instead the device should be taken to the waste collection centers for activation of the treatment collection recycling and disposal procedure To prevent possible harm to the environment or human health from uncontrolled waste disposal please separate this from other types of wastes and recycle it responsibly to promote the sustainable reuse of material resources Household users sh...

Page 5: ... 3 7 POSTouch Touch Screen Driver Installation 16 3 8 USB Smart Card Reader Driver Installation 18 4 Peripherals Installation 20 4 1 Magnetic Smart Card Reader I Button Installation 20 4 2 Cash Drawer Installation 21 4 3 Customer Display Installation 24 4 4 Second Display Installation 27 5 System Disassembly 31 5 1 Open the Chassis Box 31 5 2 Replace the HDD 33 5 3 Replace the Power Supply 34 5 4 ...

Page 6: ...st Take the system unit out of the carton Remove the unit from the carton by holding it by the foam inserts The following contents should be found in the carton 1 1 Standard Items a Driver CD b Manual c Power Cable 6 ...

Page 7: ...2 1 Front View USB 1 2 Power Switch LED 2 2 Rear View LPT COM4 Cash Drawer 2 COM1 Keyboard Mouse LAN 2nd VGA Cash Drawer 1 USB3 USB4 COM3 COM2 Note The maximum current that can be drawn from each COM port is 500 mA 7 ...

Page 8: ...mmon SmartCard USB USB Smart Card Reader Driver CD Common Elo_Touch ELO Touch Screen Driver CD Common POS_Touch POSTouch Touch Screen Driver The following procedures are for Windows 2000 XP other platforms are similar 3 2 Chipset Driver Installation a Double click infinst_enu_6 0 1002 on the My Computer window b Click the Next button on the Welcome window c Click the Yes button on the License Agre...

Page 9: ...our system 3 3 VGA Driver Installation a Double click win2k_xp147 on the My Computer window b Click the Next button on the Welcome window c Click the Next button on the Welcome window d Click the Yes button on the License Agreement window 9 ...

Page 10: ...sh button and restart your system 3 4 LAN Driver Installation a Double click Setup on the My Computer window b Click the Finish button on the Maintenance complete window c Click the OK button and restart your system 10 ...

Page 11: ... developer site Windows 98 Retail Developers and OEMs should contact Orange Ware For end users if your device does not ship with Windows 98 drivers contact your device or system manufacturer If USB 2 0 drivers are not available your device will operate at USB 1 1 speeds Linux USB 2 0 support is available in kernel 2 4 19 or later development kernels or in the 2 4 19 or later production kernel More...

Page 12: ...ce Manager d Select Device Æ Update Driver e Click the Next button on the welcome window f Select Search for a suitable and click the Next button on the Install Hardware Device Drivers window g Select Specify a location and click the Next button on the Locate Driver Files window 12 ...

Page 13: ...ress Browse to select the driver and then click the OK button to next page i Click the Next button on the Driver Files Search Results window j Click the Finish button to complete this process k Finished 13 ...

Page 14: ...n on the Welcome window c Click the Unzip button on the WinZip Self Extractor window d Select Install Serial Touchscreen Drivers and then click the Next button on the Welcome window e Click the Yes button on the License Agreement window f Click the Next button on the on the Select the COM ports window 14 ...

Page 15: ...the You have selected the COM ports window i Click the Finish button on the Setup Complete window j Click the Yes button and restart your system k After the computer has restarted click Align on the Elo Touchscreen Properties window l Follow the instructions on the screen to calibrate the touch panel 15 ...

Page 16: ...w b Click the Next button on the Welcome window c Click Yes button on the License Agreement window d Click Next button on the Choose Destination Location window e Click the Next button on the Select Program Folder window f Click the Finish button on the InstallShield Wizard Complete window 16 ...

Page 17: ... the OK button and restart your system i After the computer has restarted select Programs ÆTouchUtility ÆScan RS232 Touch Device j The serial ports are scanned for a touch device k Select Programs ÆTouchUtility ÆTouch Utility l Click Scale Offset on the POSTouch Utility window 17 ...

Page 18: ...l n Select Device Æ9Pts Calibration on the POSTouch Utility window o Follow the instructions on the screen to do a three point calibration of the touch panel 3 8 USB Smart Card Reader Driver Installation a Double click setup on the My Computer window b Click the yes button on the window 18 ...

Page 19: ...c Click the YES button and restart your system 19 ...

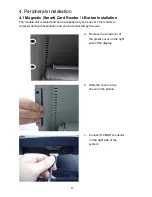
Page 20: ...sted and can be supplied at your request This module is removed during transportation and can be connected by the user a Remove the screws 2 of the plastic cover on the right side of the display b Slide the cover out as shown in the picture c Connect the MSR connector on the right side of the system 20 ...

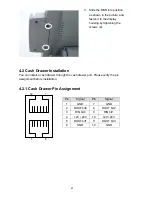
Page 21: ...2 Cash Drawer Installation You can install a cash drawer through the cash drawer port Please verify the pin assignment before installation 4 2 1 Cash Drawer Pin Assignment 21 1 12 6 7 Pin Signal Pin Signal 1 GND 7 GND 2 DOUT bit0 8 DOUT bit2 3 DIN bit0 9 DIN bit1 4 12V 24V 10 12V 24V 5 DOUT bit1 11 DOUT bit3 6 GND 12 GND ...

Page 22: ...OUT bit3 pin output control 1 Opening the Cash Drawer2 0 Allow closing the Cash Drawer2 Bit 2 Cash Drawer2 DOUT bit2 pin output control 1 Opening the Cash Drawer2 0 Allow closing the Cash Drawer2 Bit 1 Cash Drawer1 DOUT bit1 pin output control 1 Opening the Cash Drawer1 0 Allow closing the Cash Drawer1 Bit 0 Cash Drawer1 DOUT bit0 pin output control 1 Opening the Cash Drawer1 0 Allow closing the C...

Page 23: ...23 The I O address 4B8h bit4 1 means the Cash Drawer1 is closed or no Cash Drawer The I O address 4B8h bit4 0 means the Cash Drawer1 is open ...

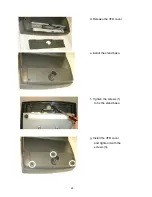
Page 24: ...4 3 Customer Display Installation a Take out the rubber cover b Take out the round plastic cover c Remove the screws 4 24 ...

Page 25: ...d Release the VFD cover e install the stand base f Tighten the screws 1 to fix the stand base g Install the VFD cover and tighten it with the screws 3 25 ...

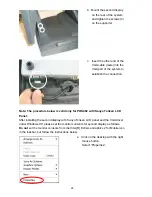
Page 26: ...h Install the VFD cable short long pole i Assemble the VFD j Connect VFD cable to the COM port Don t forget to setup the COM port power 26 ...

Page 27: ...before connecting the second display Failure to do so may damage the electronics of the system and is not covered by the product warranty Note Please set motherboard Jumper 15 to 1 2 Refer to P 38 Item 12 Second Display Power Setting a Insert the male head of the VGA cable into the VGA port 27 ...

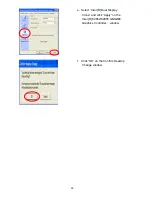
Page 28: ...ow is valid only for POS462 with Sanyo Torisan LCD Panel After installing the second display with Sanyo Torisan LCD panel and the VGA driver under Windows XP please set the monitor contents for second display as follows Do not set the monitor contents from the Intel R Extreme Graphics 2 for Mobile icon in the taskbar but follow the instructions below a Click on the desktop with the right mouse but...

Page 29: ...then click on the Advanced button on the Display Properties window c Select Intel R Extreme Graphics 2 for Mobile on the Default Monitor and Intel R window d Select Graphic Properties on the Default Monitor and Intel R window 29 ...

Page 30: ...e Select Intel R Dual Display Clone and click Apply on the Intel R 82852 82855 GM GME Graphics Controller window f Click OK on the Confirm Desktop Change window 30 ...

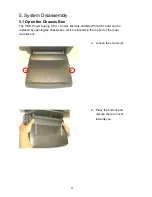
Page 31: ...x The HDD Power Supply CPU Cooler Memory and Mini PCI SCSI Card can be replaced by opening the chassis box which is located in the top part of the main modular box a Loosen the screws 2 b Press the buttons and remove the rear cover towards you 31 ...

Page 32: ...c Pull the chassis box cover towards you by the handle and lift it up d Fix the chassis box cover in the open position as shown in the picture e Replace the HDD and the power supply HDD Power Supply 32 ...

Page 33: ...5 2 Replace the HDD Open the chassis box as described in chapter 5 1 a Disconnect the cables 2 as shown in the picture b Remove the screws 4 to remove the HDD 33 ...

Page 34: ...5 3 Replace the Power Supply Open the chassis box as described in chapter 5 1 a Disconnect the cables 2 as shown in the picture b Remove the screws 3 c Remove the screws 2 to remove the power supply 34 ...

Page 35: ...ard Tray Open the chassis box as described in chapter 5 1 a Lift the chassis box cover to disengage it from the chassis box b Disconnect the cables 3 as shown in the picture c Disconnect the cables 4 as shown in the picture 35 ...

Page 36: ...d Remove the screw 1 on the right side e Remove the screw 1 on the left side f Remove the screw 1 on the motherboard 36 ...

Page 37: ...g Pull the motherboard tray towards you to remove the motherboard 37 ...

Page 38: ... cd 300 cd Maximal Resolution 800 x 600 1024 x 768 1024 x 768 1280 x 1024 Touch Screen Type Resistive Tilt Angle 0 60 Storage HDD 1 x 3 5 Drive bay Flash Memory Compact Flash Type I II Expansion Mini PCI Socket 1 External I O Ports Front I O USB 2 V2 0 Rear I O PS 2 Keyboard 1 PS 2 Mouse 1 USB 2 V2 0 2 V1 1 2 0 Serial COM 4 x powered COM ports pin 1 pin9 support 5Vv 12V by Jumper Parallel 1 LAN 10...

Page 39: ...t IC Card USB I Button PS2 RS232 Finger Print Card Reader MSR PS2 RS 232 Finger Print USB Output Device Customer Display VFD LCD type Second Display 8 4 10 4 12 1 TFT LCD Communication Wireless LAN Optional Mini PCI 802 11a b g WI FI card and antenna POS462 323 x 335 353 x 180 287mm POS465 378 x 358 5 367 5 x 179 305mm Dimension W x D x Hmm POS467 410 x 373 7 382 2 x 192 8 335 9mm POS462 N W 8kgs ...

Page 40: ...Appendix B Jumper Settings B81 Motherboard JP6 JP3 JP15 JP14 JP13 JP12 JP10 JP11 JP9 JP5 JP4 JP2 JP1 40 ...

Page 41: ...ormal N C CMOS Reset 1 2 To clear the CMOS 1 Remove AC power from the unit 2 Open the cabinet 3 Change the JP6 jumper setting from N C to 1 2 4 Wait 1 minute 5 Change the JP6 jumper setting back to N C 6 Close the cabinet 7 Apply AC power and continue 4 POWER USB Power Setting Reserved Function JP14 SHORT 24V 1 2 12V 3 4 5 Cash Drawer Power Setting Function JP8 SHORT 12 V 1 2 Cash Drawer 1 24V 3 4...

Page 42: ...1 12V 5 6 RI 7 8 5V 9 10 9 12V 11 12 8 COM3 Power Setting Pin Function JP10 SHORT DCD 1 2 5V 3 4 1 12V 5 6 RI 7 8 5V 9 10 9 12V 11 12 9 COM4 Power Setting Pin Function JP12 SHORT DCD 1 2 5V 3 4 1 12V 5 6 RI 7 8 5V 9 10 9 12V 11 12 10 CPU Voltage Setting CPU Type JP1 SHORT JP2 SHORT P4 1 2 3 4 5 6 7 8 9 10 11 12 N C Mobile Celeron 1 2G 1 3V N C 3 4 9 10 42 ...

Page 43: ...8 18 Single SHORT SHORT OPEN SHORT 3 1280 x 1024 24 Dual SHORT SHORT OPEN OPEN 4 1024 x 768 24 Single SHORT OPEN SHORT SHORT 5 800 x 600 24 Single SHORT OPEN SHORT OPEN 12 Second Display Power Setting Function JP15 SHORT 12V 1 2 NC 1 13 ACPI Mode Setting Function JP7 SHORT Disable 1 2 Enable N C 14 Power Mode Setting Function JP13 SHORT ATX Power N C AT Power 1 2 Note OPEN SHORT 43 ...

Page 44: ...IOS Setup 1 Turn on or reboot this product 2 Press the DEL key immediately after the product is turned on or press the DEL key when the following message is displayed during POST the Power on Self Test Press DEL to enter SETUP 3 The main menu of the BIOS setup is displayed 4 If the supervisor password is set you must enter it here 3 When a Problem Occurs If after making and saving system changes w...

Page 45: ... Use this menu for basic system configuration Advanced BIOS Features Use this menu to set the Advanced Features available on the system Advanced Chipset Features Use this menu to change the values in the chipset registers and optimize the system s performance Integrated Peripherals Use this menu to specify your settings for integrated peripherals Power Management setup Use this menu to specify you...

Page 46: ...IOS to maximize performance the factory has the option to change these defaults to meet their needs Set Supervisor Password Enables you to change set or disable the supervisor or user password Set Password Change set or disable the password It allows you to limit access to the system and to the setup or just to the setup Save exit setup Save CMOS value changes to CMOS and exits setup Exit without ...

Reviews: