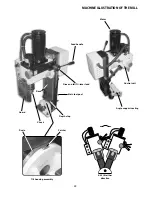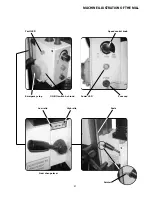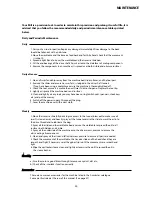
Tri-Lever feed
Three levered handle that is used to drive the quill (and hence the
chuck or the tool) up and down. The boss of the handle is fitted to the
end of a ‘splined’ gear shaft. This ‘splined’ gear is, in turn, engaged in
the rack cut into the quill body. The other end of the ‘splined’ shaft is
engaged in a contra-wound spring, this provides counter balance to the
weight of the quill, arbor, chuck and drill, giving a more controlled ‘feel’
during drilling operations. It also retracts the quill when drilling is
completed.
Fine feed
The fine feed assembly floats around the splined gear shaft that
assembly
drives the quill up and down. When the action of the fine feed
mechanism is required; pushing the tri-lever feed handle in ‘engages’
the knob of the fine feed control meshes the gearing (you may have to
‘joggle’ the feed handle to aid the meshing action) between the splined
shaft and the fine feed control shaft; this enables the spindle to be
driven by the fine feed control wheel with greater precision. Behind the
boss of the fine feed control wheel handle is a graduated ring (thimble)
so that the movement of the quill can be measured. The thimble is
held to the drive shaft by friction, and can be pre-positioned to
establish a predetermined start or stop dimension.
Quill hold pocket
The size of the machine precludes any ‘fancy’ locking mechanism for
the quill. There is a blind pocket on the spindle that accepts the tommy
bar supplied in the tool kit, to enable the spindle to be held in position
whilst the draw bar is loosened.
Draw bar cover
A moulded plastic cover that clips into the top of the Motor Gearbox
assembly, to afford protection from the rotating top of the draw bar,
when the quill is at the top of its travel.
Draw bar
This is a metal rod, threaded at one end and with an 19mm
(unseen)
squared shank and flange machined on the other. It is fitted through
the spindle mandrel to hold the fitted tool/tooling hard into the No. 3 MT
taper of the spindle shaft.
Motor control
Power On LED
panel
Green LED that indicates that power is available to the motor. i.e.
mains is applied, fuse is intact and the Emergency stop switch is
not activated.
Fault LED (marked UN-NORMAL)
Amber LED that indicates that there is a fault or an incorrect
control sequence. i.e. the chuck guard interlock has been activated
or the speed control is activated. The Motor will not run if the fault LED
is illuminated. If the safety interlock is activated, the safety interlock will
remain in force until the interlock is reset and the start sequence
re-initiated.
Fuse Cap
Access cap for the 20mm fuse cartridge (1 Amp 250V) Speed Control
Knob Round raised ridge knob connected to the circuit that controls the
spindle speed (0-1100 rpm or 0-2500 depending upon the gearbox
selection).
40
PARTS IDENTIFICATION AND DESCRIPTION
Summary of Contents for SIEG SC6
Page 2: ...2 ...
Page 7: ...7 ...
Page 8: ...8 ...
Page 9: ...9 ...
Page 10: ...10 ...
Page 11: ...11 ...
Page 12: ...12 ...
Page 13: ...13 ...
Page 14: ...14 ...
Page 17: ...LATHE MAINTENANCE 17 ...
Page 18: ...18 ...
Page 19: ...19 ...
Page 20: ...20 ...
Page 21: ...21 ...
Page 22: ...22 SC6 WIRE DIAGRAM ...
Page 23: ...23 ...
Page 24: ...24 ...
Page 25: ...25 ...
Page 26: ...26 ...
Page 27: ...27 ...
Page 28: ...28 ...
Page 29: ...29 ...
Page 30: ...30 ...
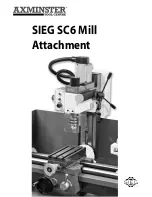
Page 31: ...SIEG SC6 Mill Attachment ...
Page 46: ...MAINTENANCE OILING POINTS 46 Oil OIL ...
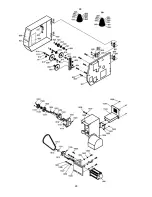
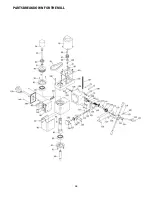
Page 48: ...PARTS BREAKDOWN FOR THE MILL 48 ...
Page 49: ...PARTS BREAKDOWN FOR THE MILL 49 ...
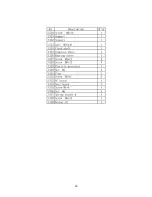
Page 50: ...50 PARTS LIST FOR THE MILL ...


