


AXIS Panorama PTZ
Network Installation
5
Network Installation
To install the AXIS Panorama PTZ on an Ethernet network, please follow these instructions for both
cameras, providing a separate IP address for each camera.
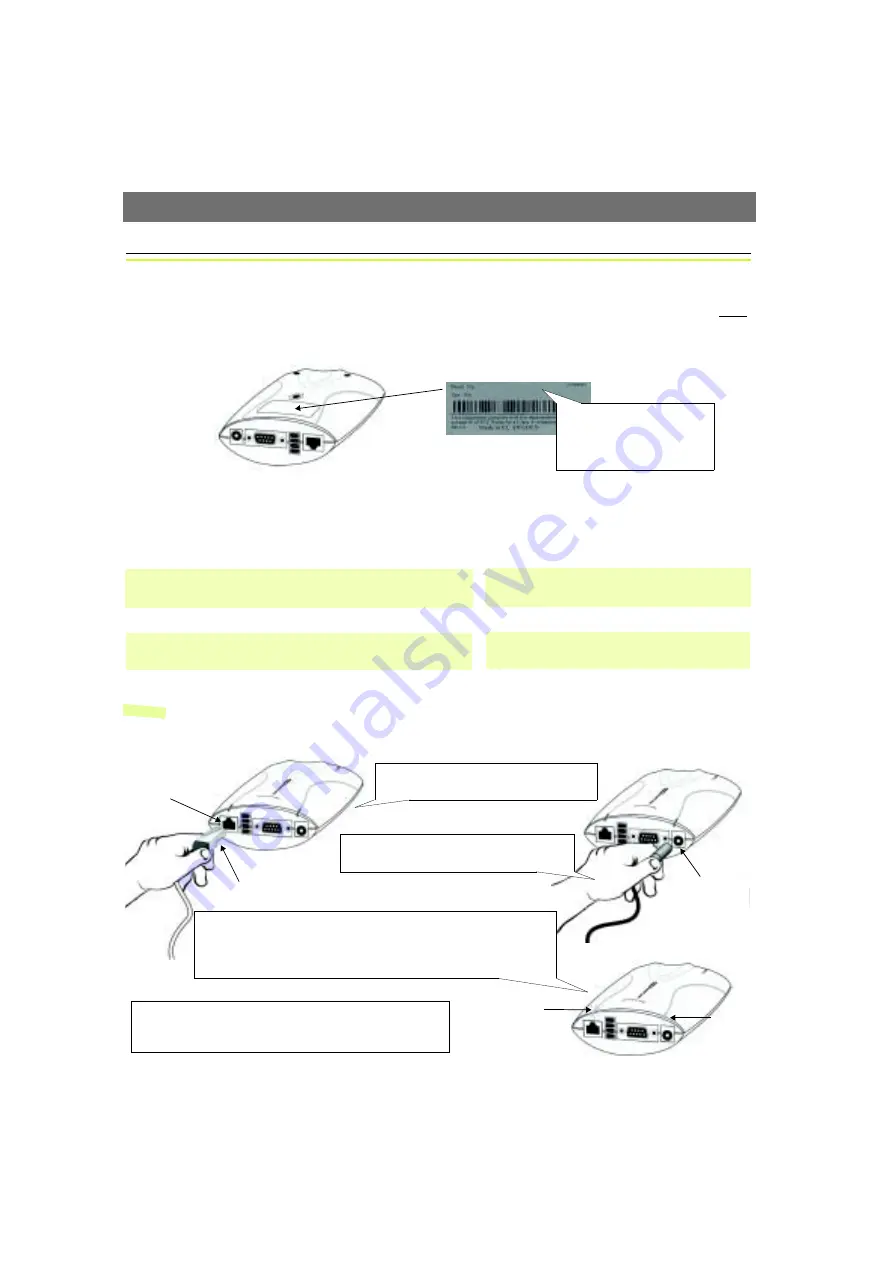
❶
Note the Serial number on the underside of the unit. You need to know this to set the IP address.
❷
Using an appropriate method for your operating system, assign your product with a unique IP
address from a computer on your network, as follows:
Note:
In some Unix systems, the arp command can be located in a directory that is not on the
command path; e.g: /usr/sbin/arp
You will now see
‘
Request timed out ...
’
messages repeatedly returned in the window.
Serial number same as
00408c100086 =
MAC/Ethernet number; e.g.
00-40-8c-10-00-86
Windows only
-
Start a Command Prompt and type these commands:
Syntax:
arp -s <Camera IP address> <MAC address> <my PC IP address>
ping -t <Camera IP address>
Example:
arp -s 172.21.1.200 00-40-8c-10-00-86 172.21.1.193
ping -t 172.21.1.200
UNIX only
- Type this in your command line:
Syntax:
arp -s <IP address> <MAC address> temp
ping <IP address>
Example:
arp -s 172.21.1.200 00:40:8c:10:00:86 temp
ping 172.21.1.200
❸
Connect an Ethernet cable to your AXIS
Panorama PTZ and attach it to the network.
❹
Connect the power adapter to the unit and
connect it to your main power supply.
RJ-45 connector
Network socket
Network
Power Supply
socket
❻
Exit Ping. The installation is now complete, and you are ready
to access the AXIS Panorama PTZ from your browser, as
described in the next section.
❺
Approximately 10-15 seconds after connecting power, the message
‘Reply from 172.21.1.200...
’
- or similar, is returned in the Command
Prompt window. Ensure that the Power Indicator is permanently lit and
that the Network Indicator flashes intermittently.
Indicator
Power
Indicator


