AXIS M3007-P Network Camera
Video
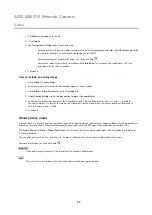
2. Click
Browse
and browse to the file.
3. Click
Upload
.
4. The
Transparency Settings
page is now displayed:
-
To make a color in the overlay image transparent, select
Use transparency
and enter the RGB hexadecimal value
for the color. Example: To make white transparent, enter FFFFFF.
For more examples of hexadecimal values, see the online help
.
-
To scale the image automatically, select
Scale with resolution
. The image will be scaled down to fit the
resolution used by the Axis product.
5. Click
Save
.
How to include an overlay image
1. Go to
Video > Overlay Image
.
2. Select the image to use from the
Use overlay image
list and click
Save
.
3. Go to
Video > Video Stream
and select the
Image
tab.
4. Under
Overlay Settings
, select
Include overlay image at the coordinates
.
5. To control the image’s position, enter the X (horizontal) and Y (vertical) coordinates. The
X=0
and
Y=0
position is
the top left corner. If a part of the image is positioned outside the video image, the overlay image will be moved so
that the whole image is visible.
6. Click
Save
.
About privacy masks
A privacy mask is a user-defined area that covers parts of the monitored area. Privacy masks appear as blocks of solid color and are
applied on the video stream. Privacy masks cannot be bypassed using the VAPIX® application programming interface (API).
The
Privacy Mask List
(
Video
>
Privacy Mask
) shows all the masks that are currently configured in the Axis product and indicates
if they are enabled.
You can add a new mask, re-size the mask with the mouse, choose a color for the mask, and give the mask a name.
For more information, see the online help
Important
If you add many privacy masks, this may affect the product’s performance.
Note
Privacy masks in view modes other than the Overview mode may appear warped.
23


