AXIS 200+
Users Manual
Section 2: Installing the AXIS 200+
19
Test the results of the adjustments by taking some new pictures. To do
this, simply reload the URL in your Web browser. Use one of the
automatic updating functions to monitor the changes to focus.
The installation is complete and you can now include pictures into
your own applications.
Optionally, you can replace the basic lens delivered with the AXIS
200+ with another lens. See
Stage 8. Replacing the Lens,
on page 19.
Stage 7. Adjusting the Image Parameters
To automatically adjust the image parameters, click the
Image Wizard
link. Screen by screen, the wizard will display a number of samples and
ask you to choose the best picture with respect to brightness, white
balance, color etc. You can also set a time period for automatically
adjusting the color in the image to the environment.
Stage 8. Replacing the Lens
You can replace the basic lens with any industry standard C or CS
lens.
Note:
❏
To mount a C lens, you will need a C/CS ring adapter.
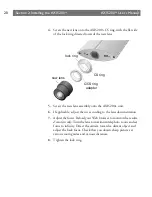
Follow these steps to replace the lens:
1.
Unscrew the AXIS 200+ lens assembly.
2.
Detach the plastic lens fitting from the CS ring.
3.
C lens only:
Attach the new lens to a C/CS ring adapter.
Summary of Contents for 200+
Page 1: ......
Page 2: ...AXIS 200 User s Manual AXIS 200 Network Camera Server User s Manual ...
Page 31: ...Section 3 Assigning an IP Address AXIS 200 User s Manual 30 ...
Page 43: ...Section 4 Configuring the AXIS 200 AXIS 200 User s Manual 42 ...
Page 75: ...Appendix B The Parameter List AXIS 200 User s Manual 74 ...
Page 79: ...Section 6 Updating the Software AXIS 200 User s Manual 78 ...
Page 83: ...Appendix C Technical Specifications AXIS 200 User s Manual 82 Dimensions ...
Page 89: ...Appendix D The Auxiliary IO Port AXIS 200 User s Manual 88 ...
Page 99: ...Appendix E The RS232 Serial Port AXIS 200 User s Manual 98 ...


