Section 2: Installing the AXIS 200+
AXIS 200+ Users Manual
16
3.
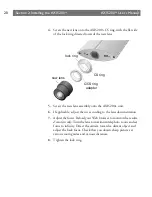
Connect your AXIS 200+ to the network using an Ethernet 10baseT
connector.
4.
Connect the power supply to the AXIS 200+.
5.
Check that the Power indicator is constantly lit.
Stage 4. Assigning an Internet Address
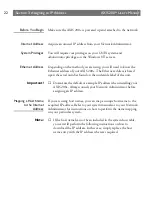
To access the AXIS 200+ from a Web browser, you must first assign a
valid Internet address.
Refer to
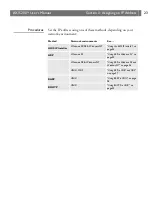
Section 3 - Assigning an IP Address
on how to do this.
Stage 5. Verifying the Installation
After assigning an Internet address, verify the connection between
your AXIS 200+ and the network. Follow these steps:
Summary of Contents for 200+
Page 1: ......
Page 2: ...AXIS 200 User s Manual AXIS 200 Network Camera Server User s Manual ...
Page 31: ...Section 3 Assigning an IP Address AXIS 200 User s Manual 30 ...
Page 43: ...Section 4 Configuring the AXIS 200 AXIS 200 User s Manual 42 ...
Page 75: ...Appendix B The Parameter List AXIS 200 User s Manual 74 ...
Page 79: ...Section 6 Updating the Software AXIS 200 User s Manual 78 ...
Page 83: ...Appendix C Technical Specifications AXIS 200 User s Manual 82 Dimensions ...
Page 89: ...Appendix D The Auxiliary IO Port AXIS 200 User s Manual 88 ...
Page 99: ...Appendix E The RS232 Serial Port AXIS 200 User s Manual 98 ...


