background image


X-Series aXess 700-560-01E 

Door Selection 

Table 2: Door Selection 

Door 

Default 

o


To select a door number press the number on the keypad followed by [*] 

o


Once all selections are made press [*] to exit door/arm selection 

o


Enter [user code] then [*]. (If no user code press [*] 

Option 33: Adding Access Tag by swiping the tag 

Menu option 33 allows the adding of access tags to the system or the editing of existing tags by swiping the tag. The 
procedure to add a tag is to swipe the tag on a reader, allocate it to a user code and any of the eight doors the system is 
monitoring. 


Enter [3] [3] [*] 

o


Enter the [Door No] [*] that will be used to swipe the tag   

o


Swipe card, if card number is correct, [*] 

o


Select the doors by entering the [door number] [*] to enable ‘Y’ and by entering the [door number] [*] to disable ‘-
’. See Table 2 Door selection 

o


Once all selections are made press [*] to exit door/arm selection 

o


Enter [User Code] then [*]. (If no user code press [*]) 

Option 34: Deleting Access Tags 

This menu option allows the user to remove a card from the reader 


Enter [3][4][*] 

o


Enter the [card number][*] to delete the tag 

Option 35: Delete Access Tags via Swipe 

This menu option allows the user to remove a card from the reader if the card is available 


Enter [3][5][*] 

o


Enter the door number that the action will be carried out 

o


Swipe the card to be deleted  

Option 36: View Transactions 

This menu option allows the master user to view the log of transactions for a specific door. The most recent transaction 
logged will be the first event displayed. To view older transactions the back scroll button can be used and once you 
have scrolled back the forward scroll button can be used to go forward to the most recent entry. The keypad will give 
an error beep if there are no transactions or the last recorded one has been reached. 


Enter [3][6][*] 

o


Enter the door [number] of the transactions you want to view followed by [*]  
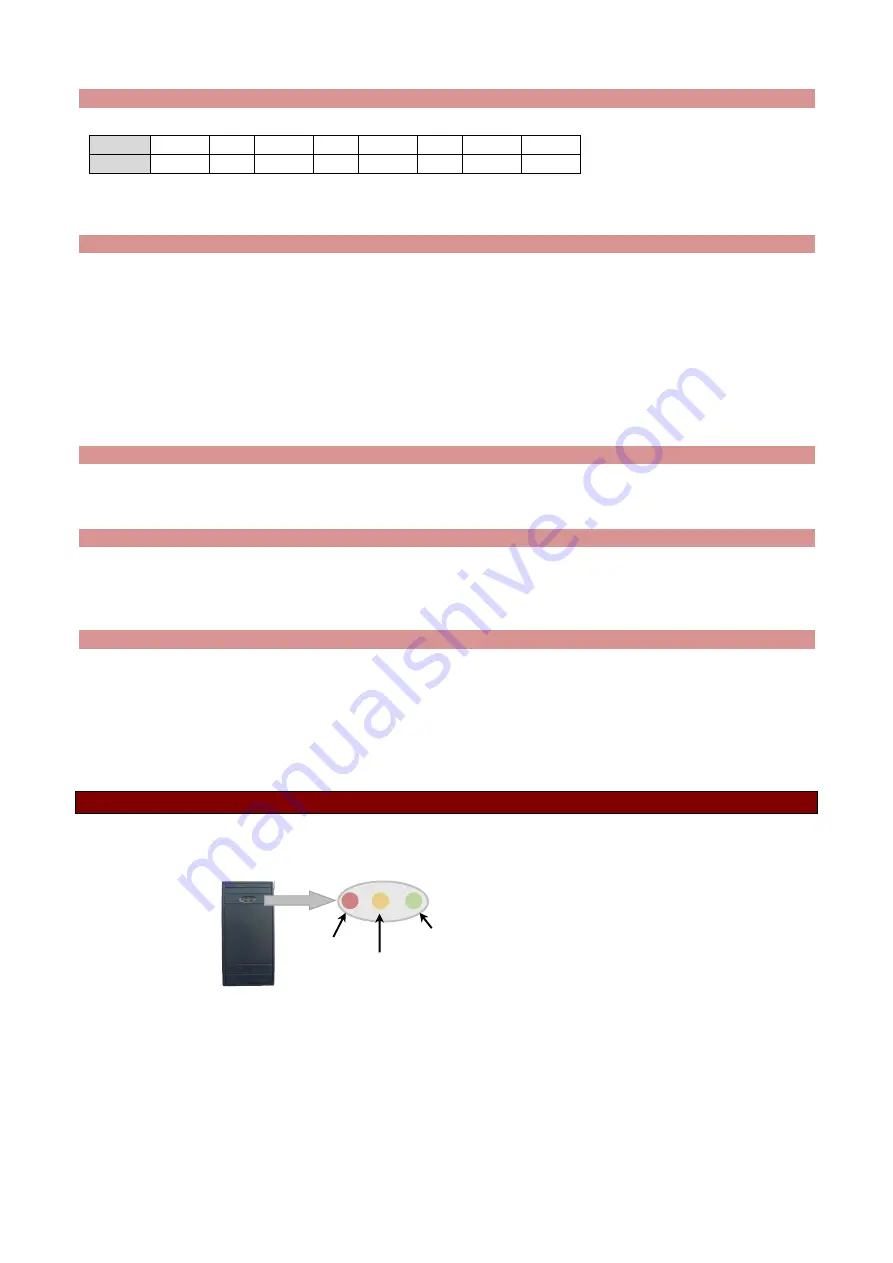
 

Reader Feedback 

Each access reader has three different colour LEDs, Red, Yellow, Green and a buzzer to communicate feedback to users 
of the system depending on the type of reader 

Figure 1: aXess Reader LEDS  


Red 

Yellow 

Green 

Summary of Contents for X Wireless Series

Page 1: ...Installation Manual ...

Page 2: ...trol for up to eight doors Each door has an interface that can be installed in two configurations 1 Two readers one on each side of the door for entry and exit 2 One reader one for entry and a push button for exit Access tags can be linked to alarm codes to be able to arm and disarm the alarm Clear Interface Memory When powering up for the first time and the aXess readers do not show the correct L...

Page 3: ...be armed or disarmed Note The tag must have been allocated a valid alarm user code defined below The user code properties will define the mode or type of arming Fire Door If a door is enabled as a fire door and a fire alarm is triggered all fire doors will automatically unlock Off Line Mode if the interface loses communication with the panel due to a break in the communications bus line it will co...

Page 4: ...ng Access Tags This menu option allows the user to remove a card from the reader Enter 3 4 o Enter the card number to delete the tag Option 35 Delete Access Tags via Swipe This menu option allows the user to remove a card from the reader if the card is available Enter 3 5 o Enter the door number that the action will be carried out o Swipe the card to be deleted Option 36 View Transactions This men...

Page 5: ...ng Partition s ARM LED Slow Flash Following Partition s READY LED None Access Only Reader Table 4 Access Only Reader Action Description ACCESS ONLY READER Red Yellow Green Beeper Factory Reset All 3 LED s flashing in sync None Enrol Mode Flashing in sync with Green LED Flashing out of sync with Red Green LED s Flashing in sync with Red LED Single beep when any tag swiped Idle Following Partition s...

Page 6: ...shing Single beep when tag swiped Access Granted Relay On Following Partition s ARM LED ON if comms to panel is good Following Relay On whilst Relay is On Strike Time Single beep when valid tag swiped Access Denied Solid On for 2s ON if comms to panel is good Off Failed Beep Door Forced Solid On for 2s ON if comms to panel is good Off Failed Beep if door switch connected and configured and X Serie...

Page 7: ...X Series aXess 700 560 01E Figure 3 Tag Reader Wiring Diagram Figure 4 Jumpers Reset Jumper Clears all memory Term Jumpers Do not short Mode Jumper Used if Wiegand device attached ...

Page 8: ...X Series aXess 700 560 01E ...

Reviews: