background image

QUICK  INSTALLATION 

Page  9 


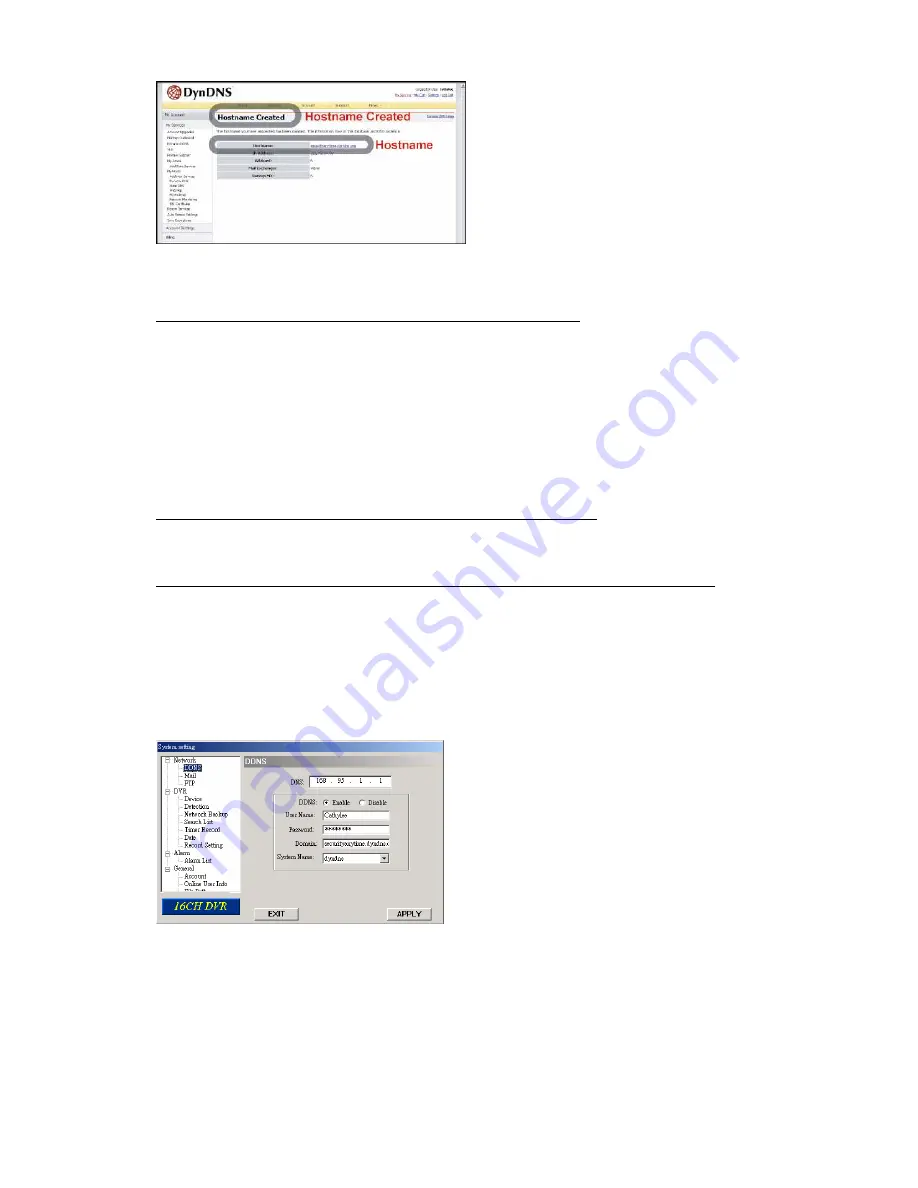
The host name is created. You will be connected to the corresponding IP address whenever you enter this hostname. 


3.6.3 Dynamic IP 

  PPPOE 

1)  Build a Local Area Network (LAN) between DVR and PC/NB with network cable: 

Your NB/PC and DVR must be under the same network domain to build the area network. Please change the IP 

address of your PC/NB into 192.168.1.X (X can be the number between 1~255, except 10) and the subnet mask into 

255.255.255.0 for communicate with the DVR. 

Install the supplied AP software on your NB/PC. And then login the DVR with the supplied AP software for the 

following default DVR settings. 


The DVR default IP address: 192.168.1.10 


The DVR default account / password: admin 


The DVR default port: 80 

2)  Set DVR network setting in    “SYSTEM CONFIG” 

  “Network” of the supplied AP: 

In the “SYSTEM CONFIG” 

  “Network” of the supplied AP, select the “

PPPOE

” in “IP TYPE” section. And then type 

the “

User Name

” and “

Password

” obtained from your ISP. Press ”APPLY” button to confirm the setting. 

3)  Set DVR DDNS setting in the “SYSTEM CONFIG” 

  “Network” 

  “DDNS” of the supplied AP software. 


DDNS: Choose “Enable”. 


User Name: Type your 

DDNS account


Password: Type your 

DDNS password


Domain: Type the “

Host Name

” you applied previously (EX: securityanytime.dyndns.org). 


System Name: Choose the 

DDNS server 

where you applied the domain name (EX: dyndns). 

After setting, please press “APPLY” button to confirm and finish the setting. 


Summary of Contents for AVD715

Page 1: ...ans our manufacture processes and products are strictly lead free and without the hazardous substances cited in the directive The crossed out wheeled bin mark symbolizes that within the European Union...

Page 2: ...path in your PC An IR transmitter is also supplied for remote control 1 2 Package Contents ITEMS QTY Digital Video Recorder DVR 1 Adapter and Power Cord 1 Screws 12 DSUB PIN Connector 1 HDD Data BUS...

Page 3: ...following instructions If you plan to install three HDDs please set two HDDs to Master mode and one HDD to Slave mode and place them to the exact position according to the indication If you plan to in...

Page 4: ...to section 6 4 5 Remote at page 32 of the manual 3 2 2 PTZ Camera Connection 1 Connect the PTZ camera with indicated power supply 2 Connect the PTZ camera video output to the DVR video input port wit...

Page 5: ...the HDD key supplied in the IDA package 2 Connect all IDA with SCSI cable IDE interface Connect from one of the three DEVICE PORT at one IDA rear panel to the host port of another disk array One IDA a...

Page 6: ...TE DAYLIGHT SAVING DAYLIGHT SAVING START 4TH SUN MAR 24 00 00 END 4TH SUN OCT 24 00 00 ADJUST 01 00 Note Please DO NOT change the date or time of your DVR after the recording function is activated Oth...

Page 7: ...p network After setting up the network information of the DVR and connect it to the network you can use the IP address Port Account Password you just entered in the supplied AP software to log into yo...

Page 8: ...r account You must complete the procedure according to the instructions in the mail That is to must visit the confirmation address within 48 hours of the time that the e mail was sent to complete the...

Page 9: ...QUICK INSTALLATION Page 8 Click Add Host Services Click Add Dynamic DNS Host Fill in and choose the desired host name...

Page 10: ...following default DVR settings The DVR default IP address 192 168 1 10 The DVR default account password admin The DVR default port 80 2 Set DVR network setting in SYSTEM CONFIG Network of the supplie...

Page 11: ...ork Please change the IP address of your PC NB into 192 168 1 X X can be the number between 1 255 except 10 and the subnet mask into 255 255 255 0 for communicate with the DVR Install the supplied AP...

Page 12: ...confirm the selection MENU Go to the menu list confirm the change exit the menu list 1 Admin password Password for supervisor allow all the setup of DVR 2 Guest password Only allow viewing the live st...

Page 13: ...ing is scheduled by TIMER function This mode is indicated by the wording TIMER RECORD When the recording function is activated please DO NOT change the date or time on your DVR The recorded data will...

Page 14: ...ing RS 485 serial communication signals DVR can be controlled remotely by the keyboard of PC 13 EXTERNAL ALARM NO Under the normal operation COM disconnects with NO But when any alarm is triggered COM...

Page 15: ...Page 14 6 MENU TREE...

Reviews: