


-5-
2. BASIC OPERATION
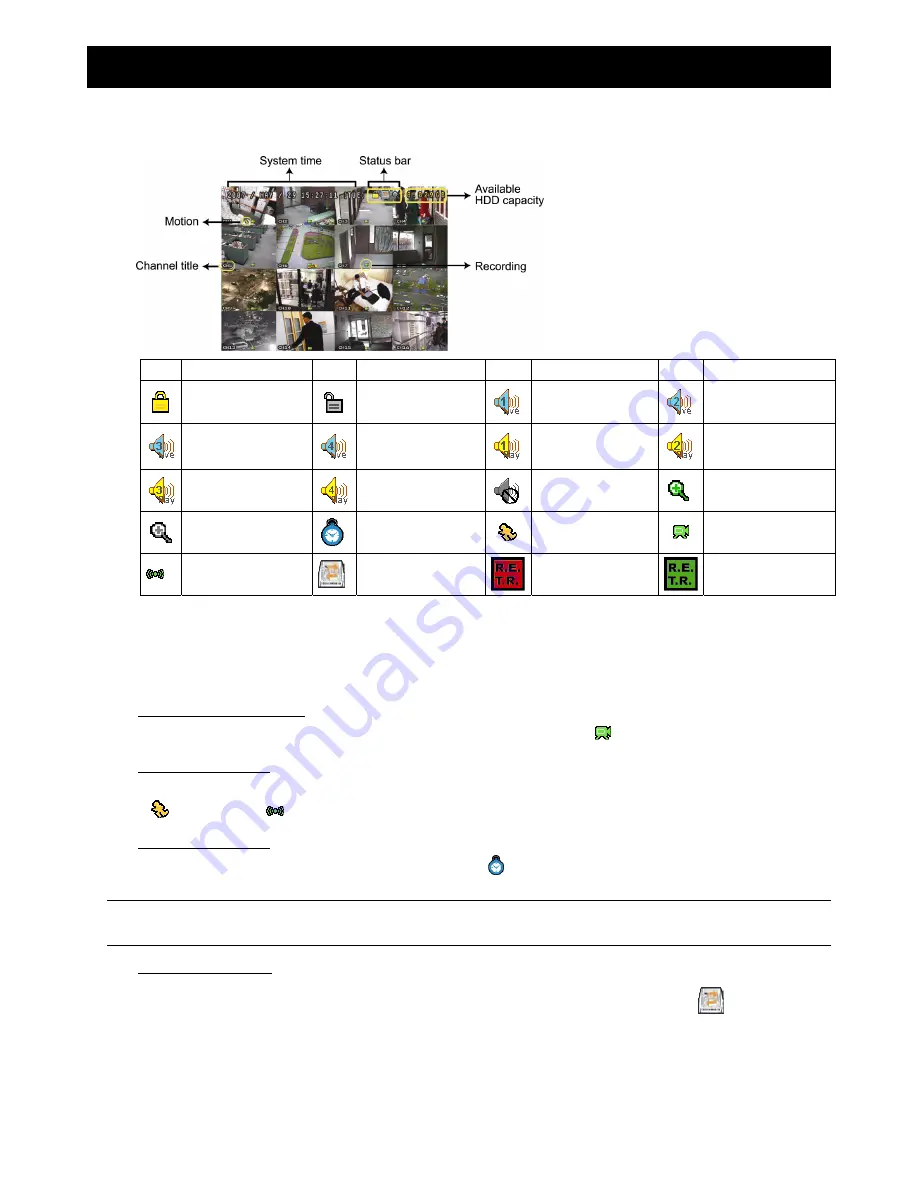
2.1 Live Page
In this live page of the DVR, you can see the live viewing of 1- / 4- / 9- / 16-cut screen.
Icon Function
Icon Function
Icon Function
Icon Function
Key lock
Key unlock
1
st
live audio
channel
2
nd
live audio
channel
3
rd
live audio
channel
4
th
live audio
channel
1
st
playback audio
channel
2
nd
playback audio
channel
3
rd
playback audio
channel
4
th
playback audio
channel
Audio channel
unselected
Digital zoom mode
Digital zoom
unselected
Timer recording
Motion
Recording
Alarm
HDD overwrite
R.E.T.R. ON
R.E.T.R. Delay
2.2 Recording
When the HDD overwrite function is activated, this device will overwrite 8GB data from the oldest for continuous
recording without notice.
1) Continuous Recording Icon
When the DVR is properly connected with camera, you can see the icon “
” (recording) on the screen.
2) Event Recording Icon
When the motion / alarm detection is activated, once motion or external alarm happens, you will see the icon
“
” (motion) or “
” (external alarm) on the screen.
3) Timer Recording Icon
When the timer record is activated, you will see the icon “
” (timer) on the screen.
Note:
A new log will be added in the system log when the HDD data is overwritten or the recording starts
after DVR reboots.
4) HDD Overwritten Icon
The HDD overwritten function can be set to ON / OFF. When this function is enabled (ON), the
icon will display
on the monitor screen.
2.3 Playback
Press “
PLAY
” on the DVR control panel, and the device will playback the latest recorded video.


