


VIDEO VIEWER BASIC OPERATION
-9-
(
(
S
S
e
e
a
a
r
r
c
c
h
h
)
)
Click to search and view the available IP address(es) for the network camera connection. You can choose one
address to add into the address book, edit the details, or update the address list.
NO. Button
Function Description
4
Add into
address book
Select from the available IP address list, and click this button. Key in the
network camera access information needed, and click “Apply” and “Close” to
add the selected address to the address book.
5
Setting
Select from the available IP address list, and click this button to edit the setting.
6
Refresh
Click to update the available IP address list.
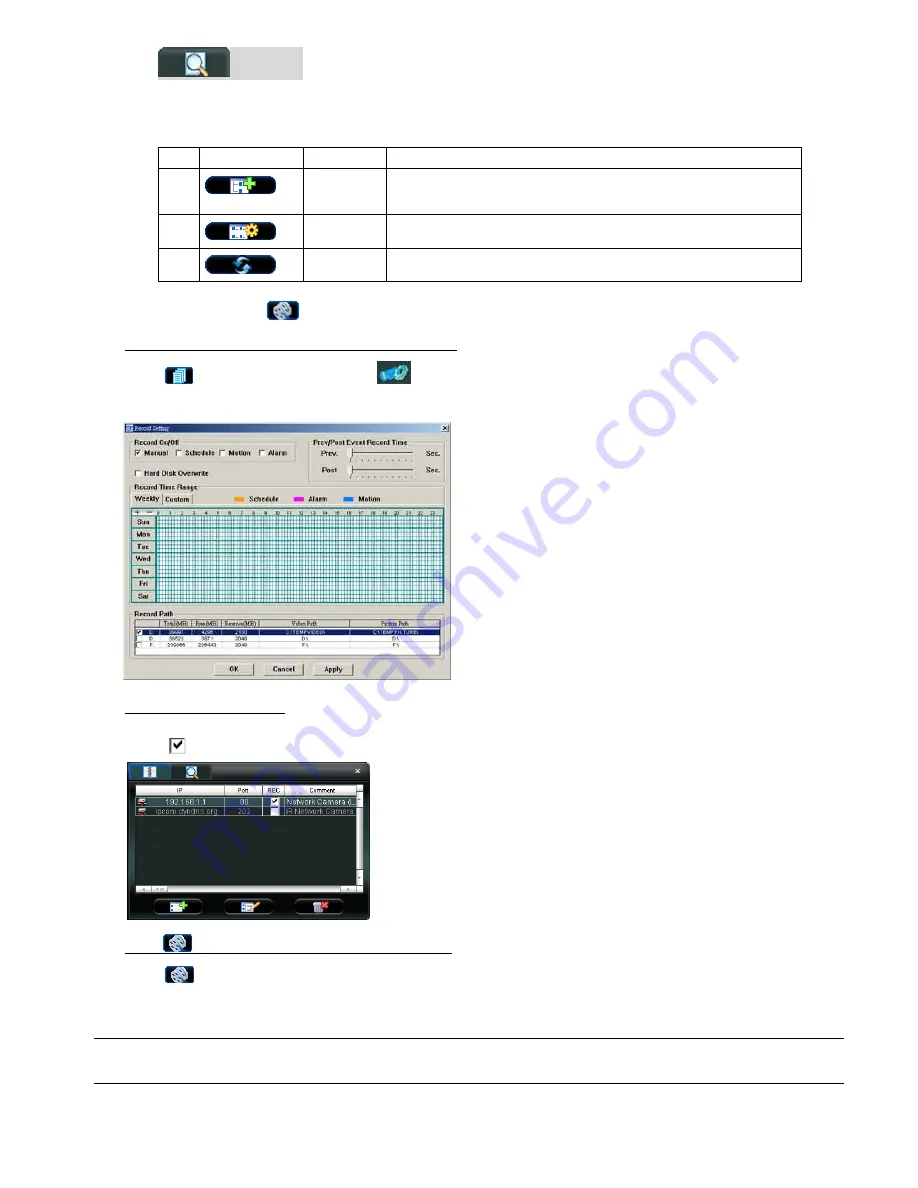
4.3 Manual Record
1)
Choose the record type and assign the record location
Click “
” (Miscellaneous Control)
→
“
” (Record Setting) to go to the “Record Setting” page. Check the record
type “Manual”, and assign the location to save the recordings by double-clicking the “Video Path” cell.
2)
Enable the record settings
Once the “Manual” checkbox is checked in the “Record On/Off” section, check the “REC” box in the address book
panel “
” to enable the record settings.
3) Click
“
” (Record) button to start manual recording
Click “
” (Record) on the main control panel to start the manual recording immediately, and the recordings will be
saved in the specified location. When the record function is started, a flashing indication icon will be shown at the
bottom right corner of the image display view.
Note:
For detailed schedule record setting, motion-triggered and alarm-triggered recording, please refer to
“5.3 Record Setting” at page 14, “Trigger” at page 18 and “Detection” at page 25.


