7
Initial Setup: WebUI
1. With the AC-MX-88 placed into its new home (AV Rack, cabinet, table top) take a Phillips
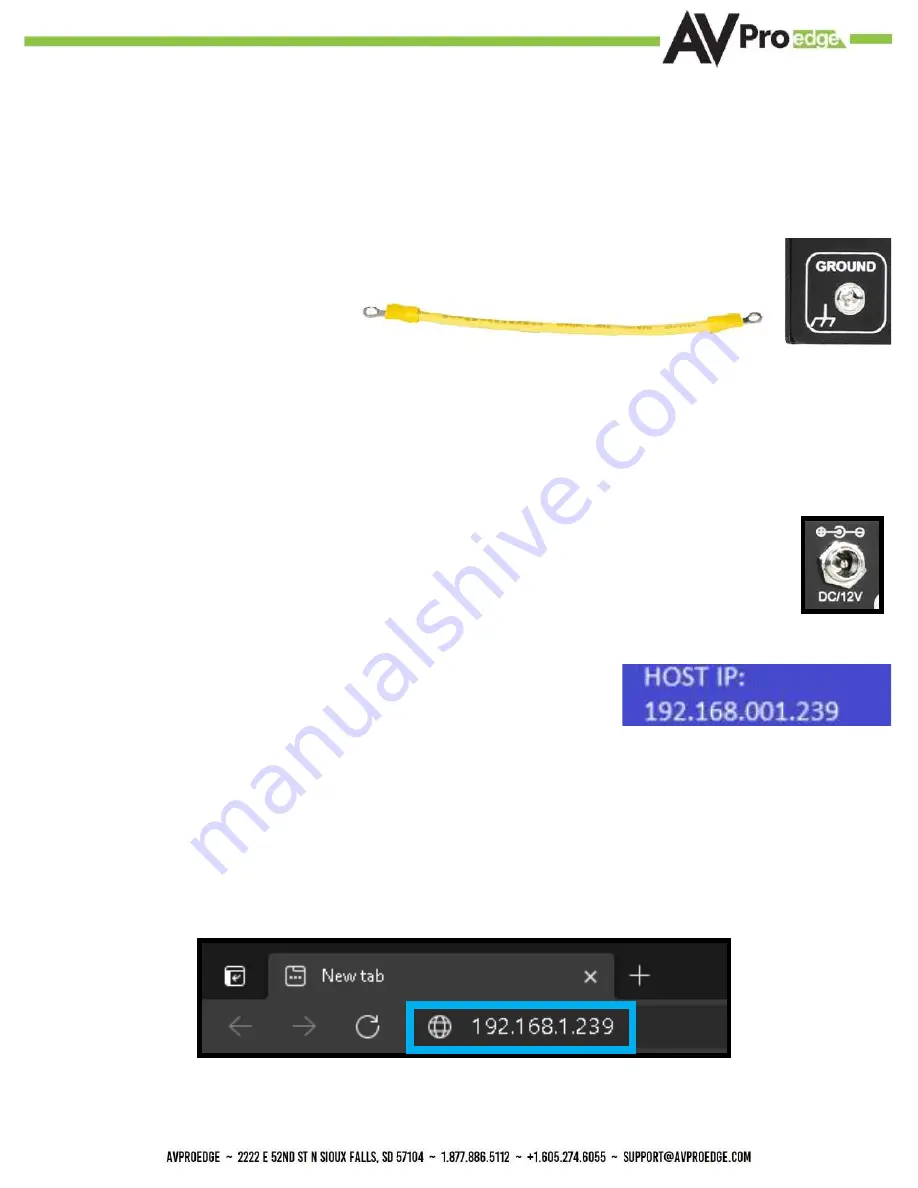
head screwdriver and attach the included yellow ground strap to the back of the chassis
using the pre-installed screw, then attach the other end to a suitable grounded object.
2. Connect the HDMI Input sources to the HDMI Inputs on the back of the matrix.
3. Connect the HDMI/devices to the HDMI Outputs.
4. Connect the network LAN cable to the RJ45 port labeled LAN (between the Micro USB and 3pin RS232
port).
5. Power on the sources (Inputs).
6. Power on the Output devices/displays.
7. Connect the 12V power supply to power on the matrix and then to a suitable power source.
8. In order to see the current IP settings, press and hold (for 3 seconds) INPUT 3 and INPUT 4 buttons
simultaneously. This screen will change every 3 seconds showing
additional settings (host, net mask, router IP).
NOTE: This screen starts with the current IP address of the matrix.
9. To Enable/Disable DHCP, press and hold INPUT 1 and INPUT 4 at the same time for 3 seconds. With
the matrix connected to the local network, using a computer on the same network open up a web
browser and type the HIP (Host IP Address) into the address bar to navigate to the WebUI.
10. With the WebUI open, navigate to System. Click on the Privacy Policy and Terms of Use, this will open
these documents in a new tab for review. Once read click on the boxes next to each to agree. When
both are checked the switch for Enable Cloud Services will be selectable (will be red or disabled by
default). Click to enable (the switch will turn green).
The AC-MX-88 can be controlled using the Micro USB port, 3pin RS232, or over TCP/IP using the LAN con-
nection. For initial setup it is recommended to connect the matrix to a local area network (LAN) and use a
computer on the same network in conjunction with the built in WebUI. After making all the physical con-
nections, the first step will be to check for any Firmware Updates. The below steps are an example of this
setup, other control options are covered in separate sections of this user manual.
Summary of Contents for AC-MX-88
Page 1: ...User Manual 18Gbps True 4K60 4 4 4 8x8 Matrix AC MX 88 1...
Page 5: ...Specifications 5...
Page 6: ...6 Front and Rear Panel Overview...
Page 39: ...39 Command List Baudrate 57600 Checksum None Bit Num 8 Stop Bit 1...
Page 40: ...40 Command List Continued...
Page 41: ...41 Command List Continued...
Page 49: ...49...
Page 50: ...50...


