


Revision Date: 1/17/2020
30
Turning on the Power
1.
Turn on your source components.
2.
Plug the female end of the supplied power cord into the AC receptacle on the side of the display (AC
100V ~ 240V). See Figure 2-2.
3.
Connect the other end to your AC power source.
4.
Turn on the main power switch at the side of the display (see Figure 2-1). The power indicator lights
orange to indicate that the display is
in “standby” mode.
5.
Press the power button (
) on the remote control to turn on the display or press the power button
(
) on the keypad.
6.
After a brief warm-up period, the display will display an image.
NOTE If there's no input signal for a period of time, the display will
automatically go into power saving (sleep) mode.
Changing the OSD Language
The display OSD language is initially set to English, but can also display the menus in different languages.
To change the OSD language:
1.
Press MENU.
2.
Select Basic Settings from the Main Menu.
3.
Select OSD Language from the Basic Settings Menu.
4.
Press or to select the desired language and press OK. The change takes effect immediately.
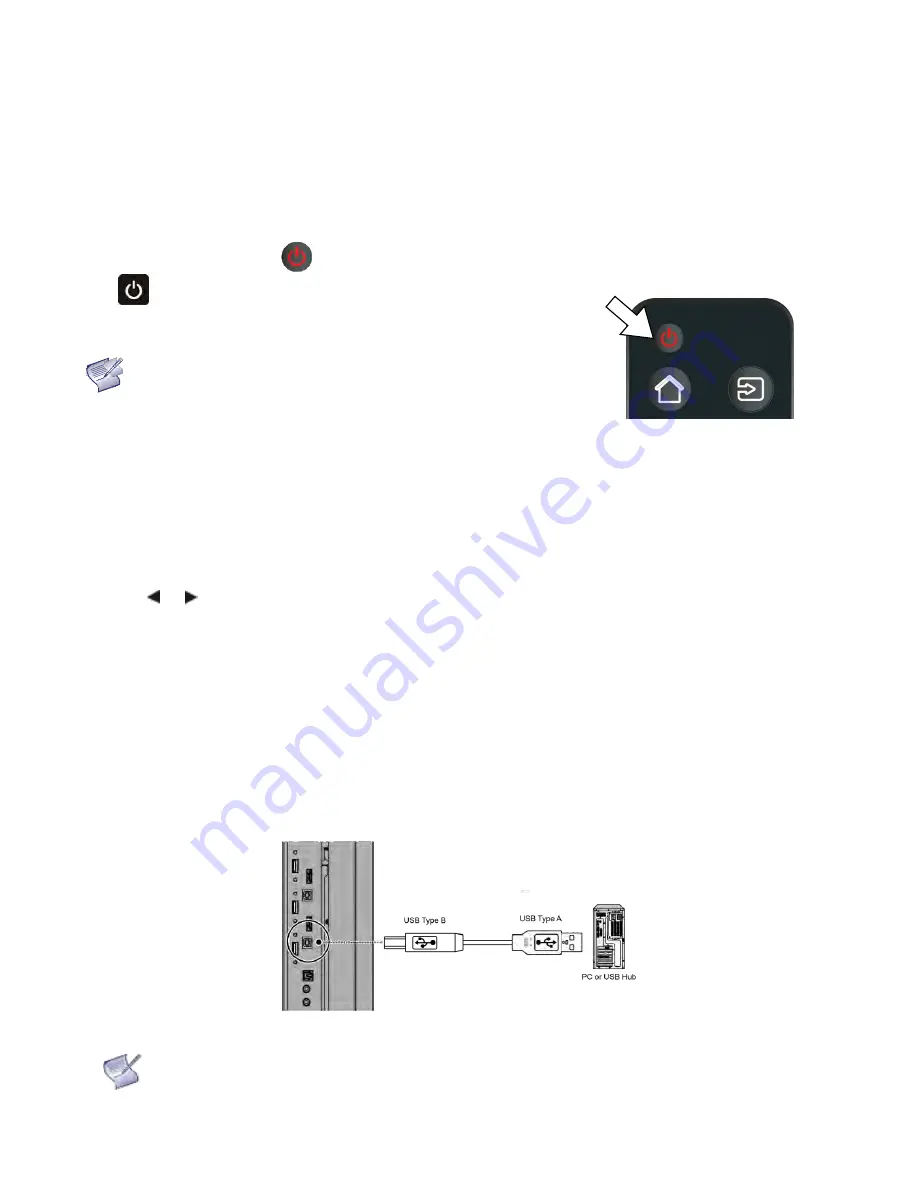
Enabling the Touch Screen
Before setting up your display to support touch screen capability, ensure that:
•
Your computer is turned on and connected to the displasy using the provided USB cable. See Figure 3-7.
•
The video output from the computer is connected to a video input on the display. See Figure 3-4, Figure 3-5
or Figure 3-6.
•
The display is turned on.
Use the provided USB cable to connect the computer to the USB input on the display as shown in Figure 3-7.
Figure 3-7. Touch Screen Controller (USB) Connection
NOTE
If the touch screen is not working, please turn off your computer or the display and enabling
the touch screen again following the steps above.
Summary of Contents for AVF-6550
Page 10: ...Revision Date 1 17 2020 10 Notes...
Page 14: ...Revision Date 1 17 2020 14 Notes...
Page 63: ...Revision Date 1 17 2020 63 Notes...
Page 67: ...Revision Date 1 17 2020 67 Appendix IV Wall Mount Safety Notes...
Page 68: ...Revision Date 1 17 2020 68...
Page 70: ...Revision Date 1 17 2020 70 System IP Configuration Network Status Load Default Setting...
Page 71: ...Revision Date 1 17 2020 71 Firmware Update Boot Loader Upgrade...
Page 76: ...Revision Date 1 17 2020 76 Reset Device Reset NET2UART module...


