


4
Integrated LCD KVM Switch Installer/User Guide
NOTE:
Avocent recommends having two people assist each other while rack
mounting this unit.
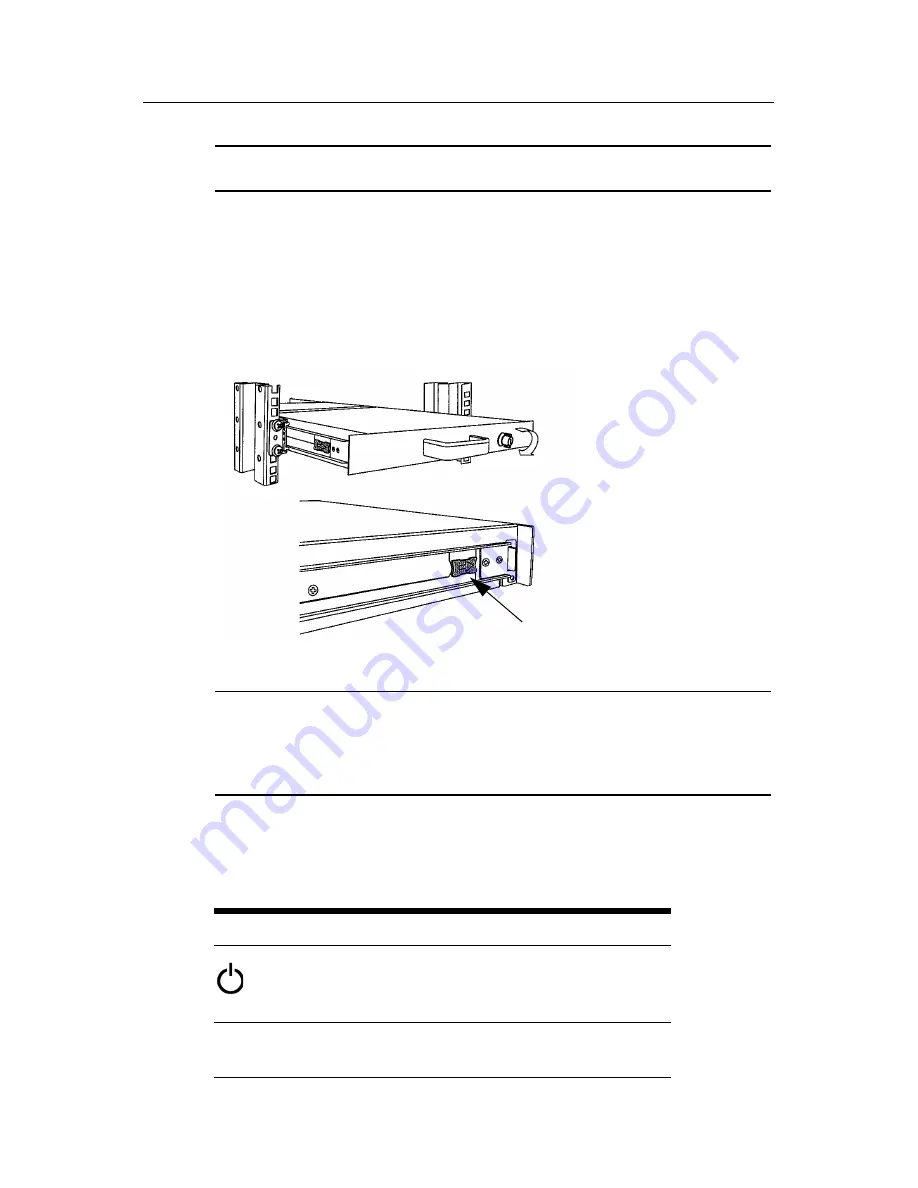
4.
Using the Integrated LCD KVM Switch keys, unlock the unit and
pull the rail lock switches located on the side of the unit. Guide the
Integrated LCD KVM Switch into the cabinet.
5.
Using the flat screws provided, attach both the left and right
brackets to the Integrated LCD KVM Switch to secure the unit.
Figure 1.3: Utilizing the Rail Lock Switch
NOTE:
To attach the long support brackets (for cabinet mounts more than 33
inches long), you must remove the factory installed rear brackets and replace with
the long brackets provided. Adjust the long brackets to fit the cabinet and use two
of the previously removed screws to tighten. Repeat steps 1-5 of the mounting
procedure to secure the unit.
After installation, reference the following table which lists the functions
of the LCD monitor push-buttons.
Table 1.2: Monitor Push-button Functions
Controls
Description
Soft turn your Integrated LCD KVM Switch
on or off.
Auto
Auto-synchronizes and scales down display
to factory presets.
Rail Lock
Switch
Summary of Contents for Integrated LCD KVM Switch
Page 1: ...Installer User Guide Integrated LCD KVM Switch...
Page 2: ......
Page 6: ...iv Integrated LCD KVM Switch Installer User Guide...
Page 16: ...10 Integrated LCD KVM Switch Installer User Guide Figure 1 7 Basic Daisy Chain Example...
Page 19: ......
Page 20: ......
Page 24: ...iv Guide d installation et d utilisation du commutateur KVM cran LCD int gr...
Page 36: ...12 Guide d installation et d utilisation du commutateur KVM cran LCD int gr...
Page 40: ...16 Guide d installation et d utilisation du commutateur KVM cran LCD int gr...
Page 41: ......
Page 42: ...590 698 616B For Technical Support www avocent com support...


