


Chapter 3: Local Port Operation
21
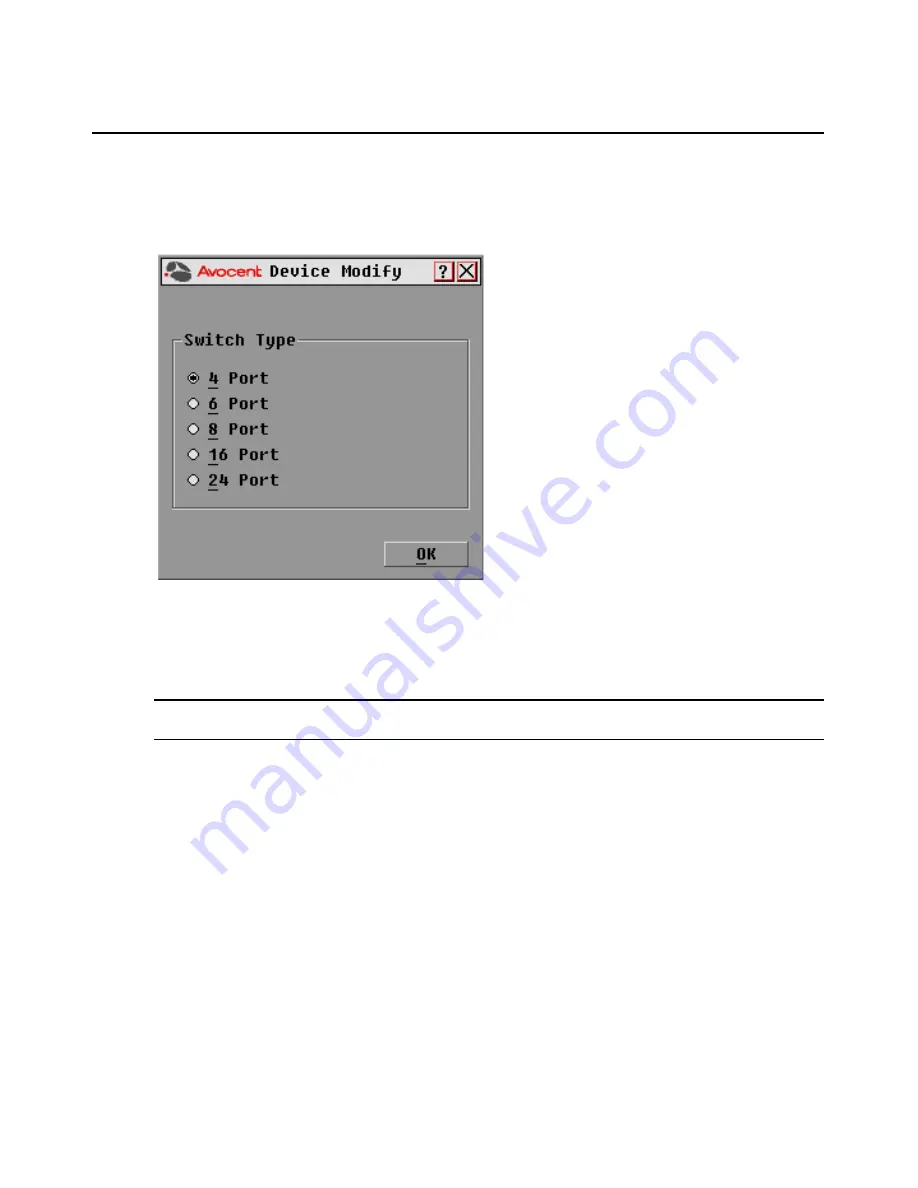
To assign a device type:
1.
In the Devices dialog box, select the desired port number.
2.
Click
Modify
to open the Device Modify dialog box.
Figure 3.6: OSCAR Interface Device Modify Dialog Box
3.
Choose the number of ports supported by your switch and click
OK
.
4.
Repeat steps 1-3 for each port requiring a device type to be assigned.
5.
Click
OK
in the Devices dialog box to save settings.
NOTE:
Changes made in the Device Modify dialog box are not saved until you click
OK in the Devices
dialog box.
Changing the display behavior
Use the Menu dialog box, shown in Figure 3.7 on page 22, to change the display order of target
devices and set a Screen Delay Time for the OSCAR interface. The display order setting alters how
target devices will display in several dialog boxes, including Main, Devices and Broadcast.
To access the OSCAR interface Menu dialog box:
1.
Press
Print Screen
to launch the OSCAR interface and to open the Main dialog box.
2.
Click
Setup - Menu
in the Main dialog box to open the Menu dialog box appears.
Summary of Contents for 3100/3200
Page 1: ...Installer User Guide AutoView 3100 3200 ...
Page 8: ...vi AutoView 3100 3200 Switch Installer User Guide ...
Page 10: ...viii AutoView 3100 3200 Switch Installer User Guide ...
Page 12: ...x AutoView 3100 3200 Switch Installer User Guide ...
Page 72: ...60 AutoView 3100 3200 Switch Installer User Guide ...
Page 78: ...66 AutoView 3100 3200 Switch Installer User Guide ...
Page 92: ...80 AutoView 3100 3200 Switch Installer User Guide ...
Page 93: ......
Page 94: ......
Page 100: ...vi Guide d installation et d utilisation du commutateur AutoView 3100 3200 ...
Page 102: ...viii Guide d installation et d utilisation du commutateur AutoView 3100 3200 ...
Page 104: ...x Guide d installation et d utilisation du commutateur AutoView 3100 3200 ...


