


Assigning Names to the Extensions
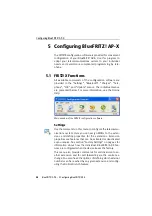
BlueFRITZ! AP-X – 5 Configuring BlueFRITZ! AP-X
43
The following sections explain how to go about configuring
the settings. Perform the settings in the order presented
here.
H
Have ready the documents in which your ISDN provider
supplied the Multiple Subscriber Numbers (MSNs) for your
ISDN line.
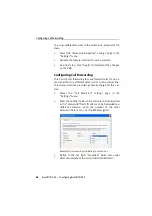
Assigning Names to the Extensions
Two extensions are available on the BlueFRITZ! AP-X PBX.
You can enter a description for each extension.
1.
Select the “General” settings page in the “Settings”
menu.
2.
Enter a name for each extension in the window area
labelled “Assigning Internal Parties/Devices to the
Extensions”.
3.
As a final step, click “Apply” to implement the changes
on the PBX.
Checking the Charge Unit
If you would like to use the charge statistics of FRITZ!X, make
sure that the charge unit entered here is correct for your ISDN
line. The charges are calculated on the basis of this value.
1.
Select the “General” settings page in the “Settings”
menu.
2.
In the “Charge Unit” section of the window, enter the
cost of one unit. The currency symbol displayed
depends on your computer’s currency settings (“Control
Panel / Regional Settings”). This setting can be
changed to the symbol appropriate for your location.
3.
As a final step, click “Apply” to implement the changes
on the PBX.
If you would like to use the charge record feature, make sure
that your ISDN provider has enabled the transmission of
charge information on your line.
Summary of Contents for Bluefritz! AP-X
Page 1: ......