


MAITREVIEW 4KLITE QUICK START GUIDE 7
INSTALLATION
44
Note: please turn the power off for your displays and video sources before you begin the installation.
45
1. Turn the device to the back, connect each video source to the input ports respectively.
46
2. Connect each display to the output ports respectively.
47
3. Connect the power adapter to the DC 12V power port, and locking the DC power jack. The LED will turn blue after
48
connected successfully.
49
4. Once step1~3 is completed, please turn the device to the front and turn the power on for displays and video sources.
50
5. Power on your device: on your front panel, press the POWER button once, the blue LED will start to blink for around
51
30 seconds.
52
6. After the LED turn green, then the device is ready to use.
53
7. Power off your device: when you wish to turn off the power, please long press the POWER button for around 3
54
seconds, the LED will blink in blue for around 20 seconds, and then the device will shut down itself.
55
REMOTE CONTROL
56
Single View
57
Single view allows user to output a single region from any of the HDMI IN 1~4 channels, you can
58
press from 1~ 4 on output 1 or output 2. To do this you need to:
59
Press any of input 1~4 on SingleView
Region Input
60
1.
Press 1~4 to choose one region layout from input source 1~4 to display on Output 1 or Output
61
2, for example press on Output 2, then
single view displays selected input on full screen in
62
Output 2
63
64
65
66
67
68
Layouts
69
Layout button allows user to choose any of the 6 layouts to show on Output 1 or Output 2. To do this
70
you need to:
71
Select the layout from either of the 6 layouts pattern
72
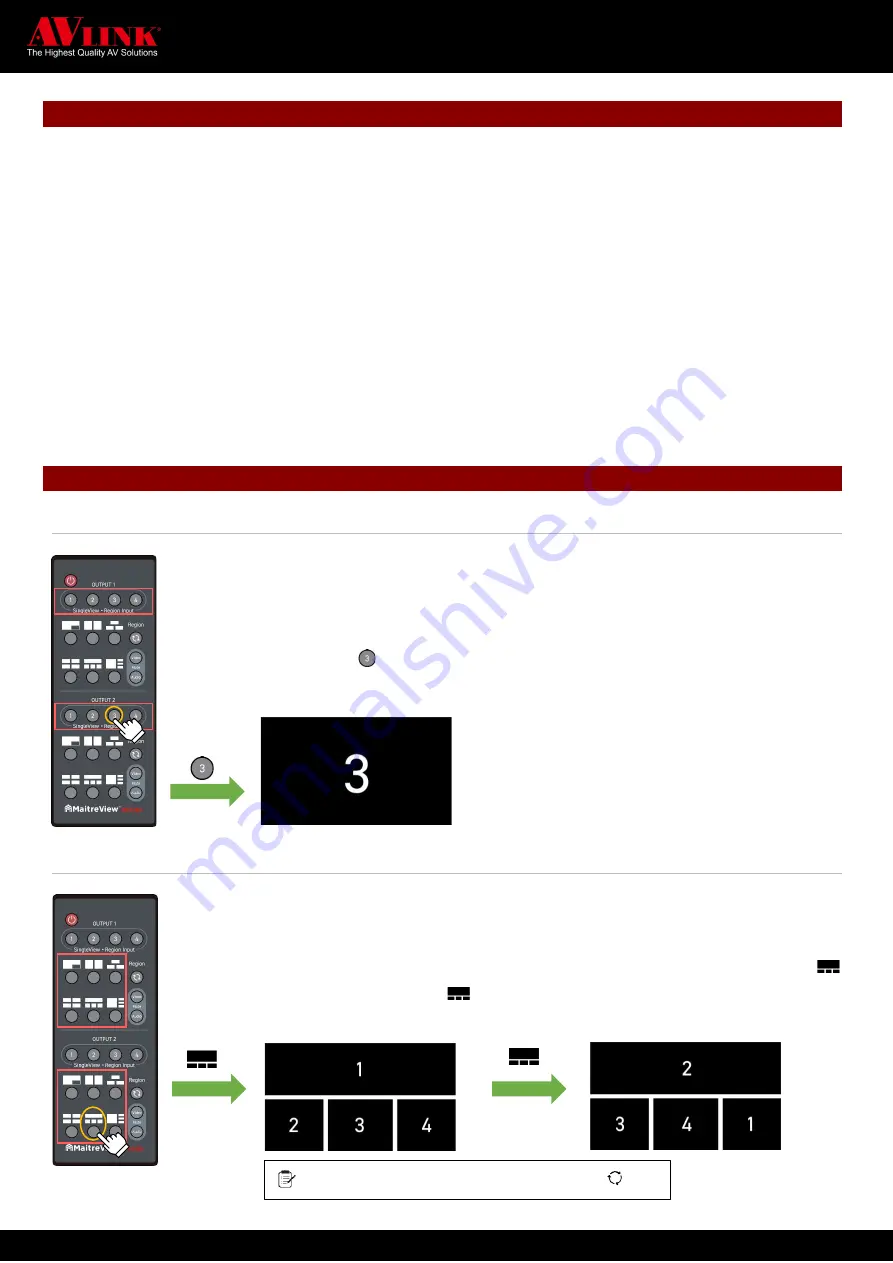
1.
Select layout by press the button next to the layout icon you wish to use, for example, press
73
once on layout section, then layout
will show on Output 2
74
75
76
77
78
79
80
81
Press more than once, it will rotate clockwise
v
v


