Loom Manual
Page 10
Safety Features:
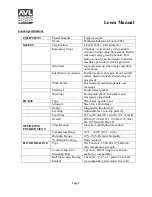
The loom contains several safety features designed to avoid injury and equipment damage.
These include:
1)
Electrical lockout switches stop electricity flow to loom.
2)
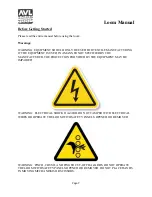
Safety labels draw attention to danger areas. Do not reach under a panel while the loom is
powered.
3)
Green light prominently displays that the loom is powered and On/Off Breakers are
switched on. Light extinguishes when power is removed, Breakers are off, or when
either or both emergency stop buttons are pressed.
4)
Panel secured with fasteners. Behind the main panels are high voltage and the more
extreme pinch dangers.
5)
Panel hinges allow for opening and access without removal of large, heavy equipment
panels.
6)
Covers and shielding separate weaver from moving components where pinch hazards
exist. Do not reach under a covers and shielding while the loom is operating.
7)
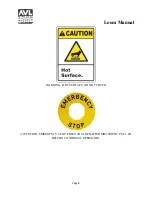
Emergency stop button cuts power to the rapier motor. Activation stops the rapier from
moving avoiding potential personal and equipment damage. The depressed emergency
stop button lights red to notify user that the loom requires attention. The Green Power-
On Lamp is deactivate when red light is on. Pull out the emergency stop button once the
danger has been addressed and to resume loom normal operation.
8)
Beater and drive sensors disallow rapier activation unless beater is in rear-most position
and drive is in open shed position.
9)
Slow start programming is provided to enable clearing of the equipment after emergency
or accidental shut down. Slow start allows small, incremental step movements of the E-
Lift and rapier by pressing the respective beater button until home positions are reached.
Shed lift home is the open shed position. Rapier home is the fully retracted position.
Summary of Contents for TECHNICAL EDUCATION LOOM
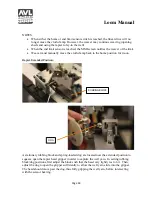
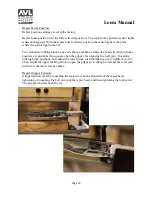
Page 27: ...Loom Manual Page 27 Cloth Clamp Closed Cloth Clamp Open Fixed Clamp Open Fixed Clamp Hanging ...
Page 29: ...Loom Manual Page 29 Module Hooks Exposed Front Cover Removed Hooks Close Up ...
Page 33: ...Appendices Page 33 APPENDIX A WIRING DIAGRAMS continued ...
Page 34: ...Appendices Page 34 APPENDIX A WIRING DIAGRAMS continued ...
Page 35: ...Appendices Page 35 APPENDIX A WIRING DIAGRAMS continued ...
Page 36: ...Appendices Page 36 APPENDIX A WIRING DIAGRAMS continued ...
Page 37: ...Appendices Page 37 APPENDIX A WIRING DIAGRAMS continued ...
Page 38: ...Appendices Page 38 APPENDIX A WIRING DIAGRAMS continued ...
Page 39: ...Appendices Page 39 APPENDIX A WIRING DIAGRAMS continued ...
Page 40: ...Appendices Page 40 APPENDIX A WIRING DIAGRAMS continued ...
Page 41: ...Appendices Page 41 APPENDIX A WIRING DIAGRAMS continued ...
Page 42: ...Appendices Page 42 APPENDIX A WIRING DIAGRAMS continued ...
Page 43: ...Appendices Page 43 APPENDIX A WIRING DIAGRAMS continued ...
Page 44: ...Appendices Page 44 APPENDIX A WIRING DIAGRAMS continued ...
Page 45: ...Appendices Page 45 APPENDIX A WIRING DIAGRAMS continued ...
Page 46: ...Appendices Page 46 APPENDIX A WIRING DIAGRAMS continued ...
Page 47: ...Appendices Page 47 APPENDIX A WIRING DIAGRAMS continued ...
Page 48: ...Appendices Page 48 APPENDIX A WIRING DIAGRAMS continued ...
Page 49: ...Appendices Page 49 APPENDIX A WIRING DIAGRAMS continued ...
Page 50: ...Appendices Page 50 APPENDIX A WIRING DIAGRAMS continued ...
Page 51: ...Appendices Page 51 APPENDIX A WIRING DIAGRAMS continued ...
Page 52: ...Appendices Page 52 APPENDIX A WIRING DIAGRAMS continued ...
Page 53: ...Appendices Page 53 APPENDIX A WIRING DIAGRAMS continued ...
Page 54: ...Appendices Page 54 APPENDIX A WIRING DIAGRAMS continued ...


