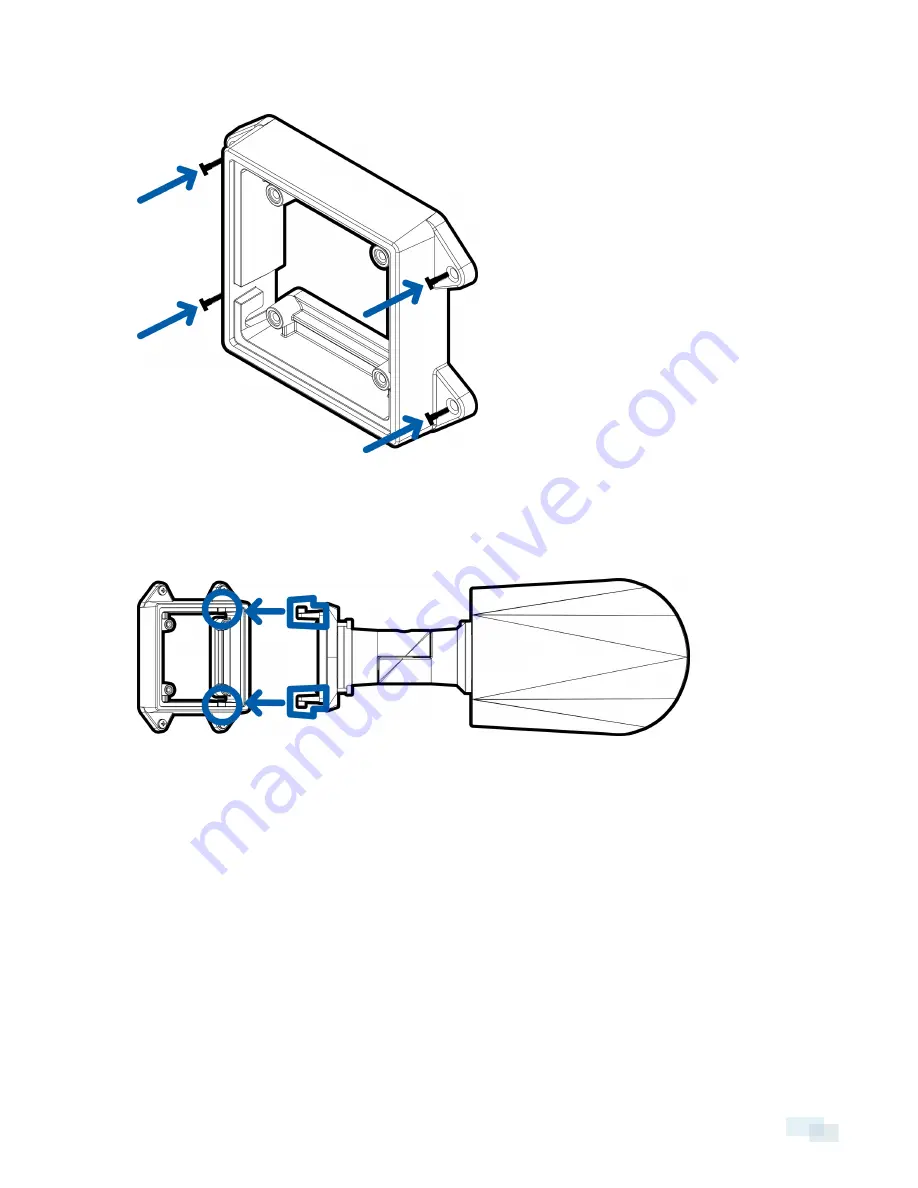
3. Fasten the mounting bracket to the mounting surface.
NOTE:
It is recommended that silicone sealant be applied around the edge of the mounting bracket to
prevent moisture from entering the mounting surface.
4. Insert the mounting hooks on the rear of the camera into the mounting hook slots on the mounting
bracket, and let the camera hang.
(Optional) Removing the Sun Shroud
The sun shroud should only be removed when the camera is installed indoors and space is limited.
1. As you press down on the center of the sun shroud, pull up the corners of the shroud from one side of the
camera.
2. Use a T20 Pin-In Torx driver to unscrew and remove the sun shroud mount from the camera.
Reinstalling the Sun Shroud
1. Use a T20 Pin-In Torx driver to screw on the sun shroud mount.
2. Align one side of the sun shroud to the mount.
3. Press down on the center of the sun shroud and flex the edges up, then lower it into place.
(Optional) Removing the Sun Shroud
8


