


EZTouch I/O Flex
36 / 64
6.
Once again, a dialog box will appear. Enter "O1" as the address string. Click
OK.
7.
Click on
Instructions
>
Line
to wire “NO Contact” and “NO Coil.”
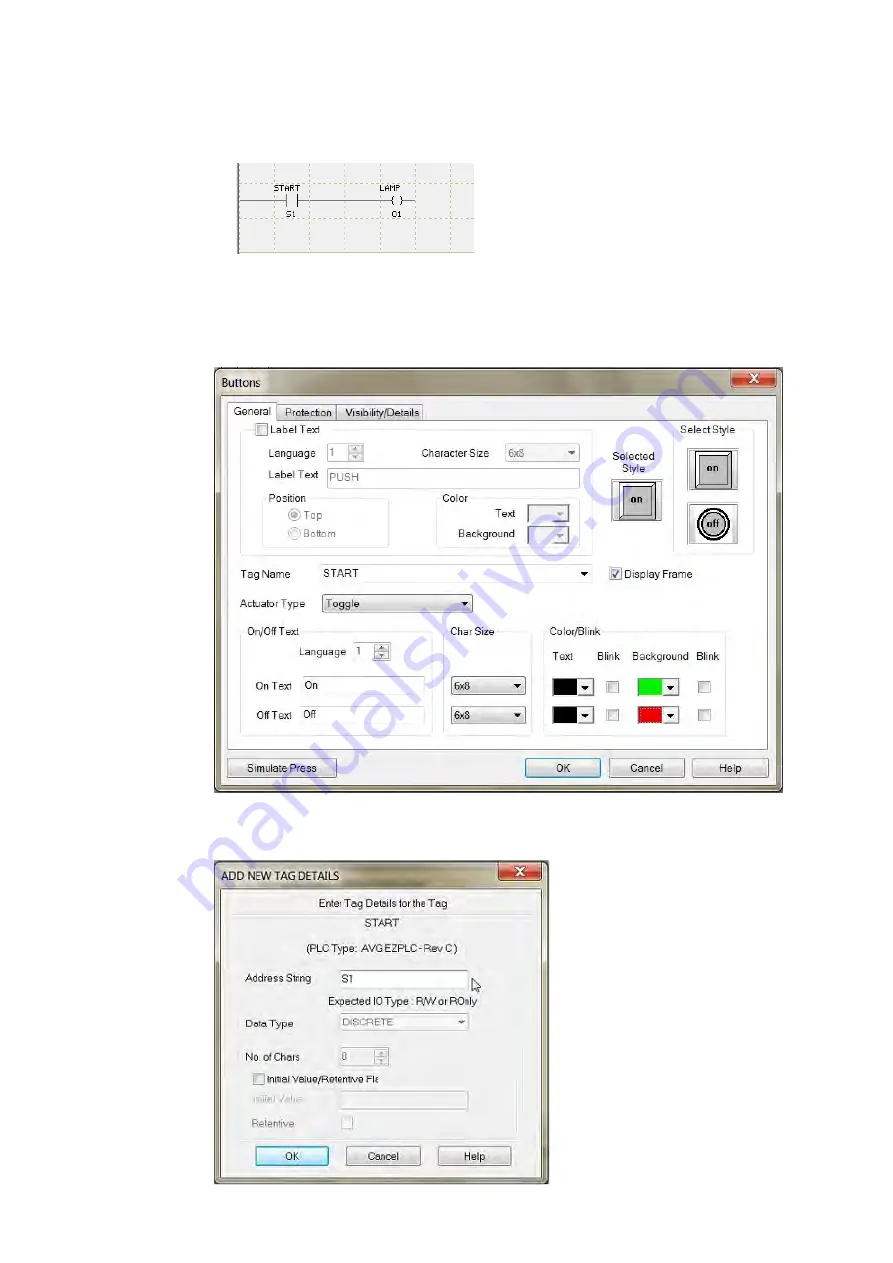
Your screen should look like this when finished:
Create a Panel Program
: Click on “Panel” and "Scr 1" to create the Panel display screen
as explained in the sample below.
1.
In the Main Menu, click on
Objects
>
Buttons
>
Buttons
. The screen below
will appear. Enter
START
for Tag Name. Click OK.
2.
A dialog box might appear requesting the memory location. Enter "S1" in the
field to the right of "Address String." The Data Type should be marked as
DISCRETE. Click OK.
Summary of Contents for 6" EZTouch I/O Flex
Page 1: ...Copyright 2015 by AVG Automation All Rights Reserved EZTouch I O Flex ...
Page 21: ...EZTouch I O Flex 21 64 Touch I O with Micro Terminal Layout ...
Page 22: ...EZTouch I O Flex 22 64 Terminal Pinouts ...
Page 23: ...EZTouch I O Flex 23 64 ...
Page 26: ...EZTouch I O Flex 26 64 Analog I O Specifications ...
Page 27: ...EZTouch I O Flex 27 64 ...
Page 28: ...EZTouch I O Flex 28 64 Touch I O with Nano Terminal Layout ...