background image

ZM505 Indicator User Instructions

21

4.1    Accessing the menus

4 Menus

Password protected menus are available to configure the indicator and/or view 
information. 

4.1 Accessing the menus

Follow these steps to access the menus in the ZM505 indicator.

1.

With the indicator powered up and in normal operating mode, press and hold 

SETUP

Pass

 is displayed, prompting you to enter the password.

2.

Key in the password for the menu you want and press the 

ZERO

 key …

The first item in the top level of the menu you accessed is displayed.

3.

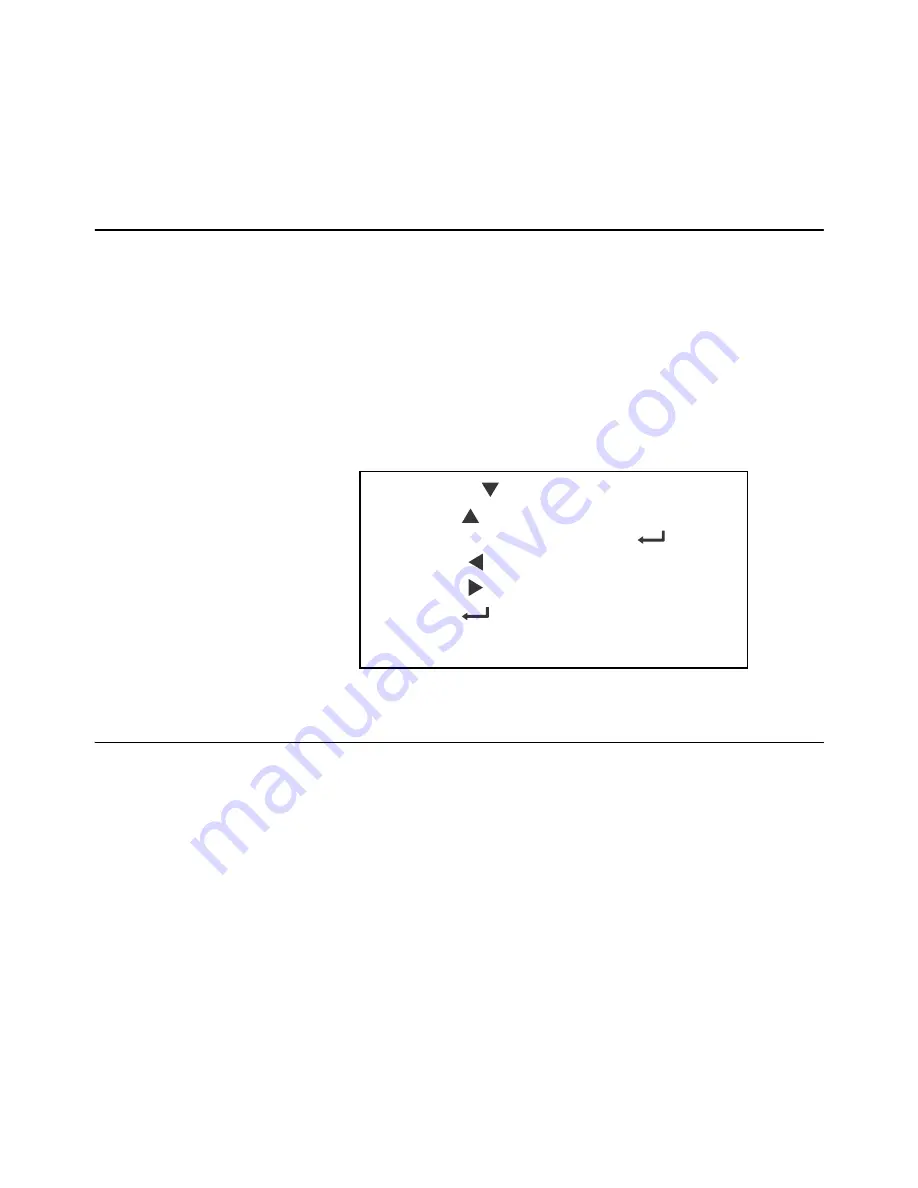
Use the navigation keys, shown below, to navigate through the menu 
structure. The symbols in the chart appear on the bottom of the keys.

4.2 Menu annunciators

The menu structure is made up of menu items, parameters, value entry screens and 
lists from which you choose one item. To help you know where you are in the menu, 
the bargraph at the top of the display is on while the indicator is in the menus and will 
change appearance according to the following rules:

All segments flashing

This means you are in the menu structure but not 
in any of the following screens.

Center flashing / others solid

This means you are in a parameter prompt 
screen.

Center flashing / others off

This means you are in a numeric entry screen. 
Enter a number and press 

ZERO

 to accept.

Right flashing / others off

This means you are in a list. Scroll through the 
choices with the 

PRINT

 and 

UNITS

 keys and 

press 

ZERO

 to accept.

Press 

SELECT

  to move down in a menu

Press 

TARE

  to move up in a menu, except at the 

bottom item in a menu, then use 

ZERO

   or 

F1

Press 

PRINT

  to move left in a menu

Press 

UNITS

  to move right in a menu

Press 

ZERO

   to accept a value or choice and 

move up in the menu.
Press 

F1

 to escape and move up in the menu

Summary of Contents for ZM505

Page 1: ...ZM505 Indicator User Instructions AWT35 501338 Issue AC...

Page 2: ...two dimensional work and the making of a copy in two dimensions of a three dimensional work stored in any medium by electronic means or transmitted in any form or by any means including electronic mec...

Page 3: ...ction 12 Front panel 13 Display 14 Powering up a ZM505 series indicator 15 Using the alphanumeric keypad 15 Entering negative numbers or decimal point 15 Chapter 3 Operator Instructions 16 Power Up 16...

Page 4: ...4 ZM401 405 Indicator User Instructions Print 30 Chapter 5 Error messages 31 Chapter 6 Supervisor menu 32 Printed Preset Tare report example 33...

Page 5: ...nction it may be referred to by its alternate function Displayed messages appear in bold italic type and reflect the case of the displayed message Annunciator names appear as italic text and reflect t...

Page 6: ...tion provided by the socket is suitable for the environment 1 3 Routine maintenance Always isolate the indicator from the power supply before starting any routine maintenance to avoid the possibility...

Page 7: ...ory to the user Take frequent breaks during prolonged usage 1 6 Sharp objects Do not use sharp objects such as screwdrivers or long fingernails to operate the keys Table 1 1 Cleaning DOs and DON Ts DO...

Page 8: ...io communications Operation of this equipment in a residential area is likely to cause harmful interference in which case the user will be required to correct the interference at his own expense This...

Page 9: ...DWLRQ GH O XWLOLVDWLRQ GH FHUWDLQHV VXEVWDQFHV GDQJHUHXVHV GDQV OHV pTXLSHPHQWV pOHFWULTXHV HW pOHFWURQLTXHV 1 8 E 8 RQIRUPLWHLWVYHUNODU LQJ 1DDP HQ DGUHV YDQ GH IDEULNDQW YHU HLJK 7URQL RXQGU DQH 6PH...

Page 10: ...QJOHWHUUH 6LJQp SDU HW DX QRP GH YHU HLJK 7URQL j UPVWURQJ ULYH DLUPRQW 01 86 OH HWHUW QQRYDWLRQV LUHFWHXU 0DUNHWLQJ E 8 RQIRUPLWHLWVYHUNODU LQJ 0RGHO 7 SH 0 0 5 1DDP HQ DGUHV YDQ GH IDEULNDQW YHU HLJ...

Page 11: ...OHWHUUH 6LJQp SDU HW DX QRP GH YHU HLJK 7URQL j UPVWURQJ ULYH DLUPRQW 01 86 OH HWHUW QQRYDWLRQV LUHFWHXU 0DUNHWLQJ E 8 RQIRUPLWHLWVYHUNODU LQJ 0RGHO 7 SH 0 0 5 1DDP HQ DGUHV YDQ GH IDEULNDQW YHU HLJK...

Page 12: ...e indicator requires 100 VAC 240 VAC 50 or 60 Hz or 12 36VDC The standard indicator connectivity includes a USB Host three serial ports and an Ethernet port With an multiple option cards it can suppor...

Page 13: ...s Press the SELECT key to toggle between the active display values Press and hold to enter the setpoint editor Acts as a down arrow key for menu navigation Allows entry of numeric values Press the PRI...

Page 14: ...e scale is enabled The SETUP key can be used to perform custom application functions It can also be used to view the password entry screen for menu access The TARGET key can be used to perform custom...

Page 15: ...the letters starting with upper case and then lower case The decimal key scrolls through the negative sign pound sign colon comma and percent sign The 0 key toggles between 0 and a space 2 4 Entering...

Page 16: ...uctions for the Accumulation app 3 2 1 Gross weighing To perform gross weighing power up the unit and follow these steps 1 Empty the scale and if necessary press ZERO to zero the display 0 is displaye...

Page 17: ...ace item to be tared on the scale Weight is displayed 3 Press TARE 0 is displayed and the NET weight is displayed 4 Place material to be weighed into or on the tared item on the scale Net weight of ma...

Page 18: ...gross weigh mode Using Preset Tare Preset tares are entered in a password protected menu Refer to details described in the Supervisor menu on page 32 There are 10 tare values stored in memory To perfo...

Page 19: ...oint or output values PRINT key A brief key press or triggering input 3 accumulates and transmits data out serial port 1 See sample below Chan 1 Trans 2 Gross 52 lb Tare 25 lb Net 27 lb Press and hold...

Page 20: ...ayed value or key in a new value and press ENTER to accept The indicator returns to the normal weighing mode 3 2 4 Performing Accumulation weighments The accumulator application can be used to record...

Page 21: ...d lists from which you choose one item To help you know where you are in the menu the bargraph at the top of the display is on while the indicator is in the menus and will change appearance according...

Page 22: ...accept the displayed choice If you choose SAVE no or SAVEYES the indicator exits the menu and returns to normal weighing mode OR If you choose CAnCEL the indicator remains in the menu 4 4 USER level m...

Page 23: ...his to enter values for the time h x Hour m x Minute s x Seconds User Time Site ID Seal Date Set Style MMDD4Y MMDD2Y DDMM2Y DDMM4Y y x m x d x Set 12hr 12hr AP 24hr Style h x m x s x Archive Port 1 Pr...

Page 24: ...Month 2 digit Year ddMM4Y Day Month 4 digit Year 4 5 3 Site ID 4 5 4 Seal To exit the menu see Exiting the menus on page 22 Date Set Style MMDD4Y MMDD2Y DDMM2Y DDMM4Y y x m x d x Site ID SitE Use thi...

Page 25: ...ion X X X XX View Firmware PN AWT30 XXXXX View version X X X XX AWT30 XXXXX X X X XX IP Gateway Subnet Mac 1 xx 2 xx 3 xx 4 xx 5 xx 6 xx 1 xx 2 xx 3 xx 4 xx 1 xx 2 xx 3 xx 4 xx 1 xx 2 xx 3 xx 4 xx Opt...

Page 26: ...wo parts Press RIGHT arrow key or LEFT arrow key to toggle the display between the first and second parts of the part number VErSion Use this to view the version of the firmware View Firmware PN View...

Page 27: ...ion card Bus 1 or 2 There are 2 Busses in the ZM505 Card 1 or 2 There can be 2 Cards on each bus in the ZM505 View card description View card version Version Type Bus 1 Card 1 Bus 2 Card 2 Option Enet...

Page 28: ...enu see Exiting the menus on page 22 To upload a configuration file the license number of the Configurator Ztools software must match one of the license numbers in the indicator Contact AWTX Technical...

Page 29: ...ned below 4 7 1 Counter Audit Print Counter Config Calib Port 1 Port 2 USB Column Ticket Column Ticket View number of configurations View number of calibrations Counter Config Calib countEr Use this t...

Page 30: ...olumn or ticket printer Port 2 Under Port 2 choose to print to a column or ticket printer uSb Printing to USB requires that a USB flash drive is connected to the indicator host USB Printing to USB wil...

Page 31: ...isplay Overload Can t fit on display Underload Can t Entry not in valid range Password entry failed Indicator did not reach a stable zero weight within time window set for automated weighing process B...

Page 32: ...n the Supervisor menu are described below SuPEr This is the top item in the Supervisor menu tArE This item appears only if Preset Tares are enabled Use this to enter tare weights for up to 10 Preset T...

Page 33: ...Totals if enabled The message cLr tot will flash on the display Print Select the destination the 200 channel report will be transmitted to Choices are Port 1 Port 2 or USB See a sample report below Ch...

Page 34: ...34 ZM505 Indicator User Instructions Supervisor menu...

Page 35: ......

Page 36: ...A Tel 507 238 4461 Fax 507 238 4195 Email usinfo awtxglobal com www averyweigh tronix com Avery Weigh Tronix UK Foundry Lane Smethwick West Midlands England B66 2LP Tel 44 0 8453 66 77 88 Fax 44 0 121...

Reviews: