background image


C A R E   &   M A I N T E N A N C E  

3

This chapter tells you how to 


clear label jams 


clean the platen roller and printhead 


clean the printer. 

C l e a r i n g   L a b e l   J a m s  

To clear a jam: 

1.


Open the cover.   

2.


Tear the supply and remove the label roll. 

3.


Remove the jammed labels. 

Caution:


Do not

 use sharp or pointed objects to remove labels. It may damage the printer.  

4.


Remove any adhesive that might be on the platen roller.  See “Cleaning the Platen Roller 
and Printhead” for more information. 

5.


Reload the labels.   

6.


Close the cover. 

C l e a n i n g   t h e   P l a t e n   R o l l e r   a n d   P r i n t h e a d  

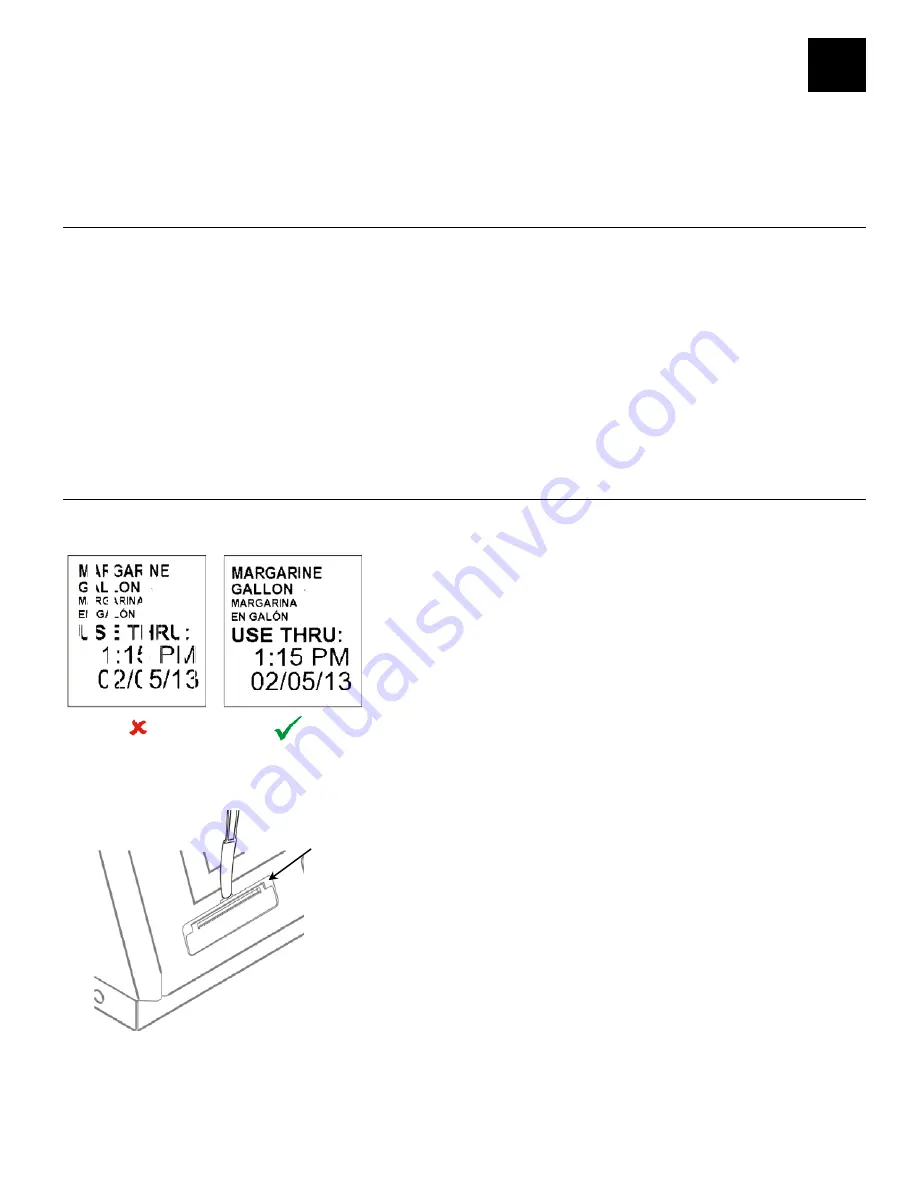
Clean the platen roller and printhead after every five rolls of labels or when you see voids in 
the print.   

1.


Remove any labels. 

2.


Use a plastic knife to remove the supply slot cover. 

S u p p l y  C o ve r  

Care & Maintenance  

3-1


Summary of Contents for Monarch 8417

Page 1: ...Operator s Handbook 2013 Avery Dennison Corp All rights reserved TC9417OH Rev A 13 28028 0 Monarch 9417 Food Freshness System...

Page 2: ...tection against harmful interference when the equipment is operated in a commercial environment This equipment generates uses and can radiate radio frequency energy and if not installed and used in ac...

Page 3: ...e Power Cord Loading Labels Left Printer Loading Labels Right Printer PRINTING LABELS 2 1 About the System Printing Freshness Labels Printing Use First Labels CARE MAINTENANCE 3 1 Clearing Label Jams...

Page 4: ...ii Operator s Handbook...

Page 5: ...loading supplies 2 Printing Labels Printing product labels and Use First labels 3 Care Maintenance Clearing supply jams and cleaning the printer 4 Troubleshooting Common problems and their solutions...

Page 6: ...ecting the Power Cord 1 Plug the power cord into the socket on the side of the printer 6 above 2 Plug the other end of the power cord into a grounded electrical outlet 3 Turn on the printer Press the...

Page 7: ...pen the cover 3 Pull on the supply tab Supply Tab Getting Started 1 3 Note When loading supply open the supply lever as shown above 4 Unlock the supply guide Remove the supply guide from the supply ho...

Page 8: ...supply Lock the supply guide 7 Put the supply tab back 8 Guide the labels along the inside edge and into the slot behind the white roller The printer feeds the supply Note Tear a straight edge on the...

Page 9: ...9 Slide the supply lever next to the supply Close the supply lever 10 Close the cover Getting Started 1 5...

Page 10: ...g Labels Right Printer 1 Turn on the printer Press the power button on the side of the printer 2 Open the cover 3 Pull on the supply tab 4 Unlock the outer supply guide and remove it 1 6 Operator s Ha...

Page 11: ...up on the supply holder 6 Place the outer supply guide on the supply holder and lock it in place 7 Unlock the inner supply guide and move it until it touches the supply Lock it into place 8 Put the s...

Page 12: ...side edge and into the slot The printer feeds the supply Note Tear a straight edge on the supply before feeding it into the printer 10 Slide the supply lever next to the supply and close it 11 Close t...

Page 13: ...th six tabs of product buttons and a Use First button The product category buttons and their tabs of product buttons are color coded so you can easily print freshness labels Select a new category by t...

Page 14: ...d press Enter To print a single label press Enter Note If you have a dual printer your System Administrator can enable the Backup Printer selection option Select the number of labels to print then sel...

Page 15: ...e First category button on the right side of the screen Use First Button 2 Enter the quantity of Use First labels you need to print and press Enter OR Press Enter without entering a quantity to print...

Page 16: ...2 4 Operator s Handbook...

Page 17: ...rp or pointed objects to remove labels It may damage the printer 4 Remove any adhesive that might be on the platen roller See Cleaning the Platen Roller and Printhead for more information 5 Reload the...

Page 18: ...platen roller 7 Snap the cover into place 8 Reload the labels See Loading Labels in Chapter 1 for more information Cleaning the Display Make sure the printer is turned off when cleaning the display U...

Page 19: ...Description 004 005 Supply size is incorrect Reload the correct supplies See Loading Supplies in Chapter 1 for more information 267 271 410 413 Communication error See your System Administrator 703 7...

Page 20: ...4 2 Operator s Handbook...

Page 21: ...upply single printer 13 38 lbs 6 07 kg without supply dual printer Power 100 240V AC 47 to 63Hz input supplies 24V DC 90W to system Operating Limits Operating 32 to 122 F 0 to 50 C Storage 4 to 149 F...

Page 22: ...28028 0 Avery Dennison 170 Monarch Lane Miamisburg OH 45342 1 800 543 6650 In the U S A 1 800 387 4740 In Canada www monarch com...

Reviews: