background image

©

 2010-2015, Avaya Inc.

All Rights Reserved.

Notice

While reasonable efforts have been made to ensure that the

information in this document is complete and accurate at the time of

printing, Avaya assumes no liability for any errors. Avaya reserves

the right to make changes and corrections to the information in this

document without the obligation to notify any person or organization

of such changes.

Documentation disclaimer

“Documentation” means information published by Avaya in varying

mediums which may include product information, operating

instructions and performance specifications that Avaya may generally

make available to users of its products and Hosted Services.

Documentation does not include marketing materials. Avaya shall not

be responsible for any modifications, additions, or deletions to the

original published version of documentation unless such

modifications, additions, or deletions were performed by Avaya. End

User agrees to indemnify and hold harmless Avaya, Avaya's agents,

servants and employees against all claims, lawsuits, demands and

judgments arising out of, or in connection with, subsequent

modifications, additions or deletions to this documentation, to the

extent made by End User.

Link disclaimer

Avaya is not responsible for the contents or reliability of any linked

websites referenced within this site or documentation provided by

Avaya. Avaya is not responsible for the accuracy of any information,

statement or content provided on these sites and does not

necessarily endorse the products, services, or information described

or offered within them. Avaya does not guarantee that these links will

work all the time and has no control over the availability of the linked

pages.

Warranty

Avaya provides a limited warranty on Avaya hardware and software.

Refer to your sales agreement to establish the terms of the limited

warranty. In addition, Avaya’s standard warranty language, as well as

information regarding support for this product while under warranty is

available to Avaya customers and other parties through the Avaya

Support website: 

http://support.avaya.com

 or such successor site as

designated by Avaya. Please note that if You acquired the product(s)

from an authorized Avaya Channel Partner outside of the United

States and Canada, the warranty is provided to You by said Avaya

Channel Partner and not by Avaya.

Licenses

THE SOFTWARE LICENSE TERMS AVAILABLE ON THE AVAYA

WEBSITE, 

HTTP://SUPPORT.AVAYA.COM/LICENSEINFO

 OR

SUCH SUCCESSOR SITE AS DESIGNATED BY AVAYA, ARE

APPLICABLE TO ANYONE WHO DOWNLOADS, USES AND/OR

INSTALLS AVAYA SOFTWARE, PURCHASED FROM AVAYA INC.,

ANY AVAYA AFFILIATE, OR AN AVAYA CHANNEL PARTNER (AS

APPLICABLE) UNDER A COMMERCIAL AGREEMENT WITH

AVAYA OR AN AVAYA CHANNEL PARTNER. UNLESS

OTHERWISE AGREED TO BY AVAYA IN WRITING, AVAYA DOES

NOT EXTEND THIS LICENSE IF THE SOFTWARE WAS

OBTAINED FROM ANYONE OTHER THAN AVAYA, AN AVAYA

AFFILIATE OR AN AVAYA CHANNEL PARTNER; AVAYA

RESERVES THE RIGHT TO TAKE LEGAL ACTION AGAINST YOU

AND ANYONE ELSE USING OR SELLING THE SOFTWARE

WITHOUT A LICENSE. BY INSTALLING, DOWNLOADING OR

USING THE SOFTWARE, OR AUTHORIZING OTHERS TO DO SO,

YOU, ON BEHALF OF YOURSELF AND THE ENTITY FOR WHOM

YOU ARE INSTALLING, DOWNLOADING OR USING THE

SOFTWARE (HEREINAFTER REFERRED TO

INTERCHANGEABLY AS “YOU” AND “END USER”), AGREE TO

THESE TERMS AND CONDITIONS AND CREATE A BINDING

CONTRACT BETWEEN YOU AND AVAYA INC. OR THE

APPLICABLE AVAYA AFFILIATE (“AVAYA”).

Avaya grants You a license within the scope of the license types

described below, with the exception of Heritage Nortel Software, for

which the scope of the license is detailed below. Where the order

documentation does not expressly identify a license type, the

applicable license will be a Designated System License. The

applicable number of licenses and units of capacity for which the

license is granted will be one (1), unless a different number of

licenses or units of capacity is specified in the documentation or other

materials available to You. “Software” means computer programs in

object code, provided by Avaya or an Avaya Channel Partner,

whether as stand-alone products, pre-installed on hardware products,

and any upgrades, updates, patches, bug fixes, or modified versions

thereto. “Designated Processor” means a single stand-alone

computing device. “Server” means a Designated Processor that

hosts a software application to be accessed by multiple users.

“Instance” means a single copy of the Software executing at a

particular time: (i) on one physical machine; or (ii) on one deployed

software virtual machine (“VM”) or similar deployment.

Licence types

Designated System(s) License (DS). End User may install and use

each copy or an Instance of the Software only on a number of

Designated Processors up to the number indicated in the order.

Avaya may require the Designated Processor(s) to be identified in

the order by type, serial number, feature key, Instance, location or

other specific designation, or to be provided by End User to Avaya

through electronic means established by Avaya specifically for this

purpose.

Heritage Nortel Software

“Heritage Nortel Software” means the software that was acquired by

Avaya as part of its purchase of the Nortel Enterprise Solutions

Business in December 2009. The Heritage Nortel Software currently

available for license from Avaya is the software contained within the

list of Heritage Nortel Products located at 

http://support.avaya.com/

LicenseInfo

 under the link “Heritage Nortel Products” or such

successor site as designated by Avaya. For Heritage Nortel

Software, Avaya grants You a license to use Heritage Nortel

Software provided hereunder solely to the extent of the authorized

activation or authorized usage level, solely for the purpose specified

in the Documentation, and solely as embedded in, for execution on,

or for communication with Avaya equipment. Charges for Heritage

Nortel Software may be based on extent of activation or use

authorized as specified in an order or invoice.

Copyright

Except where expressly stated otherwise, no use should be made of

materials on this site, the Documentation, Software, Hosted Service,

or hardware provided by Avaya. All content on this site, the

documentation, Hosted Service, and the product provided by Avaya

including the selection, arrangement and design of the content is

owned either by Avaya or its licensors and is protected by copyright

and other intellectual property laws including the sui generis rights

relating to the protection of databases. You may not modify, copy,

reproduce, republish, upload, post, transmit or distribute in any way

any content, in whole or in part, including any code and software

unless expressly authorized by Avaya. Unauthorized reproduction,

transmission, dissemination, storage, and or use without the express

written consent of Avaya can be a criminal, as well as a civil offense

under the applicable law.

Third Party Components

“Third Party Components” mean certain software programs or

portions thereof included in the Software or Hosted Service may

contain software (including open source software) distributed under

third party agreements (“Third Party Components”), which contain

terms regarding the rights to use certain portions of the Software

(“Third Party Terms”). As required, information regarding distributed

Linux OS source code (for those products that have distributed Linux

OS source code) and identifying the copyright holders of the Third

Party Components and the Third Party Terms that apply is available

in the products, Documentation or on Avaya’s website at: 

http://

support.avaya.com/Copyright

 or such successor site as designated

by Avaya. You agree to the Third Party Terms for any such Third

Party Components.

Preventing Toll Fraud

“Toll Fraud” is the unauthorized use of your telecommunications

system by an unauthorized party (for example, a person who is not a

corporate employee, agent, subcontractor, or is not working on your

company's behalf). Be aware that there can be a risk of Toll Fraud

associated with your system and that, if Toll Fraud occurs, it can

Summary of Contents for Virtual Services Platform 9000

Page 1: ...Installing the Avaya Virtual Services Platform 9000 Release 4 1 NN46250 304 Issue 07 01 October 2015...

Page 2: ...city is specified in the documentation or other materials available to You Software means computer programs in object code provided by Avaya or an Avaya Channel Partner whether as stand alone products...

Page 3: ...problem with your Avaya product or Hosted Service For a list of support telephone numbers and contact addresses go to the Avaya Support website http support avaya com or such successor site as design...

Page 4: ...10 chassis installation 28 Chassis installation time requirements 28 Unpacking the shipping container 29 Installing the installation shelf 30 Reducing the chassis weight 32 Lifting the chassis 34 Secu...

Page 5: ...hassis operations 86 Determining the minimum number of power supplies 86 Installing a new chassis 87 Powering up the system 92 Protecting modules 93 Removing external storage devices from the CP modul...

Page 6: ...Platform 9000 NN46250 100 for a list of the documentation for this product Training Ongoing product training is available For more information or to register you can access the website at http avaya l...

Page 7: ...t up to date documentation product notices and knowledge articles You can also search for release notes downloads and resolutions to issues Use the online service request system to create a service re...

Page 8: ...e 5 Select any of the following to narrow your search Whole Words Only Case Sensitive Include Bookmarks Include Comments 6 Click Search The search results show the number of documents and instances fo...

Page 9: ...g the Avaya Virtual Services Platform 9000 NN46250 304 for Release 4 1 Features There are no feature related changes in the current document in Release 4 1 Other changes There are no other changes Oct...

Page 10: ...is to a Virtual Services Platform 9010 AC chassis if the Virtual Services Platform 9012 runs a software version earlier than Release 3 4 For more information about hardware and software compatibility...

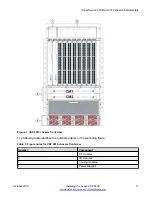
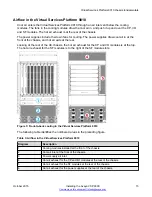
Page 11: ...e preceding figure Table 1 Figure notes for VSP 9010 chassis front view Number Component 1 CP modules 2 I O modules 3 Cooling modules 4 Power supplies Virtual Services Platform 9010 chassis fundamenta...

Page 12: ...and eight power switches that connect the main power to the corresponding power supply bays The following figure shows the rear view of the AC input chassis Figure 2 VSP 9010 AC chassis rear view The...

Page 13: ...r more information about the power consumption of each module see Component input power on page 99 If the chassis operates in a redundant power configuration you can upgrade or replace power supplies...

Page 14: ...If you use n n redundancy and plug four power supplies in to power feed A and the remaining four power supplies in to power feed B this configuration gives you power feed redundancy Ensure that each...

Page 15: ...ir exhaust for the SF modules is to the right of the SF module slots Figure 3 Front to back cooling in the Virtual Services Platform 9010 The following table identifies the numbered areas in the prece...

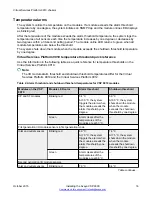
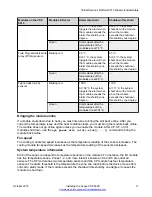
Page 16: ...Virtual Services Platform 9010 and the Virtual Services Platform 9012 Table 4 Alarm threshold and shutdown threshold temperatures for VSP 9010 modules Modules on the VSP 9010 Module LED color Alarm th...

Page 17: ...e If a module shuts down due to heat you must intervene to bring the slot back online After you correct the temperature issue and the heat condition clears you must bring the module back online The mo...

Page 18: ...generation I O module on the left and the PIM component of a first generation I O module on the right Figure 4 Heat sensor locations in a first generation I O module The following figure shows the ba...

Page 19: ...modules with the following command show sys info temperature Note The I O module alarm threshold and shutdown threshold temperatures differ for the Virtual Services Platform 9010 and the Virtual Servi...

Page 20: ...9 47 90 95 7 FA 42 50 66 66 42 105 110 8 FPGA 67 51 52 55 53 52 55 57 61 67 51 90 95 8 FA 39 50 72 72 39 105 110 The following table describes the output for the show sys info temperature Table 6 Outp...

Page 21: ...Specifies the FPGA or FA temperature when exceeded by one degree that causes the system to shutdown the module by removing power from the slot Virtual Services Platform 9010 show sys info output On t...

Page 22: ...RONT FAN 2 2 OK FRONT FAN 2 3 OK FRONT FAN 2 4 OK Use the data in the following table to understand the output for the show sys info command on the Virtual Services Platform 9010 Value Description FRO...

Page 23: ...as Normal Highest Temperature For VSP 9010 no rear fan zone exists as a result the temperature always reports as 0 C Fan Info FAN 1 Specifies the module type under card type FAN 2 Specifies the module...

Page 24: ...ments depend on your hardware configuration Control Processor module The 9080CP module performs the following tasks runs all high level protocols for example Border Gateway Protocol BGP and Open Short...

Page 25: ...independent and you can configure either building phase to any circuit Space requirements The installation site must provide sufficient free space around the chassis to ensure proper ventilation and...

Page 26: ...sis cover panel kit The cover panel kit includes the cable management cover with two mounting brackets and screws and the air inlet cover with mounting bracket Screws and hardware The hardware require...

Page 27: ...nitor the results of startup diagnostics Rack mounting hardware The hardware to mount the chassis in an equipment rack depends on your rack type Install the device in a standard EIA 310D 19 inch or ET...

Page 28: ...nd damaged items do not install the chassis Call the Avaya Technical Solutions Center in your area Verify that the items in the shipping container match those on the shipment packing list Verify that...

Page 29: ...kit and a cover panel kit About this task The installation kit includes extra screws and bolts to support a variety of installation options You do not need to use all of the hardware provided If the...

Page 30: ...rest and then mark that location and the location of the rail guide holes on the front of the rack Start at the bottom of the rack and install subsequent chassis above it Note Fold or trim off the mar...

Page 31: ...k support 4 Insert a Phillips screw through each installation shelf mounting hole and into the corresponding hole in the rack 5 If using hex nuts add a nut to each screw and then tighten using a hex w...

Page 32: ...l additional components before you mount the chassis in the rack All unused slots must contain filler modules If you remove filler modules to reduce the chassis weight ensure you reinstall them after...

Page 33: ...then grasp the two handles to gently pull the module out and away from the chassis Warning The cooling module is heavy Use both hands to support the weight of the module Virtual Services Platform 9010...

Page 34: ...it Always use a mechanical lift when one is available Ensure you have at least three people to lift the chassis Use two people to lift the chassis at the sides and a third person to support the chassi...

Page 35: ...is mounting bracket with the holes on either side of the vertical rack support 2 Ensure that the hole pairs on either side of the rack vertical supports match horizontally 3 Insert a Phillips screw th...

Page 36: ...nfiguration The rack mounting brackets for the flush mount configuration are installed at the factory before the chassis ships Select the configuration that best meets your floor plan room layout or r...

Page 37: ...screwdriver to tighten the screws Attaching the cable management Use this procedure to attach the cable management brackets and cable management cover to the top of the Virtual Services Platform 9010...

Page 38: ...n the lower cable management bracket to the holes on the top of the chassis front 4 Use the screws to attach the bracket to the chassis 5 Align the tabs of each side of the cable management cover with...

Page 39: ...k Do not attach this cover before you mount the chassis in a rack Procedure 1 Align the holes in the card guide lead in bracket with the holes in the chassis 2 Use the screws to attach the bracket to...

Page 40: ...ng bracket and with the keyholes on the chassis 4 Insert the hooks into the slots and keyholes to secure the cover to the chassis Virtual Services Platform 9010 chassis October 2015 Installing the Ava...

Page 41: ...e AC chassis Procedure 1 Insert the L shaped ends of the retainer into the holes on each side of the power switch 2 Push the L shaped ends up to fully engage the retainer Virtual Services Platform 901...

Page 42: ...connect power and network cables to the system Before you begin Ensure you have a two hole cable lug that fits over the grounding studs Ensure you have a nut and a locking washer for the grounding stu...

Page 43: ...assis As shown in the following figure the grounding studs are located on the bottom right of the chassis rear 3 Bond the chassis ground cable to the single point ground window Job aid The following f...

Page 44: ...ssis frame ground studs 4 AC power inlets 5 6 AWG green yellow ground wire not provided 6 Single point ground The following figure shows the ESD ground strap input location on the front of the chassis...

Page 45: ...nt The following figure shows the ESD ground strap input location on the rear of the chassis Virtual Services Platform 9010 chassis installation October 2015 Installing the Avaya VSP 9000 45 Comments...

Page 46: ...dicate the progress of the self test Upon successful completion of the self test within 5 to 15 minutes after you apply power depending on the module type the I O module Online LED transitions from am...

Page 47: ...ds on the specific hardware configuration and redundancy needs Virtual Services Platform 9012 chassis introduction The front of the Virtual Services Platform 9012 chassis has ten slots for I O modules...

Page 48: ...cooling modules Six separate IEC 60320 C20 AC power inlets and six power switches exist which connect the main AC power to their corresponding power supply bays The following figure shows the rear vie...

Page 49: ...of the chassis and plug the power plugs in the corresponding power inlets at the back of the chassis The Virtual Services Platform 9012 chassis does not support DC input power supplies To configure a...

Page 50: ...ower shelf which comprises of AC power supplies 1 2 and 3 and a B power feed to the B power shelf which comprises of AC power supplies 4 5 and 6 Apply this power configuration protection against simul...

Page 51: ...he other slots provide additional bandwidth Important Avaya recommends that you install SF modules in both SF1 and SF4 to provide redundancy You must have a functioning SF module in at least one of th...

Page 52: ...modules for the SF modules at the back of the chassis The cooling air flows from front to back to cool the SF and auxiliary modules You install the cooling modules for the I O and CP modules at the fr...

Page 53: ...iption 1 I O module air inlet 2 Power supply fan air inlet 3 I O module air exhaust 4 9012FC or 9012FCHS cooling modules 5 Switch Fabric module air inlet 6 Airflow left to right Virtual Services Platf...

Page 54: ...in second generation mode or first generation modules in first generation mode on the front right side of the Virtual Services Platform 9012 The 9012 cooling modules provide air movement and have an a...

Page 55: ...fans exist in each 9012RC cooling module and pull air from front to back The platform polls all Switch Fabric module sensors and adjusts the 9012RC fan speed accordingly Note Do not place the Virtual...

Page 56: ...irtual Services Platform 9010 and the Virtual Services Platform 9012 Table 10 Alarm threshold and shutdown threshold temperatures for VSP 9012 modules Modules on the VSP 9012 Module LED color Alarm th...

Page 57: ...e If a module shuts down due to heat you must intervene to bring the slot back online After you correct the temperature issue and the heat condition clears you must bring the module back online The mo...

Page 58: ...generation I O module on the left and the PIM component of a first generation I O module on the right Figure 14 Heat sensor locations in a first generation I O module The following figure shows the ba...

Page 59: ...96 The system monitors the temperature every 30 seconds and displays the temperature on all the modules with the following command show sys info temperature Note The I O module alarm threshold and shu...

Page 60: ...9 57 57 53 59 51 90 95 10 FA 41 49 64 64 41 105 110 The following table describes the output for the show sys info temperature command Table 12 Output for the show sys info temperature command Value D...

Page 61: ...A temperature when exceeded by one degree that causes the system to shutdown the module by removing power from the slot Virtual Services Platform 9012 show sys info output On the Virtual Services Plat...

Page 62: ...NORMAL Mode Status Normal Highest Temperature 40 C Fan Info Tray CardType Serial Part IO FAN 1 9012FCHS LBNNTMRJ000172 EC1411004 E6 IO FAN 2 9012FCHS LBNNTMRJ00015T EC1411004 E6 SF FAN 1 9012RC LBNNTM...

Page 63: ...t available on this slot FA Highest Temperature This information applies only to second generation modules Specifies the temperature of the FA sensor located on the slice A value of indicates that thi...

Page 64: ...the rack If you place each Virtual Services Platform 9012 in a row from left to right the chassis to the left discharges hot air into the cool intake of the chassis to the right To optimize airflow s...

Page 65: ...vices Figure 17 Data center floor plan of hot and cold aisles The following table describes the layout of the data center in the preceding figure Table 13 Data center layout Diagram Description 1 Chas...

Page 66: ...the right This installation does not optimize cool airflow Optimizing cooling in a data center To optimize left to right cooling perform the following tasks Increase the space between each Virtual Ser...

Page 67: ...hassis 3 Front of VSP 9012 chassis 4 Baffle 5 7 Hot aisles 6 Cold aisle 8 to 13 Other equipment front to back cooling Other cooling considerations This table offers suggestions for other cooling consi...

Page 68: ...management can decrease the capacity of the cooling modules For instance the following diagram shows how cable management blocks two out of four fans in a row As a result the cooling module can only...

Page 69: ...ithin the specified range Important To ensure efficient cooling both the air intake left side of the chassis and air exhaust right side of the chassis require a minimum of 6 inches 152 4 mm of distanc...

Page 70: ...d to mount the chassis in a rack depends on your rack type 12 Phillips head screws 12 clip nuts Mount the chassis to a rack rail Use the clip nuts if necessary 4 Phillips head screws 4 hex nuts Mount...

Page 71: ...k type You need a Phillips screwdriver to install the Virtual Services Platform 9012 chassis in a standard rail type equipment rack if using Avaya supplied screws Install the device in standard EIA 31...

Page 72: ...container match those on the shipment packing list Verify that you have all other required hardware About this task Warning Only trained service personnel must perform the procedures in this section...

Page 73: ...the installation shelf The installation shelf is an optional item used for installation of the chassis in a rack You can mount a chassis on top of another Virtual Services Platform 9000 chassis instea...

Page 74: ...s for your specific rack model 3 Place the installation shelf at the mark on the rack inside the rails Hold the installation shelf in position and then align the mounting rail with the two holes on ea...

Page 75: ...d to reduce the risk of personal injury or equipment damage Procedure 1 Remove the 10 I O filler modules from the front of the chassis 2 Remove the two cooling modules from the front of the chassis Vi...

Page 76: ...ning the 2 captive screws grasping the two handles and gently pulling the module out and away from the chassis Virtual Services Platform 9012 chassis October 2015 Installing the Avaya VSP 9000 76 Comm...

Page 77: ...in that holds it in place while gently pulling the handle on the module to move it out and away from the chassis Virtual Services Platform 9012 chassis installation October 2015 Installing the Avaya V...

Page 78: ...three people to lift Always use a mechanical lift when one is available Before you begin Important Reduce the weight of the chassis as much as possible before you lift it Always use a mechanical lift...

Page 79: ...with the holes on either side of the vertical rack support 2 Ensure that the 7 hole pairs on either side of the rack vertical supports match horizontally 3 Insert 4 Phillips screws through each hole...

Page 80: ...nt Do not attach any cables until after the bracket installation Procedure 1 Attach the three Z brackets to the vertical cable bracket as shown below using 6 of the screws provided Nuts are not requir...

Page 81: ...cable management assembly to the top middle and bottom screw positions of the left flange and rail Virtual Services Platform 9012 chassis installation October 2015 Installing the Avaya VSP 9000 81 Co...

Page 82: ...install power supplies or connect power and network cables to the system Before you begin Ensure you have a two hole cable lug that fits over the grounding studs Ensure you have a nut and a locking w...

Page 83: ...of the back of the chassis 3 Bond the chassis ground cable to the single point ground window Job aid The following figure shows an example of how to attach the chassis ground cable to the rack ground...

Page 84: ...Figure 21 Rack grounding strip example Virtual Services Platform 9012 chassis October 2015 Installing the Avaya VSP 9000 84 Comments on this document infodev avaya com...

Page 85: ...ch the port and module LEDs display various patterns to indicate the progress of the self test Upon successful completion of the self test within 5 to 15 minutes after you apply power depending on the...

Page 86: ...ge 99 About this task To determine how many power supplies you need you can also download ERS 8000 VSP 9000 Power Supply Calculator NN48500 519 from the System Management Planning section of the Virtu...

Page 87: ...module in SF1 are running and also that the first CP module displays at the console login prompt and then insert the second CP module in slot 2 It can take several minutes for the CP module in slot 2...

Page 88: ...14 14 00 22 909 0x00034595 00000000 GlobalRouter SW INFO VSP 9000 System Software Release 3 4 5 0_B002 CP1 12 10 14 14 00 24 991 0x00010704 00000000 GlobalRouter HW INFO Waiting for CAN initializatio...

Page 89: ...10 14 14 00 33 481 0x00300604 00000000 GlobalRouter SLAMON INFO slamonLoop Entering main loop CP1 12 10 14 14 00 58 561 0x00264503 00000000 GlobalRouter SW INFO Slot SF1 IMAGE SYNC Running pre instal...

Page 90: ...4 14 13 03 140 0x00264503 00000000 GlobalRouter SW WARNING Slot 2 Reset due to image sync upgrade CP1 12 10 14 14 13 05 417 0x0001080e 00000000 GlobalRouter HW WARNING Reset Detected for module 9080CP...

Page 91: ...2 10 14 17 49 13 898 0x00010830 00000000 GlobalRouter HW INFO Detected 9090SF module Serial SSCHJW02YP in slot SF 4 CP1 12 10 14 17 49 13 898 0x0001081d 00400010 24 DYNAMIC CLEAR GlobalRouter HW INFO...

Page 92: ...14 17 56 49 802 0x00264532 00000000 GlobalRouter SW INFO Slot 9 FPGAs updated Rebooting CP1 12 10 14 17 56 49 828 0x00264503 00000000 GlobalRouter SW WARNING Slot 9 Reset due to image sync upgrade CP1...

Page 93: ...supplies could stay or enter current limit based on the system load condition until you power on a sufficient number of power supplies to guarantee the system powers on 7 Verify the power LEDs on eac...

Page 94: ...e clearance between the insertion lever and the gasket on adjacent modules during insertion or extraction Do not stack modules one on top of the other when you move them Do not leave slots open Fill a...

Page 95: ...bled To disable PCAP use the no pcap enable command Debugging features are enabled The debug config file and trace logging flags must be disabled which is the default Use the show boot config flags co...

Page 96: ...automatically recognizes them The devices are accessible within seconds after insertion After you insert the external Compact Flash enable logging to the external Compact Flash with the logging logTo...

Page 97: ...Resetting the Avaya Virtual Services Platform 9000 October 2015 Installing the Avaya VSP 9000 97 Comments on this document infodev avaya com...

Page 98: ...Input current 13 3 A 100 VAC 11 2 A 120 VAC 11 8 A 200 VAC 9 9 A 240 VAC Operating frequency range 47 63 Hz 47 63 Hz Input volt ampere VA 1445 VA 2325 VA Efficiency 85 minimum 90 typical 88 minimum 93...

Page 99: ...1 900 W for a pair of 9010CM cooling modules that operate at full speed Virtual Services Platform 9010 chassis only The Virtual Services Platform 9012 reserves the following power requirements 80 watt...

Page 100: ...e slots 2 3 5 and 6 50 170 9012FC Side cooling module Maximum fan speed 150 512 9012RC Fabric cooling module Maximum fan speed 65 222 9012FCHS cooling module Maximum fan speed Note If you use second g...

Page 101: ...e Virtual Services Platform 9010 chassis does not comply with Network Equipment Building Standard NEBS Level 3 as specified in SR3580 Environmental specifications The following environmental specifica...

Page 102: ...N 61000 3 3 1995 A1 2001 A2 2005 Australia New Zealand AS NZS CISPR 22 2006 Class A Japan VCCI V3 97 04 Class A Electromagnetic immunity The Virtual Services Platform 9010 chassis conforms to the foll...

Page 103: ...nd midplane and cooling modules 183 lb 83 kg Network Equipment Building Standard The Virtual Services Platform 9012 chassis does not comply with Network Equipment Building Standard NEBS Level 3 as spe...

Page 104: ...386 v1 3 3 EN55024 1998 A1 2001 A2 2003 EN 61000 3 3 1995 A1 2001 A2 2005 Australia New Zealand AS NZS CISPR 22 2006 Class A Japan VCCI V3 97 04 Class A Electromagnetic immunity The Virtual Services...

Page 105: ...1 Canada CSA 22 2 No IEC 60950 1 Europe ENIEC 60950 1 CE Marking Australia New Zealand AS NZS IEC 60950 1 Mexico NOM VSP 9012 chassis specifications October 2015 Installing the Avaya VSP 9000 105 Comm...

Page 106: ...6 9080CP CP module EC1404008 E6 9012QQ 2 12 QSFP I O module EC1404009 E6 9095SF Switch Fabric module for the VSP 9010 chassis EC1405A01 E6 9006AC power supply EC1411001 E6 9012FC Side cooling module f...

Page 107: ...010 Chassis Cover Panel Kit Includes the cable management cover and air inlet cover EC1411016 E6 VSP 9024XL Ventilation Cover for VSP 9010 chassis October 2015 Installing the Avaya VSP 9000 107 Commen...

Page 108: ...ionnement de cet quipement dans une zone r sidentielle risque de causer des interf rences nuisibles auquel cas l utilisateur devra y rem dier ses propres frais Warning WARNUNG Dies ist ein Ger t der K...

Page 109: ...device Electrostatic alert ELEKTROSTATIKWARNUNG Elektronische Schaltkreise k nnen durch elektrostatische Entladung besch digt werden Ber hren Sie elektronische Hardware nur wenn Sie ein Erdungsarmban...

Page 110: ...c cables are connected to a light source Danger DANGER Risques de blessure oculaire par lumi re laser L quipement de fibres optiques peut mettre une lumi re laser ou infrarouge nuisible vos yeux Ne re...

Page 111: ...rdare mai all interno di una porta di connessione o una fibra ottica Tenere sempre presente che i cavi a fibra ottica sono collegati a una sorgente luminosa Lifting chassis danger statement Danger Ris...

Page 112: ...rlo Electric shock multiple cord danger statement Voltage Risk of injury by electric shock This unit has more than one power supply cord Disconnect all power supply cords before servicing to avoid ele...

Page 113: ...onecte todos os cabos de alimenta o antes da manuten o para evitar choque el trico Voltage Riesgo de sufrir descargas el ctricas Esta unidad tiene m s de un cable de suministro de alimentaci n Descone...

Page 114: ...f the chassis I O cooling module 9012FC The I O cooling module is a hot swappable fan tray used to cool the I O and CP modules in the Virtual Services Platform 9012 I O cooling module 9012FCHS The I O...

Page 115: ...odule connects to all I O and Control Processor modules You can install 6 SF modules in Virtual Services Platform 9000 using 5 SF modules plus 1 as a hot backup The SF modules comprise a data path and...

Reviews: