background image


?


Electrical Connection 


?


This  freezer  should be properly grounded for your safety.  The power cord of this  freezer is 
equipped with a three-prong plug which mates with standard three prong wall outlets to minimize 
the possibility of electrical shock. 

?


Do not under any circumstances cut or remove the third ground prong from the power cord 
supplied. 

?


Never use an extension cord to connect power to the unit. 

?


Never use a two -prong gr ounding adapter. 

?


Where a two-prong wall receptacle is encountered, contact a qualified electrician to have it replaced 
with a 3-prong receptacle in accordance with applicable electrical codes. 

?


This freezer requires a standard 115/120 volts a.c.~/60hz elect rical outlet with three-prong ground. 

?


The cord should be secured behind the  freezer and not left exposed or dangling to prevent 
accidental injury. 


?


Door Lock 

Your unit is provided with a lock and key combination. 
The keys are located inside the plastic bag that contains the User’s Guide. Insert the key into the lock 
and turn it counterclockwise to unlock the door. To lock the door do the reverse operation making sure 
metal pin is engaged completely. Remove the key and place it in a secure place for safekeeping. 


?


Reversing the Door Swing of Your Appliance 

This appliance has the capability of either opening the door from  the left or right side. The unit is 
delivered to you with the door opening from the left side. Should you desire to reverse the opening 
direction, please call customer service for reversal instructions. 


OPERATING YOUR FREEZER 


?


Temperature Control 

?

  The temperature control is located underneath the countertop on the front side of the cabinet. 

?

  The first time you turn the unit on set the temperature control to the maximum position, using the 

thermostat key provided. (If the key is misplaced you may also use a coin or flathead screwdriver.)  

?

  The range of the temperature control is from position" 1 " the warmest to “6  the coldest. After 24 to 48 

hours, adjust the temperature control to the setting that best suites your needs. The setting of “3” 
should be correct for home or office freezer use. 

?

  To turn the freezer off, turn the temperature control to "OFF” 

NOTE: 

?


Turning the temperature control to "OFF" position stops the cooling cycle but does not shut off 
the power to the freezer. 

?


If the unit is unplugged, power lost, or turned off; you must wait 3 to 5 minutes before restarting 
the unit. If you attempt to restart before this time delay, the freezer will not start. 


?


Defrosting Your Freezer 

?

  When? For the most efficient operation and minimum energy consumption, defrost the freezer 

compartment when the frost on the freezer walls is excessive or ¼ inch thick. 

?

  How? To start defrosting, turn the temperature control to "OFF", unplug the freezer,  remove the food 

and baskets . After the frost or ice has melted, discard the melted water and dry up the interior of 
refrigerator. Then the freezer can  be restarted by a turning its thermostat to the desired setting. 


?

Warning

?


Improper use of the grounded plug can result in the risk of electrical shock. If the power cord is 
damaged, have it replaced by an authorized Avanti Products service center. 


Summary of Contents for VM319W

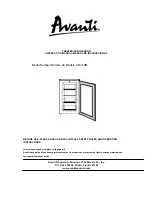
Page 1: ...LL SAFETY RULES AND OPERATING INSTRUCTIONS La secci n en espa ol empieza en la p gina 14 Avanti has a policy of continuous improvement on its products and reserves the right to change materials and sp...

Page 2: ...ore Dealer Name __________________________________ ______________________________________ City State Zip Occupation __________________________________ As Your Primary Residence Do You Area Code Phone...

Page 3: ...y correspondence or service calls concerning your freezer If you received a damaged freezer immediately contact the dealer or builder that sold you the freezer Save time and money Before you call for...

Page 4: ...4 PARTS AND FEATURES 1 ADJUSTABLE THERMOSTAT 2 REMOVABLE DRAWERS 3 LEVELING LEGS 4 REVERSIBLE DOOR 5 SECURITY LOCK...

Page 5: ...__________________________________ 7 Temperature Control__________________________________________________ 7 Defrosting Your Freezer _______________________________________________ 7 The Freezer Compa...

Page 6: ...the freezer to the power source let it stand upright for approximately 2 hours This will reduce the possibility of a malfunction in the cooling system from handling during transportation Clean the int...

Page 7: ...all customer service for reversal instructions OPERATING YOUR FREEZER Temperature Control The temperature control is located underneath the countertop on the front side of the cabinet The first time y...

Page 8: ...ace frozen food into the freezer as quickly as possible after purchase If there are instructions on the packet carefully follow these instructions regarding storage times The freezer door is susceptib...

Page 9: ...heat producing appliances or heating ducts and out of the direct sunlight Let hot foods cool to room temperature before placing in the freezer Overloading the freezer forces the compressor to run long...

Page 10: ...door is open too often The door is not closed completely The temperature control is not set correctly The door gasket does not seal properly The freezer does not have the correct clearances Vibration...

Page 11: ...r you Just call us toll free AVANTI PRODUCTS CUSTOMER SERVICES Product Information 800 323 5029 Whatever your questions are aboutour products help is available Part Orders 800 220 5570 You may order p...

Page 12: ...or shelves door rails and or door supports Chest freezer lid liners Vegetable crispers Light bulbs and or plastic housing Plastic cabinet liners Punctured evaporator that voids the warranty on the com...

Page 13: ...13 Wiring Diagram...
Page 14: ...lidad de malfuncionamiento en el sistema de enfriamiento por el manipuleo durante el transporte Limpie la superficie interior con agua tibia usando un trapo suave Instalaci n de su congelador Ubique s...

Page 15: ...n de cerradura y llave Las llaves 2 est n dentro de la bolsa pl stica junto al manualde instrucciones Introduzca la llave en la cerradura y g rela hacia la izquierda para abrir la puerta Para cerrarla...

Page 16: ...litro de agua Lave la canasta de almacenaje con un detergente suave Las partes externas de su congelador deben ser limpiadas con un detergente suave y agua tibia ADVERTENCIA Aseg rese de desconectar e...

Page 17: ...problema antes de llamar al servicio t cnico GUIA PARA SOLUCIONAR PROBLEMAS PROBLEMA SOLUCI N Su electrodom stico no funciona No est conectado a la corriente el ctrica El interruptor salt o se quem u...

Reviews: