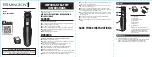
6(12)
Never move or raise an attachment that has not been locked.
Step 1:
•
Lift the quick attach plate locking pins up and turn them backwards into
the slot so that they are locked in the upper position.
•
Ensure that the hydraulic hoses are not in the way during installation.
Step 2:
•
Turn the quick attach plate hydraulically to an obliquely forward position.
The angle between the loader front plate and attachment coupling should
be about as shown in the adjacent picture.
•
Drive the loader onto the attachment. If your loader is equipped with a
telescopic boom, you can utilise this.
•
Depending on the storage of the trimmer and the loader model, the
mounting may need to be assisted by hand. Drive the loader as close to
the quick attach plate as possible, and tilt the loader plate more to help
the mounting. It is advisable to store the attachment in a way that the
quick attach brackets can be reached by the loader.
Step 3:
•
Turn the boom control lever left to turn the bottom section of the quick
attach plate onto the attachment.
•
Lift the boom slightly – pull the boom control lever backward to raise the
attachment off the ground.
•
Turn the boom control lever further left so that the automatic locking of
the attachment triggers the locking pins.
Before moving or raising the attachment, ensure that the locking
pins are in the lower position and come through the fasteners on
both sides.
Do not use the automatic return of the locking pins at a height of over a half metre. If
the locking pins do not return to the normal position when the front plate is tilted, do
not raise the attachment any more. Lower the attachment on the ground and secure
the locking manually.
When you have finished working with the edge trimmer, lower it on an even surface, where it cannot move by
accident. Prevent the unintended movement of the trimmer by placing it e.g. on a palette or blocks of wood in
a way, that the cutting blade will not touch the ground.