background image


12

5.0     Operating the AVT-3420 

 
Operating the AVT-3420 is intuitive and easily learned. The operation at the unit 
itself is accomplished via the buttons mounted within the case. Although easily 
learned due the clear labeling of the functions, it should be understood that 
operating the unit via these buttons is also a somewhat limited way to control it 
because all functions are not available from these buttons. 
 
Since virtually all users will operate the unit via the remote control to gain control 
over most of the functions, it’s recommended that you take the time to discover 
where the various buttons are located on the remote by looking at the actual 
remote and comparing it to the diagram above. 
 
Like the manual controls on the unit, the labeling is clear for the majority of the 
functions on the remote control. Pressing the c/- buttons is rather 
intuitive since pressing the + button will obviously result in increasing the channel 
number and pressing the - button will select a lower channel. The use of the 
volume control buttons, the numeric channel select buttons and the input 
selection button should also be clear. 
 

5.1     Menu Navigation 

 
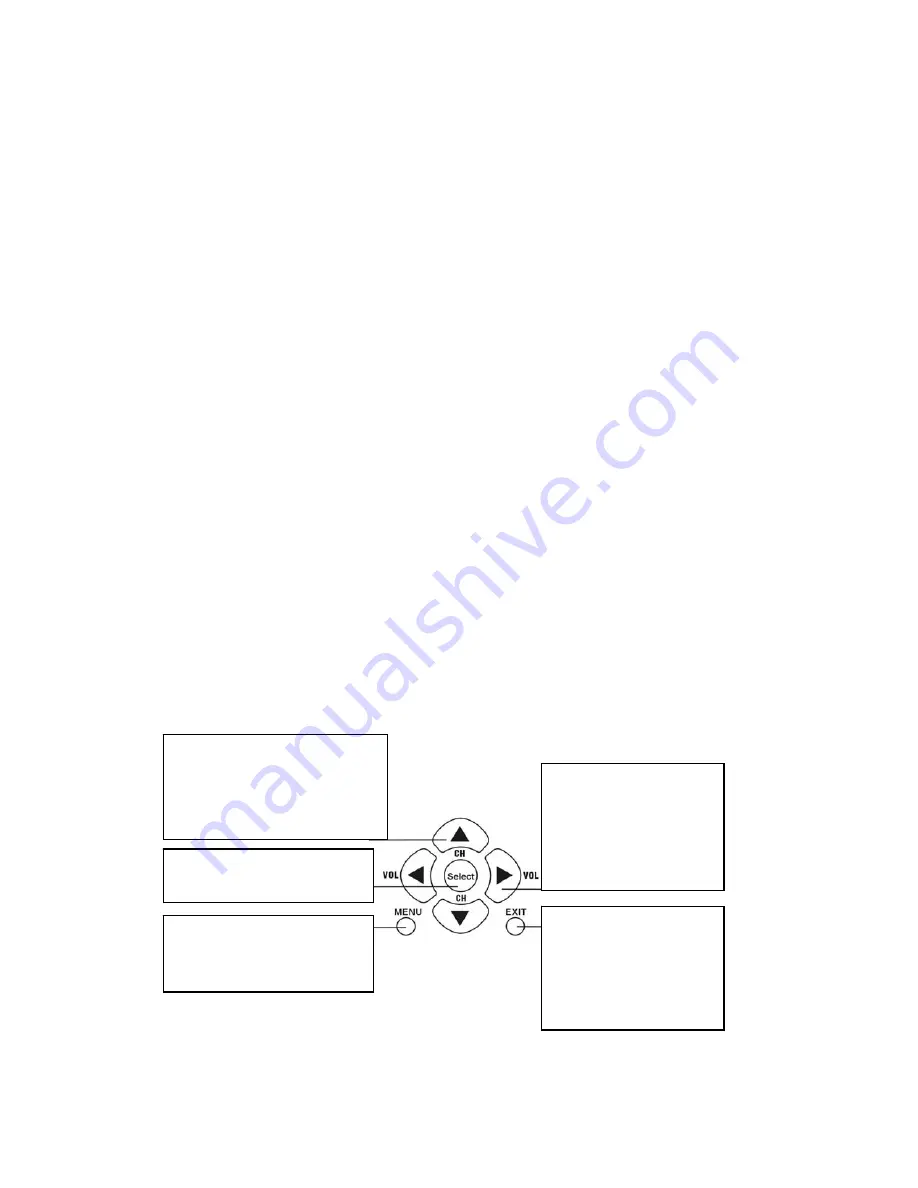
Using the Up and Down arrow keys on the remote, you can navigate to any of 
the items you desire. Once there, press the Select Button to indicate to the AVT-
3420’s microprocessor that you wish to change or adjust the function you have 
highlighted. You then use the Left and Right arrow buttons to actually make the 
adjustment. (The left arrow button decreases the value and the right arrow 
increases the value.) Pressing the Exit button returns the unit to normal 
operation. 


(2)

  Use Up and Down 

Arrow Buttons to 
highlight the function you 
wish to adjust or change. 

(3)

  Select Function to 

Adjust. 

(1)

  Press the Menu 

Button to start the 
Process. 

(4)

  Press the Left 

and Right Arrow 
Buttons to make 
the actual 
adjustment. 

(5)

  Press the Exit 

Button when you 
have finished with 
the changes or 
Adjustments. 

Summary of Contents for AVT-3420

Page 1: ...AV Toolbox Instruction Manual AVT 3420 Video Scaler...

Page 2: ...2...

Page 3: ...0 Introduction 4 2 0 Specifications 6 3 0 Package Contents 7 4 0 Connecting the Hardware 8 5 0 Operating The Unit 12 6 0 Troubleshooting 16 7 0 Limited Warranty 17 8 0 Regulatory Compliance 18 9 0 Co...

Page 4: ...quential damages arising from its use It is the responsibility of the user of the hardware to check that it is suitable for his her requirements and that it is installed correctly All rights reserved...

Page 5: ...366x768 1280x1024 1280x768 1024x768 Full RF Spectrum Coverage 125 CATV 69 Off Air 9 Channel Preview of TV Programming 16 10 16 9 5 4 and 4 3 Aspect Ratio Support PIP Picture in Picture Function Full F...

Page 6: ...1680x1050 1440x900 1366x768 1280x1024 1280x768 1024x768 Human Interface Device Control Via Top Mtd Buttons IR Remote Environmental Operating Temperature 0 to 40 C 32 to 104 F Operating Humidity 20 to...

Page 7: ...l Mtg Stand 1x Remote Control 1x HD 15 VGA to 9 Pin Cable 1x 3 5 mm Stereo Audio Cable 1x AC Power Adapter 1x Operations Manual Note Please retain the original packing material should the need ever ar...

Page 8: ...8 4 0 CONNECTING THE HARDWARE Please study the drawings below and become familiar with the inputs outputs and control locations on the AVT 3420...

Page 9: ...he Power to the AVT 3420 and to the CRT or LCD Press the Input Source button on the AVT 3420 the remote control or the OSD to select the input 4 2 Connecting the AVT 3420 to a Computer and Antenna Con...

Page 10: ...420 the remote control or the OSD select CVBS as the input type Press the Play or Start button on the external device and an image should appear on the previously attached monitor 4 4 Connecting the A...

Page 11: ...ion and operation of the various buttons Volume Control Channel Selection Power TV PC Mode Input Selection Volume Control Exit From Menu Numeric Keypad RCL Last Channel Recall PIP Key Picture In Pictu...

Page 12: ...ive since pressing the button will obviously result in increasing the channel number and pressing the button will select a lower channel The use of the volume control buttons the numeric channel selec...

Page 13: ...ntrast parameter COLOR Press or to adjust the Color parameter TINT Press or to adjust the Tint Parameter SHARPNESS Press or to adjust the Sharpness parameter TV FUNCTION OPERATION CATV AIR CHANNEL EDI...

Page 14: ...will support your resolution selection If you make a selection that is not supported by your monitor the picture will disappear and it will be difficult to recover from the error INPUT SOURCE OPERATIO...

Page 15: ...available in the AVT 3420 OSD Button When you press this button the OSD menu will be displayed on the screen Pressing the button a second time will hide the OSD display RCL Button Each time you change...

Page 16: ...re you want to store the favorite channel Use the channel arrow buttons to select the desired channel Press the FC Memo key again to store the channel in the list Continue selecting matrix positions a...

Page 17: ...com Create a technical support request on the site and our support team will respond within a short period of time 7 0 LIMITED WARRANTY TV One warrants the original purchaser that the equipment it ma...

Page 18: ...t expressed or implied and is strictly limited to two years from the date of purchase TV One assumes no liability to distributors resellers or end users or any third parties for any loss of use revenu...

Page 19: ...TV One Latin America 6991 NW 82 Avenue 8 Miami FL 33166 USA Tel 305 396 6275 Fax 305 418 9306 sales latinoamerica tvone com www tvonela com TV One Mercosur AV Diaz Velez 3965 PB Capital Federal 1200...

Reviews: